•
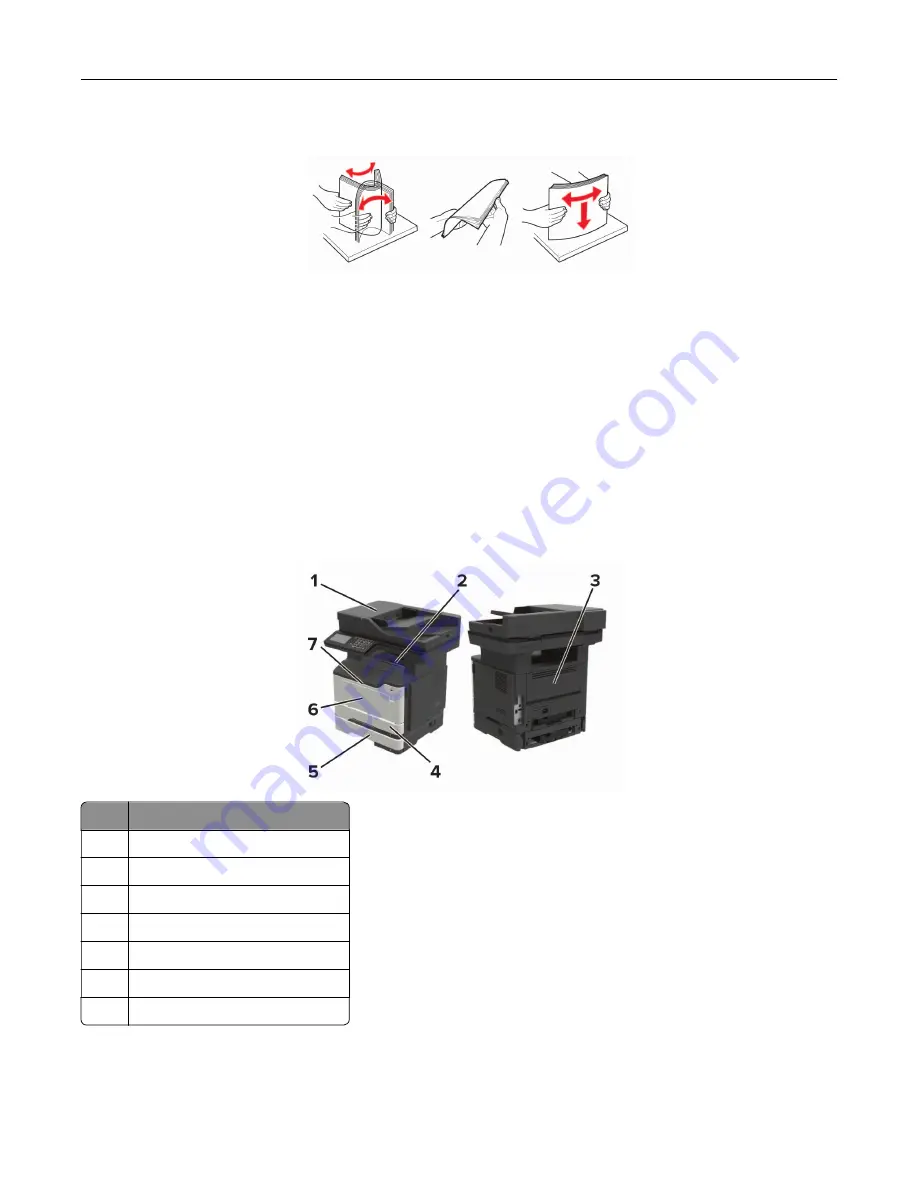
Flex, fan, and align the paper edges before loading.
•
Do not use paper that has been cut or trimmed by hand.
•
Do not mix paper sizes, weights, or types in the same tray.
•
Make sure that the paper size and type are set correctly on the computer or printer control panel.
•
Store paper according to manufacturer recommendations.
Identifying jam locations
Notes:
•
When Jam Assist is set to On, the printer automatically flushes blank pages or partially printed pages
with after a jammed page is cleared. Check your printed output for blank pages.
•
When Jam Recovery is set to On or Auto, the printer reprints jammed pages.
Jam location
1
Automatic document feeder
2
Standard bin
3
Rear door
4
Standard 250
‑
sheet tray
5
Optional 250
‑
or 550
‑
sheet tray
6
Multipurpose feeder
7
Door A
Clearing jams
143
Summary of Contents for 679
Page 48: ...Scanning 48 ...
Page 136: ...Maintaining the printer 136 ...
Page 144: ...Paper jam in door A 1 Remove the tray 2 Open door A Clearing jams 144 ...
Page 147: ...6 Insert the imaging unit Note Use the arrows inside the printer as guides Clearing jams 147 ...
Page 153: ...4 Close the ADF cover Clearing jams 153 ...
Page 197: ...b Connect the ISP extended cable to the ISP connector Upgrading and migrating 197 ...
Page 198: ...c Install the hard disk Upgrading and migrating 198 ...


