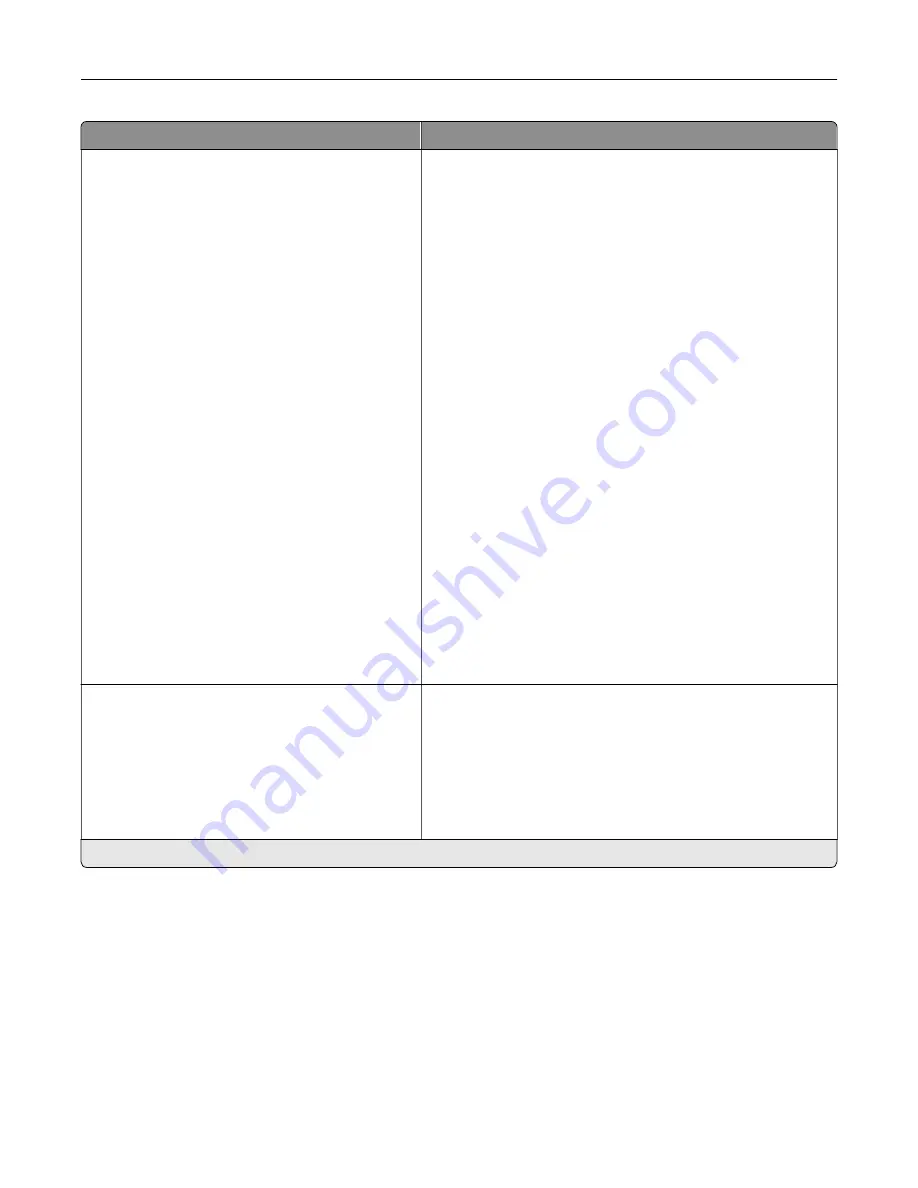
Menu item
Description
Fax Receive Settings
Rings to Answer (3*)
Auto Reduction (Off*)
Paper Source (Auto*)
Sides (Off*)
Separator Sheets (None*)
Separator Sheet Source(Tray 1*)
Output Bin(Standard Bin*)
Fax Footer (Off*)
Fax Footer Time Stamp (Receive*)
Holding Faxes
Held Fax Mode (Off*)
Admin Controls
Enable Fax Receive (On*)
Enable Color Fax Receive (On*)
Enable Caller ID (On*)
Block No Name Fax (Off*)
Banned Fax List
Answer On (All Rings*)
Auto Answer (On*)
Manual Answer Code (*9*)
Fax Forwarding (Print*)
Forward to
Confirmation E
‑
Max Speed (33600*)
Configure the fax receive settings.
Fax Cover Page
Fax Cover Page (Off by Default*)
Include To field (Off*)
Include From field (Off*)
Include Message field (Off*)
Include Logo (Off*)
Include Footer [x]
Configure the fax cover page settings.
Note:
An asterisk (*) next to a value indicates the factory default setting.
Understanding the printer menus
78
Summary of Contents for 679
Page 48: ...Scanning 48 ...
Page 136: ...Maintaining the printer 136 ...
Page 144: ...Paper jam in door A 1 Remove the tray 2 Open door A Clearing jams 144 ...
Page 147: ...6 Insert the imaging unit Note Use the arrows inside the printer as guides Clearing jams 147 ...
Page 153: ...4 Close the ADF cover Clearing jams 153 ...
Page 197: ...b Connect the ISP extended cable to the ISP connector Upgrading and migrating 197 ...
Page 198: ...c Install the hard disk Upgrading and migrating 198 ...


