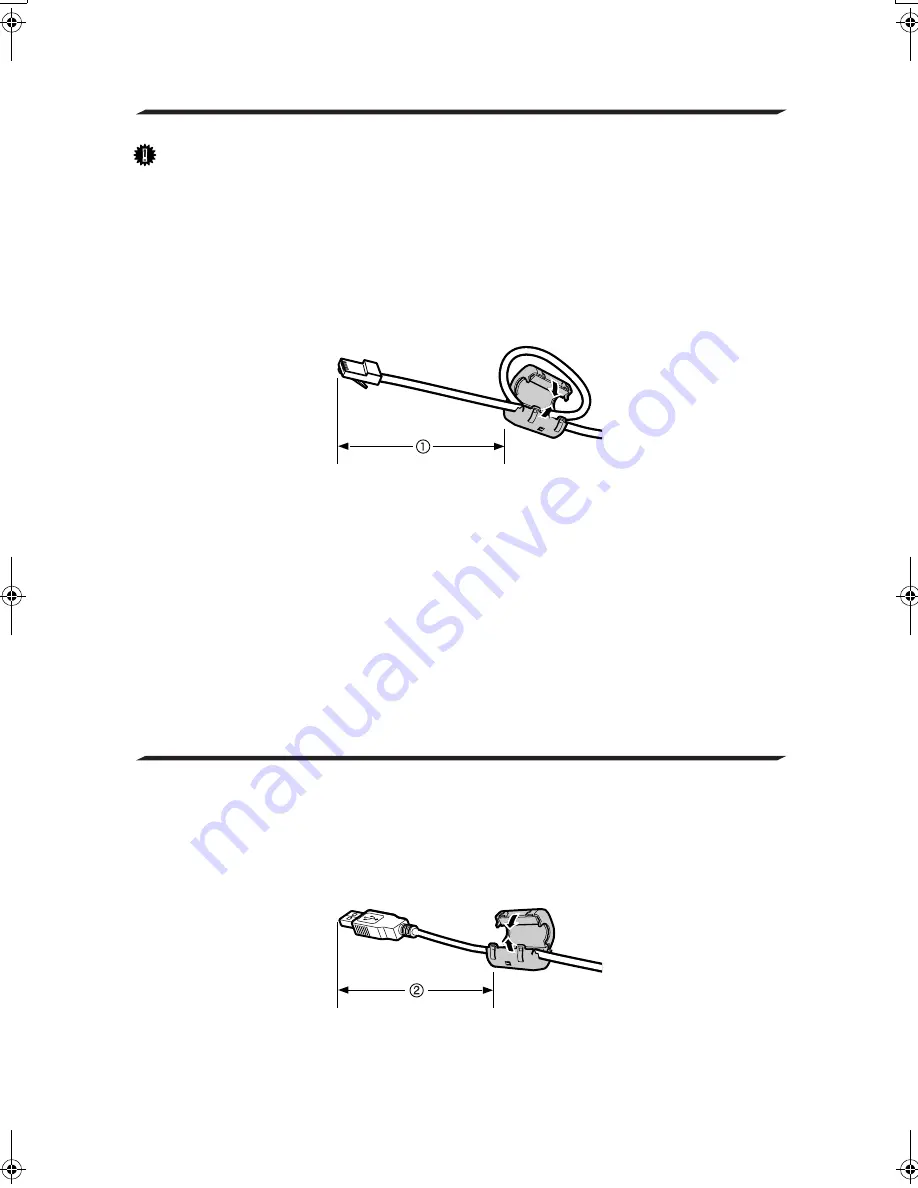
Attaching the Ferrite Core for the Network Cable
Important
❒
Use a 100BASE-TX (category 5) or 10BASE-T network cable when you con-
nect this machine to a network.
AAAA
With the network cable you use for connection, create a single loop in a dis-
tance shown in
A
A
A
A
on the both ends of the cable. Attach the ferrite core that
comes with this machine as illustrated below.
About 7.5cm(3") for the scanner side end. About 5.5cm(2.2") for the network
side end.
BBBB
Insert the network cable’s end into the network interface connector of this
machine.
CCCC
Insert the other end of the network cable into an appropriate connector of
a network device, such as an Ethernet hub.
AEV047S
Attaching the Ferrite Core for the Keyboard
AAAA
Attach the ferrite core about 17cm(6.8")(
B
B
B
B
) away from the end of the cable
of the USB keyboard.
BBBB
Connect the USB keyboard cable to either one of the USB ports of the USB
interface card.
AJH001S
siri_attach_pera_Chapter-1 Page 2 Tuesday, December 21, 2004 10:22 AM
Summary of Contents for IS200e
Page 10: ...vi ...
Page 32: ...What You Can Do With This Machine 22 1 ...
Page 42: ...Setting Up the Scanner 32 2 ...
Page 128: ...Configuring the Scanner Settings 118 3 ...
Page 136: ...Setting Originals 126 4 ...
Page 154: ...Sending Scan File by E mail 144 5 ...
Page 166: ...Sending Scan File by Scan to Folder 156 6 ...
Page 172: ...Sending Scan File by Scan to FTP 162 7 ...
Page 182: ...Printing Scanned Image Files 172 8 ...
Page 186: ...Sending Scan Files Using Delivery Server 176 9 ...
Page 192: ...Using the TWAIN Scanner Function 182 10 ...
Page 238: ...Image Scanner Operating Instructions GB GB G422 8601 ...


