ENGLISH-40
Pump d
o
wn pr
o
cedure
Objective
o
f pump d
o
wn
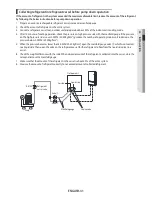
For product repairs and indoor unit relocation, pump down operation must be done recover the refrigerant into the outdoor
unit.
Cauti
o
ns when perf
o
rming pump d
o
wn
f
Product limits amount of refrigerant in the outdoor unit due to slim design.
f
Collect the majority of the refrigerant in the system in an empty refrigerant vessel and perform a pump down operation
with remaining refrigerant. Maximum amount of refrigerant is 5Kg.
f
If the amount of refrigerant exceeds maximum allowable limit, increased pressure may cause compressor trip or a burn
out.
Cauti
o
ns when perf
o
rming pump d
o
wn
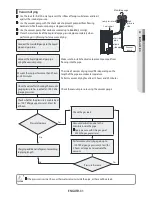
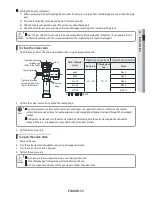
1. Close the manifold gauge.
2. Close the liquid side service valve.
3. Set the unit to the Cooling Test mode by pushing K2 button 1 time.
4. Observe low pressure side using manifold gauge whe the compressor operating.
5. When the pressure gauge indicates "0" turn the low pressure side valve counter clockwise to close.
6. Stop operation of the unit by pushing K3 button.
7. Close the each cap of valve.
•
Use a transfer cylinder when recovering refrigerant to be reused. Using modi
fi
ed refrigerant vessel may cause
explosion and cause damage or personal injury.
CAUTION
Rel
o
cati
o
n
o
f the Air t
o
water heat pump
•
Refer to this procedure when the unit is relocated.
•
Carry out the pump down procedure. (Refer to the details of ‘pump down’.)
•
Collecting refrigerant may be hard, since multi type products exceeds allowable charging amount of refrigerant
in the outdoor unit to support long piping. (Refer to page 36.)
•
Remove the power cord.
•
Disconnect the assembly cable from the indoor and outdoor units.
•
Remove the
fl
are nut connecting the indoor unit and the pipe.
•
At this time, cover the pipe of the indoor unit and the other pipe using a cap or vinyl plug to avoid foreign
material entering.
•
Disconnect the pipe connected to the outdoor unit. At this time, cover the valve of the outdoor unit and the
other pipe using a cap or vinyl plug to avoid foreign material entering.
•
Make sure you do not bend the connection pipes in the middle and store together with the cables.
•
Move the indoor and outdoor units to a new location.
•
Remove the mounting plate for the indoor unit and move it to a new location.
NOTE
Setting the
o
pti
o
n switch and functi
o
n
o
f the keys


