73
Chapter 4 Engraving
4-7 Cutter Installation Method 4 (End mill)
3.
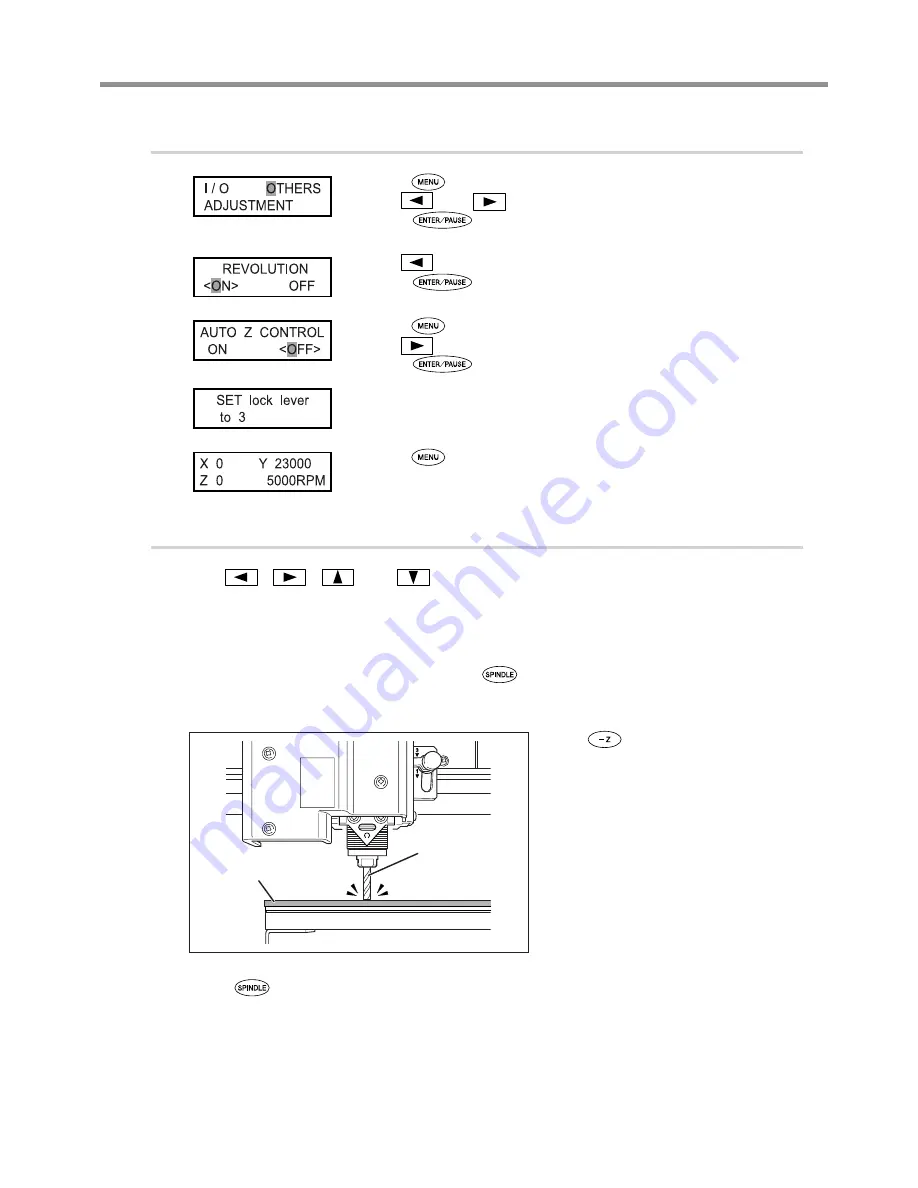
Make the settings for spindle speed and Z-axis control.
Press
several times to display the screen shown at left.
Use
and
to select [OTHERS].
Press
.
Use
to select “ON.”
Press
to confirm.
Press
.
Use
to select “OFF.”
Press
to confirm.
The message shown at left is displayed for three seconds, and then the original
screen returns.
Press
several times to return to the main screen.
4.
Set the Z-axis origin point.
Use
,
,
and
to move the end mill to a location above the work-
piece.
Next, perform a small amount of cutting into the workpiece. Move to a location where cutting will not cause any
problems.
P. 44, “Manual Movement”
Close the front cover, then press and hold
for at least one second.
The spindle rotates.
P. 47, “Starting and Stopping Spindle Rotation”
Press
to lower the end mill to a
location where the workpiece is cut by
a slight amount.
Press
.
The spindle stops.
End mill
Workpiece
Summary of Contents for EGX-350
Page 22: ...20...
Page 36: ...34 Chapter 2 Installation and Setup 2 4 Selecting the Language Switch off the power switch OFF...
Page 38: ...36...
Page 96: ...94...
Page 108: ...106...
Page 114: ...Chapter 8 Appendix 112 8 4 Main Unit Specification Dimensions of Outline Unit mm...
Page 119: ...117...
Page 120: ...118...
Page 121: ...119...
Page 122: ...120...
Page 123: ......
Page 124: ...R7 120615...


