59
Chapter 4 Engraving
4-4 Cutter Installation Method 1 (With Nose Unit)
4.
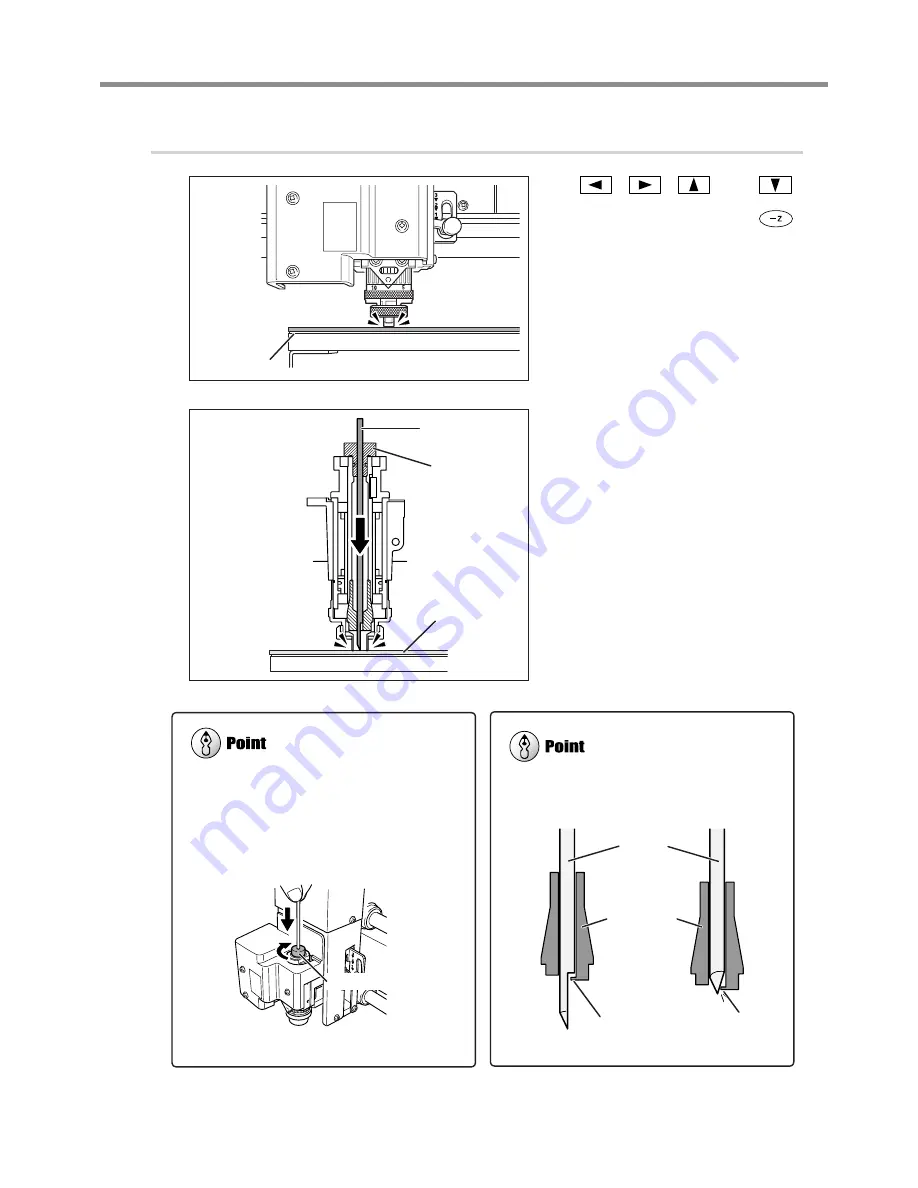
Install the cutter and make the setting for the cutting-in depth.
Use
,
,
, and
to move the spindle head to the area
above the workpiece, then press
to lower the spindle head.
Descent stops automatically when the tip of the
nose unit touches the workpiece table.
P. 44, “Manual Movement”
Insert the cutter into the cutter holder
and bring the tip of the cutter intcon-
tact with the workpiece table.
When using a diameter-4.36 mm solid
collet
Be careful to orient the cutter correctly.
If cutter insertion is difficult
If the cutter catches on the solid collet and is difficult
to insert, loosening the cutter holder makes inser-
tion easier. Note that inserting it with undue force
may result in damage to the workpiece. After insert-
ing the cutter, tighten the cutter holder again.
Workpiece table
Cutter
Cutter holder
Workpiece table
Loosen the cutter holder.
Cutter
Solid collet
Tab
Tab
OK
Not OK
Summary of Contents for EGX-350
Page 22: ...20...
Page 36: ...34 Chapter 2 Installation and Setup 2 4 Selecting the Language Switch off the power switch OFF...
Page 38: ...36...
Page 96: ...94...
Page 108: ...106...
Page 114: ...Chapter 8 Appendix 112 8 4 Main Unit Specification Dimensions of Outline Unit mm...
Page 119: ...117...
Page 120: ...118...
Page 121: ...119...
Page 122: ...120...
Page 123: ......
Page 124: ...R7 120615...


