


49
Revision 00 EN - 02/2022
MSM+ HB
35,0(6
9.3.2
If the device does not appear in the connections window
The connection of the device to the Laser-
DiagnosticsSoftware LDS may be blocked
by the firewall:
X
In
Windows > Control panel >
Firewall
, enable the UDP port 20034
The UDP port should be enabled by a system administrator.
The network address of the PC is not
within the range of the device.
X
In
Windows > Control panel > Net-
work and Sharing Center
, assign an
IP address to your PC that is in the
same address range as the device.
The IP address of your device can be
found on the identification plate.
The IP address should be set by a system administrator.
If several network interface cards or a
USB3-to-Ethernet card are installed in
the PC, the connection of the device to
the LaserDiagnosticsSoftware LDS may
be blocked by the selection of the wrong
network interface card.
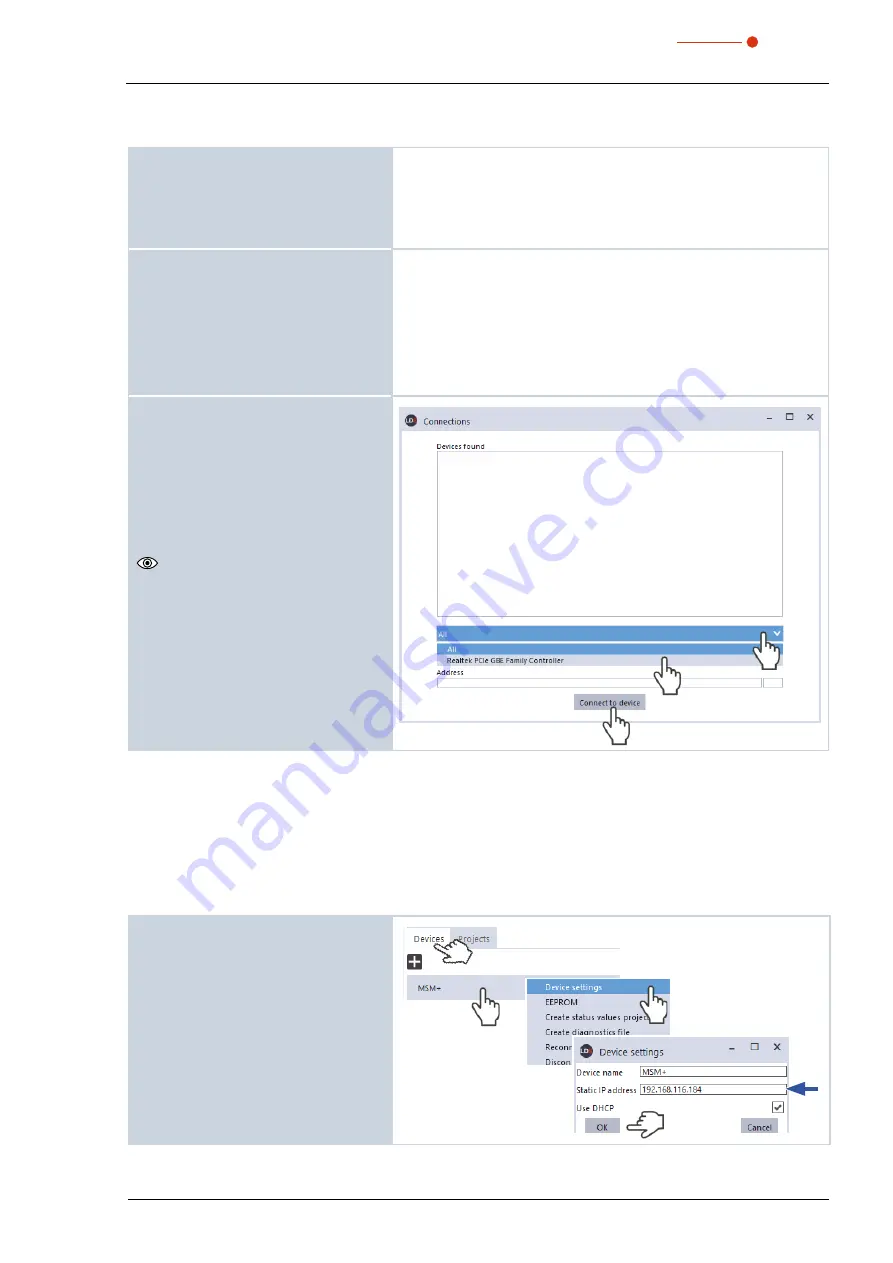
1. Select the appropriate network card
in the
Connections > All
window.
The device is displayed in the
Con-
nections
window.
2. Click on the device.
3. Click on the
Connect to device
button.
9.3.3
Change the network address of a connected device
For communication in a network, a
Static IP address
is stored for the device in the LDS and the function
Use DHCP
is activated. When establishing a connection, the device will first wait to be assigned a suitable IP
address via DHCP. If this proofs unsuccessful, it will revert to the static IP address.
If
Use DHCP
is disabled, the device will directly use the static IP address. As a result, the connection can be
established faster.
For a connected device, both the IP address and the activation of DHCP can be changed.
Change the IP address of a device as
follows:
1. Click on the
Devices
tab.
2. Right-click on the device and select
the
Device settings
menu point.
3. Enter in the desired IP address or use
the
Use DHCP
function
4. Confirm the entry with
OK
.
5. Switch the device off and on again.
Summary of Contents for MicroSpotMonitor Plus HighBrilliance
Page 2: ......
Page 3: ...3 Revision 00 EN 02 2022 MSM HB 35 0 6 IMPORTANT READ CAREFULLY BEFORE USE KEEP FOR FUTURE USE...
Page 7: ...7 Revision 00 EN 02 2022 MSM HB 35 0 6...
Page 95: ...95 Revision 00 EN 02 2022 MSM HB 35 0 6 13 Declaration of conformity...
Page 96: ...96 Revision 00 EN 02 2022 MSM HB 35 0 6...
Page 98: ...98 Revision 00 EN 02 2022 MSM HB 35 0 6 15 Dimensions 15 1 Dimensions of the MSM HB10 A...
Page 99: ...99 Revision 00 EN 02 2022 MSM HB 35 0 6 Dimensions of the MSM HB10 continued View A...
Page 100: ...100 Revision 00 EN 02 2022 MSM HB 35 0 6 15 2 Dimensions of the MSM HB10 with fibre bridge A...
Page 103: ...103 Revision 00 EN 02 2022 MSM HB 35 0 6 15 3 Dimensions of the MSM HB20 at zmax C...
Page 104: ...104 Revision 00 EN 02 2022 MSM HB 35 0 6 Dimensions of the MSM HB20 continued View C...


