Alignments
GB 79
EM1A
8.
•
-63 to -1 represent a negative offset (-63 is the minimum
negative offset).
1.
Set pattern generator (e.g. PM5418) to a white spot
(chess board) pattern and connect RF output with aerial
input. Set amplitude to 1 mV and set frequency for PAL-
BG to 475.25 MHz.
2.
Set CONTRAST to the maximum value (99).
3.
NORMAL settings
–
NORMAL RED = 32
–
NORMAL GREEN = 32
–
NORMAL BLUE =32
4.
COOL settings
–
DELTA COOL RED = -3
–
DELTA COOL GREEN = 0
–
DELTA COOL BLUE = 3
5.
WARM settings
–
DELTA WARM RED = 4
–
DELTA WARM GREEN = 0
–
DELTA WARM BLUE = -8
6.
CUT OFF (default) settings
–
BLACK LEVEL R = 7
–
BLACK LEVEL G = 7
7.
Measure with a colour analyser (calibrated with the
spectra) on the centre of a white square on the screen.
Adjust the values of BLACK LEVEL R and BLACK
LEVEL G to get the right XY-coordinates for Tint =
Normal (see table 8-1).
Note: When there is no colour analyser available, use the
default settings mentioned above.
8.3.5
Light output
In the WHITE TONE sub menu, also the light output of the
CRT can be adjusted. In this case a colour analyser is
necessary.
1.
Set pattern generator (e.g. PM5418) to a white spot
pattern and connect RF output to aerial input. Set
amplitude to 1 mV and set frequency for PAL-BG to
475.25 MHz.
2.
Set CONTRAST to the maximum value (99).
3.
Measure with a colour analyser (calibrated with the
spectra) on the centre of the white square on the screen.
Adjust the level of NORMAL RED, NORMAL GREEN
and NORMAL BLUE in a simultaneous way to get the
360 cd light output.
8.3.6
White drive
In the WHITE TONE sub menu, the values of the WHITE
DRIVE level can be adjusted. The colour temperature mode
(NORMAL, DELTA COOL, DELTA WARM) or the colour (R,
G, B) can be selected with the UP/DOWN RIGHT/LEFT
cursor keys. The value can be changed with the RIGHT/
LEFT cursor keys.
1.
Set pattern generator (e.g. PM5418) to a white spot
pattern and connect RF output to aerial input. Set
amplitude to 1 mV
RMS
and set frequency for PAL-BG to
475.25 MHz.
2.
Set CONTRAST to the maximum value (99).
3.
Measure with a colour analyser (calibrated with the
spectra) on the centre of the white square on the screen.
Adjust the level of NORMAL BLUE and NORMAL RED to
get the right XY-coordinates. See table 8-1.
Table 8-1
8.4
Options
8.4.1
Options
Options are used to control the presence / absence of certain
features and hardware. There are two ways to change the
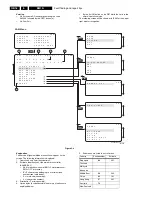
option settings (see also fig. 8-3):
Changing a single option
An option can be selected with the MENU UP/DOWN keys
and its setting can be changed with the MENU LEFT/RIGHT
keys.
Changes in the option settings are saved by leaving the
OPTION submenu. Some changes will only take affect after
the set has been switched OFF and ON with the mains switch
(cold start).
Changing multiple options by changing option byte
values
Changing the option bytes directly, makes it possible to set
all options very fast. An option byte (OB1..8) can be selected
with the MENU UP/DOWN keys and its setting can be
changed with the MENU LEFT/RIGHT keys. An option byte
represents a number of different options. All options of the
EM1A are controlled via 8 option bytes. Select the option
byte (OB1..OB8) and key in the new value.
Changes in the option byte settings are saved by leaving the
OPTION submenu. Some changes will only take affect after
the set has been switched OFF and ON with the mains switch
(cold start).
Option bits/bytes
An option byte value is calculated in the following way:
Value 'option bit 1' x 1 =
Value 'option bit 2' x 2 =
Value 'option bit 3' x 4 =
Value 'option bit 4' x 8 =
Value 'option bit 5' x 16 =
Value 'option bit 6' x 32 =
Value 'option bit 7' x 64 =
Value 'option bit 8' x 128 =
========================
Total: value 'option byte' =
2 Software versions are used: 1A1 and 2A1/2A2. Below find,
in table 8-2 and 8-3, the option definition for both versions (for
an explanation of the SW-version versus country code see
table in chapter 5.2.2, page 16).
Tint
Temperature (K) X
Y
Warm
8700
289
299
Normal
13500
266
274
Cool
18300
256
264

