Fault finding and repair tips
GB 17
EM1A
5.
Menu control
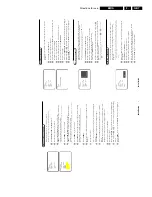
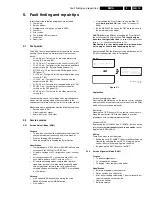
Menu items can be selected with the 'CURSOR UP/DOWN'
key. The selected item will be highlighted. When not all menu
items fit on the screen, moving the 'CURSOR UP/DOWN' will
display the next/previous menu items.
With the 'CURSOR LEFT/RIGHT' keys, it is possible to:
•
(De)activate the selected menu item (e.g. GEOMETRY).
•
Change the value of the selected menu item (e.g. VER-
SLOPE).
•
Activate the selected submenu (e.g. SERV-BLK).
Access to normal user menu
Pressing the 'MENU' button on the remote control switches
between the SDM and the normal user menus (with the SAM
mode still active in the background). Pressing the 'MENU'
key in a submenu will go to the previous menu.
The menus and submenus
•
CLEAR ERRORS. Erasing the contents of the error
buffer. Select the CLEAR ERRORS menu item and press
the 'CURSOR RIGHT' key. The content of the error
buffer is cleared.
•
The functionality of the OPTIONS and ALIGNMENTS
(TUNER, WHITE TONE, SOUND, GEOMETRY and
SMART SETTING) sub menus is described in chapter 8.
Exiting
There are 2 ways to exit this mode:
•
Switch the set to 'STANDBY', the error buffer will also be
cleared (by switching the set OFF-ON with the mains
switch, the set will come up again in the SAM).
•
By pressing the 'EXIT' button on the DST.
5.2.3
Customer Service Mode (CSM)
Purpose
The 'Customer Service Mode' is a special service mode,
which can be activated and deactivated by the customer
upon request of the service technician/dealer during a
telephone conversation, in order to identify the status of the
set. This CSM is a 'read only' mode, therefore modifications
in this mode are not possible.
Entering
The Customer Service Mode will switch ON after pressing
the 'MUTE' key on the remote control handset and any of the
top control buttons on the TV for at least 4 seconds
simultaneously. This activation only works if there is no menu
on the screen.
Explanation
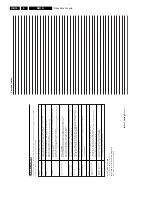
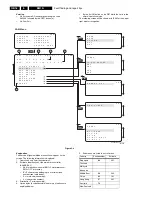
After switching on the Customer Service Menu the following
screen will appear:
Figure 5-3
Line 1:
HRS:
Hexadecimal counter of operating hours (example: 1B
(hex) = 0001 1011 (bin) = 27 (dec)). Standby hours are not
counted as operating hours.
SWID: Software identification of the main micro controller
(see paragraph 5.2.2). Details on available software versions
can be found in the chapter 'Software Survey' of the
publication 'Product Survey - Colour Television'.
Line 2:
Error code buffer (for more details see paragraph 5.3).
Displays the last 7 errors of the error code buffer.
Line 3:
Software and hardware functionality of the EM1A is
controlled by option bits. An option byte or option number
represents 8 of those bits. Each option number is displayed
as a decimal number between 0 and 255. The set may not
work correctly when an incorrect option code is set. See
chapter 8 for more information on correct option settings
Line 4:
Indicates which colour and sound system is installed for the
selected pre-set:
Line 5:
Indicates that the set is not receiving an 'ident' signal on the
selected source.
Note: On some models, BLUE MUTE is displayed (if the BM
option is ON) when no signal is received.
Line 6:
Indicates whether the SLEEPTIMER function is ON/OFF.
Line 7:
Indicates whether the CHILD LOCK function is ON/OFF.
Line 8:
Indicates whether the current pre-set is defined as SKIPPED
or NON-PREFERRED.
Line 9:
Indicates whether the HOTEL MODE is activated.
Line 10:
Indicates which SOURCE is installed for this pre-set: EXT1,
SVHS2, EXT2, and Tuner.
Line 11:
Indicates which sound mode is installed for this pre-set:
Mono, NICAM, Stereo, L1, L2, SAP or Virtual
Line 12 to 17:
Value indicates parameter levels at CSM entry.
Exiting
The Customer Service Mode will switch OFF after pressing
any key of the remote control handset (with exception of the
'P+' and 'P-' keys) and switching OFF the TV set with the
mains switch.
5.3
Problems and solving tips (related to CSM)
5.3.1
Picture problems
No colours / noise in picture
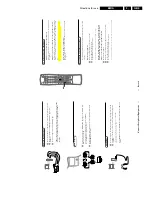
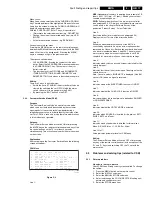
Check CSM line 4. Wrong colour system installed. To change
the setting:
1.
Press the 'MENU' button on the remote control.
2.
Select the INSTALL sub menu.
3.
Select the MANUAL STORE sub menu.
4.
Select and change the COLOUR SYSTEM setting until
picture and sound are correct.
5.
Select the STORE menu item.
C S M
1 H R S : 0 0 0 5 S W I D : E M 1 1 A 1 - 1 . 0
2 C O D E S : 0 0 0 0 0 0 0
3 O P T : 2 5 4 1 0 0 1 2 8 0 0 0 0 0
4 S Y S T E M : A U T O
1 1 S O U N D : M O N O
5 N O S I G N A L
1 2 V O L U M E :
6
T I M E R O N
1 3 B A L A N C E : + / -
7
C H A N N E L B L O C K E D
1 4 H U E : + / -
8
N O T P R E F E R R E D
1 5 C O L O U R :
9
H O T E L M O D E O N
1 6 B R I G H T N E S S :
1 0 S O U R C E : 1
1 7 C O N T R A S T :
CL 06532130_012.eps
131000
CSM Menu

