44
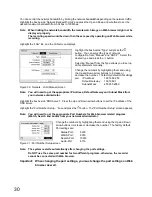
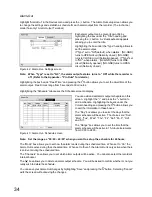
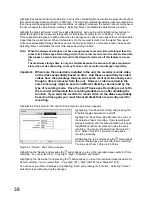
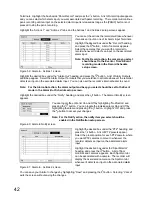
Select
: Activates highlighted blocks to detect motion.
Clear
: Deactivates highlighted blocks so that they will not detect motion.
Reverse
: Activates inactive highlighted blocks and deactivates active highlighted blocks.
Select All
: Activates all blocks to detect motion.
Clear All
: Deactivates all blocks so that they will not detect motion.
Reverse All
: Activates inactive blocks and deactivates active blocks.
OK
: Accepts changes and closes Zone setup.
Cancel
: Exits Zone setup without saving changes.
Figure 66 : Motion Detection Zone menu
You can control excessive event logging and e-mail sending by adjusting the motion ignoring dwell intervals.
Highlight the box beside "Motion Ignoring Interval" and press the button. A list of intervals ranging from 1
to 10 seconds or "Never" appears. The recorder will not log and notify motion events occurred during the
preset interval range.
Note: The record action for motion events will not be affected by the Motion Ignoring function.
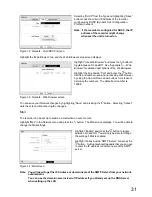
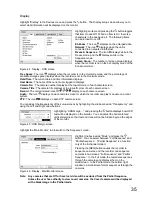
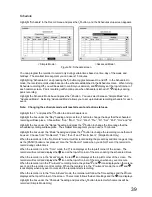
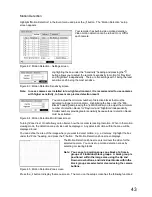
Highlighting “Daytime Setup” and pressing the button allow you to set up the Daytime range.
Highlight the box beside “Daytime” and press the button. Use the
Up and Down arrow buttons to set the Daytime range. The recorder
will consider the remaining time range as the Nighttime.
Figure 67 : Daytime Setup screen
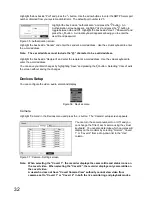
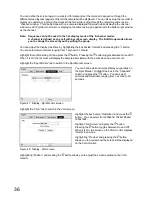
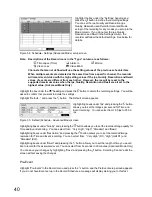
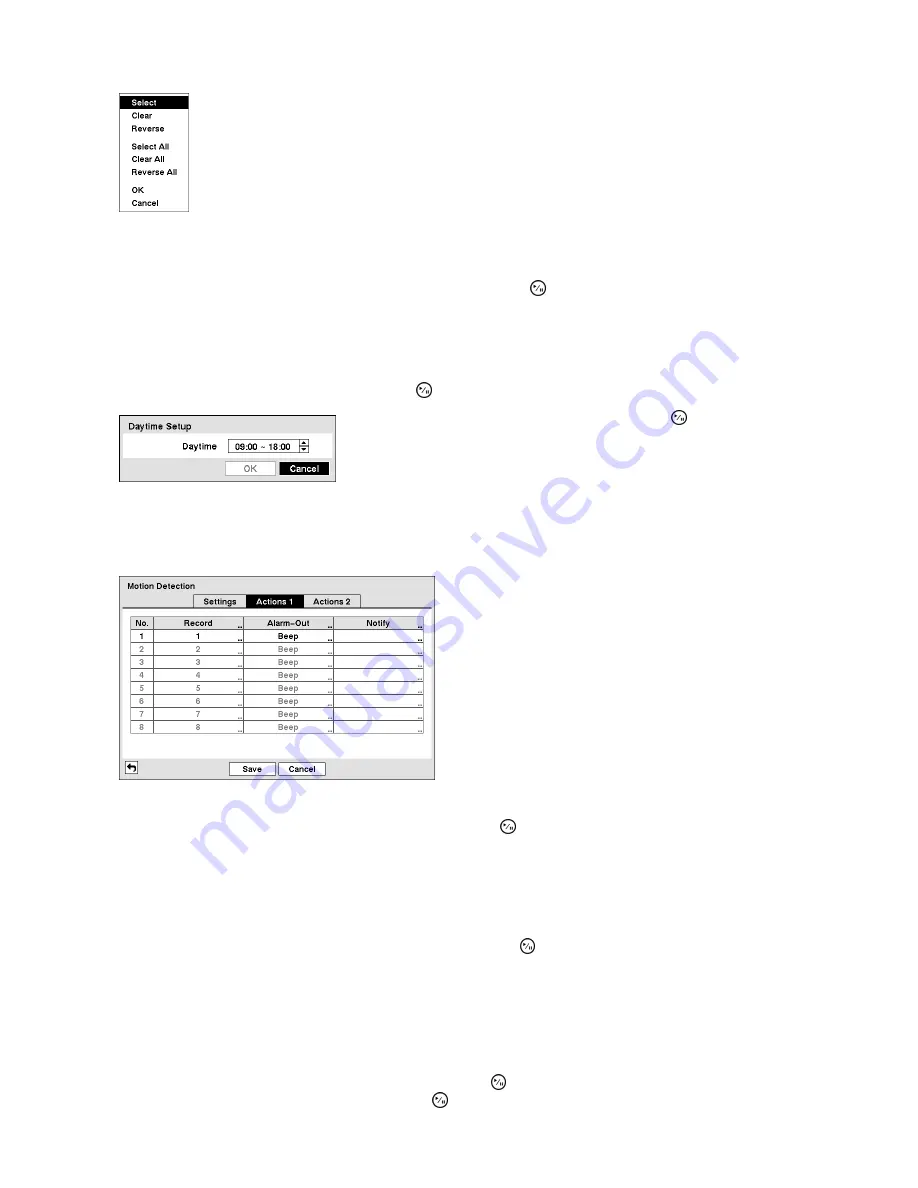
Highlight the “Actions 1” and “Actions 2” tabs and the Motion Detection Actions 1 and Actions 2 screens
display.
The recorder can be set to react to motion detection
differently for each camera. Each camera can be
associated with another camera, trigger an Alarm
Output Terminal, sound the recorder’s internal buzzer,
notify a number of different devices, move PTZ
cameras to preset positions, and/or display a camera
on a Spot monitor.
Note: You can associate multiple cameras with a
camera that detects motion.
Figure 68 : Motion Detection - Actions 1 screen
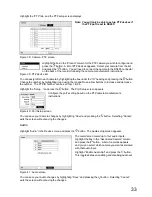
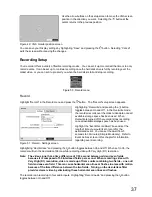
Highlight the box under the “Record” heading and press the button. A list of cameras appears. You can
associate as many cameras with that camera as you wish. If the recorder detects motion on the selected
camera, it starts recording video from all the associated cameras.
Note: For the Record action, the camera you select should be set to the Event or Time & Event
recording mode in the Record Schedule setup screen.
Highlight the box under the “Alarm-Out” heading and press the button. A list of Alarm Outputs appears.
You can associate as many Alarm-Outs with that camera as you wish. When the recorder detects motion on
the selected camera’s input, it triggers output signals on all the associated Alarm-Out connectors. You can
also have the recorder’s internal buzzer sound if motion is detected on the selected camera.
Note: For the Alarm-Out action, the alarm output and beep you select should be set to the Event
mode in the Alarm-Out Schedule setup screen.
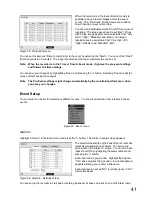
Highlight the box under the “Notify” heading and press the button. You can toggle the entire list On and
Off by highlighting “Notification” and pressing the button. You can toggle the individual items On and Off
Summary of Contents for WJ-HL204/G
Page 77: ...76 Map of Screens ...

