198
Aquarea air-to-water heat pumps - Planning and installation manual - 01/2018
Maintenance
199
Aquarea air-to-water heat pumps - Planning and installation manual - 01/2018
Maintenance
7 Maintenance
In order to ensure optimal performance of the devices, inspections need to be conducted at
regular intervals by an authorised specialist installer of the devices, the functioning of the FI pro-
tection switch, the electrical wiring and the piping. This maintenance work should be conducted
by authorised Customer Services staff. Please contact your specialist dealer for maintenance
inspections to be carried out.
The following types of maintenance work should be carried out annually:
●
Checking of the water pressure
●
Checking of the pressure relief valve
●
Conducting visual checks on the PCBs and terminals
●
Cleaning of the dirt catchers
●
Checking of the FI protection switch
●
Checking of the quick vent valve and venting the system
WARNING
Danger to life from electric shock!
The devices are operated with 230-V or 400-V alternating current. Touching the live electrical
cables can be life-threatening.
►
Service and maintenance work must only be carried out by an accredited electrician or
an authorised dealer.
►
Before commencing any maintenance work, ensure that the electricity supply is
switched off and is secured against being turned on by mistake.
►
Before opening the device, make sure that the entire system is disconnected from the
electric supply. Especially in case of outdoor units of split systems, see that the electric
supply of the hydro-module or combination hydro-module, the tank and the E-heating
element is disconnected.
7.1 Checking of the water pressure
Carry out the following steps:
1. Check the system pressure on the manometer (
→
4.6.2.1 Components (split systems),
p. 32
,
→
4.6.3.1 Components (compact systems), p. 47
).
The water pressure should not fall below 0.5 bar (0.05 MPa). Under normal operating
conditions, the water pressure should be between 0.5 and 3.0 bar (0.05 and 0.3 MPa).
2.
If the system pressure is below the target pressure, top up the fluid (
→
6.9.2 Filling and
venting the water system, p. 194
).
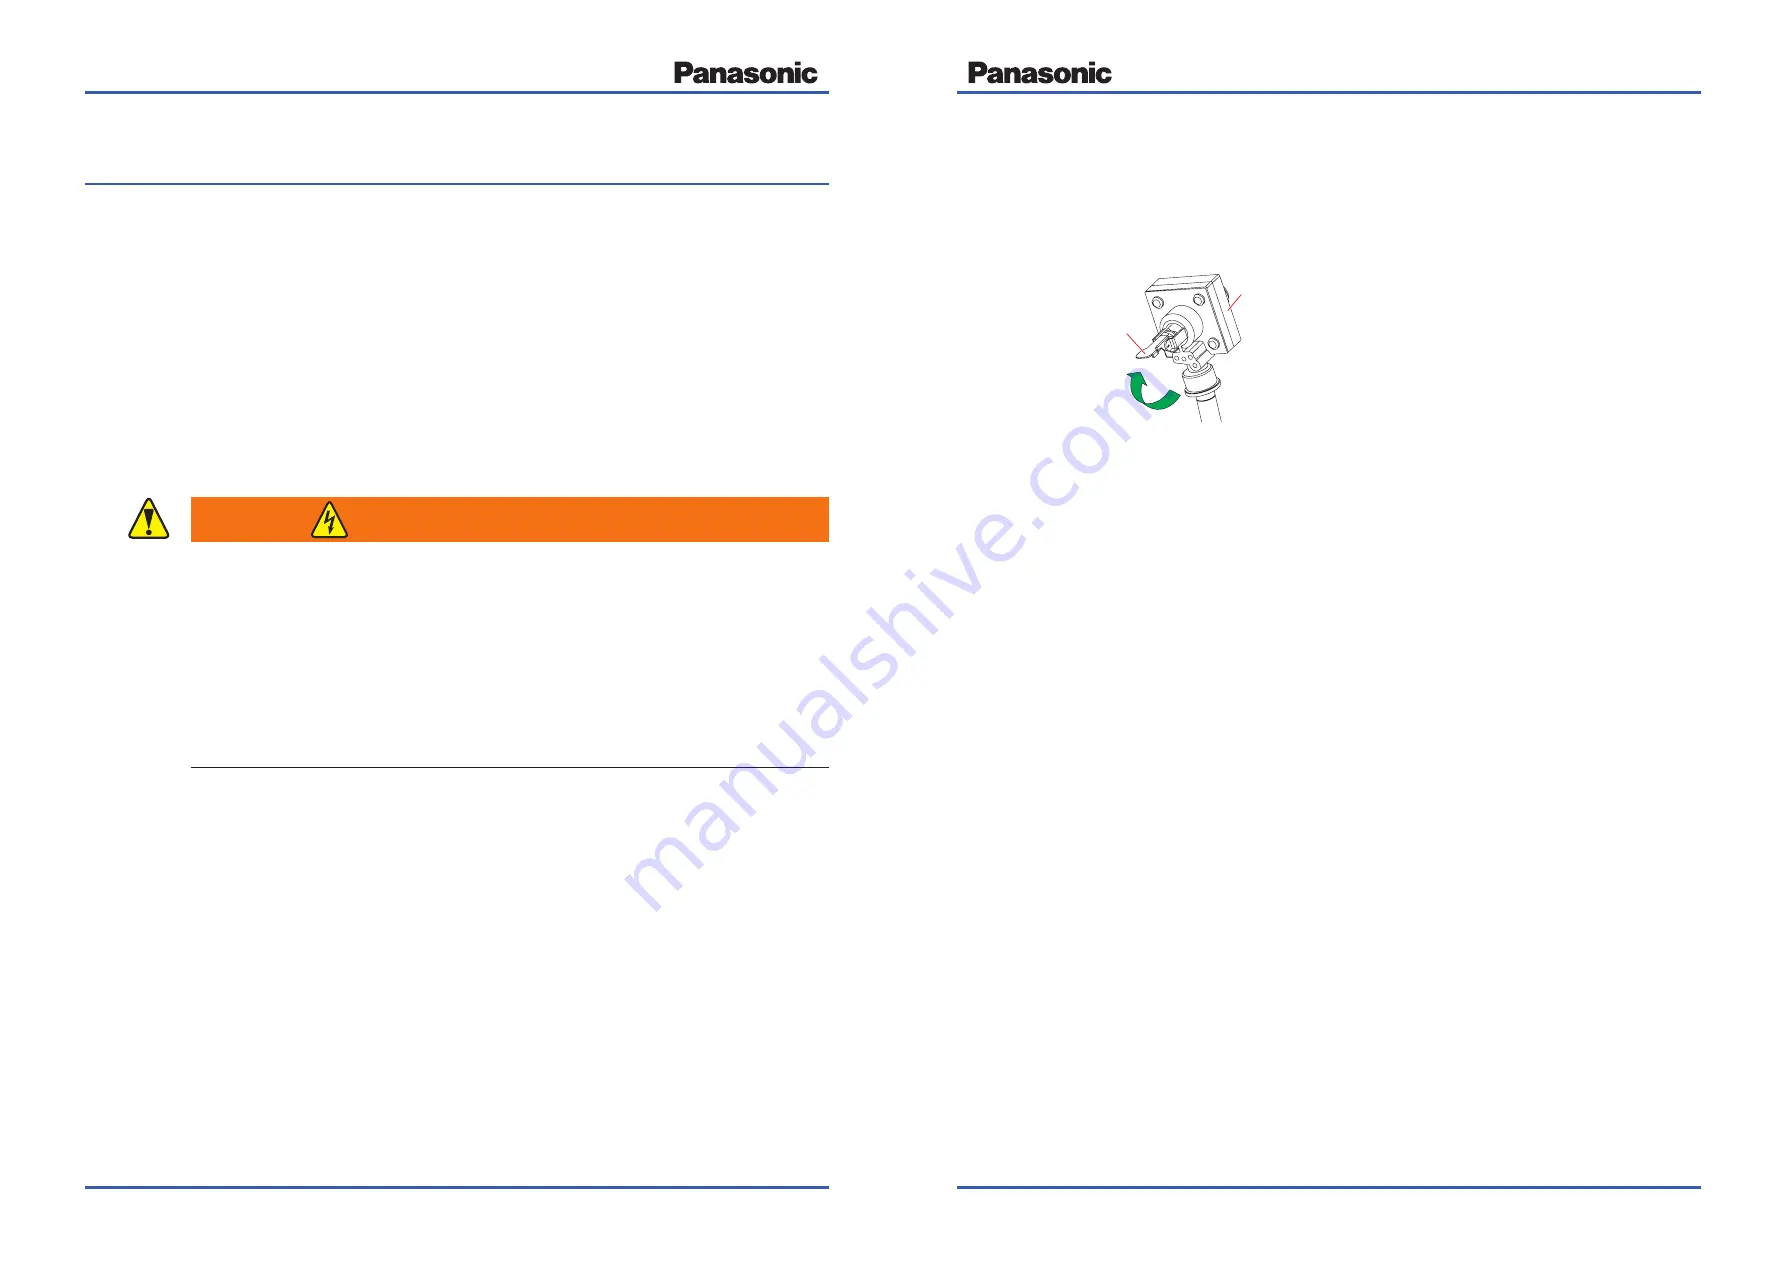
7.2 Checking of the pressure relief valve
Carry out the following steps:
1. Place the lever (
2
) of the pressure relief valve (
1
) located in the indoor unit or compact
device (
→
4.6.2.1 Components (split systems), p. 32
,
→
4.6.3.1 Components (compact
systems), p. 47
) in the horizontal position (
3
- open).
2
3
1
1 Pressure relief valve
2 Lever
3 Setting horizontal in the opening position
Air or fluids should now be heard escaping. If this is not the case, contact an authorised
trader.
1. Set the lever of the pressure relief valve after a few seconds in the home position
(closed).
7.3 Conducting visual checks on the PCBs and terminals
Carry out the following steps:
1. Carry out a visual inspection of the PCBs and terminals for loose connections, damaged
cable insulation etc.
2. Eliminate any defects or damage which may be present.
7.4 Cleaning of the dirt catchers
Carry out the following steps:
1. If mounted, close the shut-off valve before and after the dirt catcher.
3. Open the dirt catcher using a spanner. Remove the insert and ensure that the meshes of
the insert are not damaged.
4. Rinse out the insert with tap water. Remove any stubborn dirt using a soft brush.
5. Replace the insert in the dirt catcher and close the dirt catcher using the spanner.
6. Open the shut-off valve again.
Summary of Contents for Aquarea B1
Page 2: ...Notes ...
Page 116: ...Notes Notes ...


