User’s Manual
20
Schedule Setup (RECORD
Schedule Tab)
Setting up the Basic Schedule Mode…
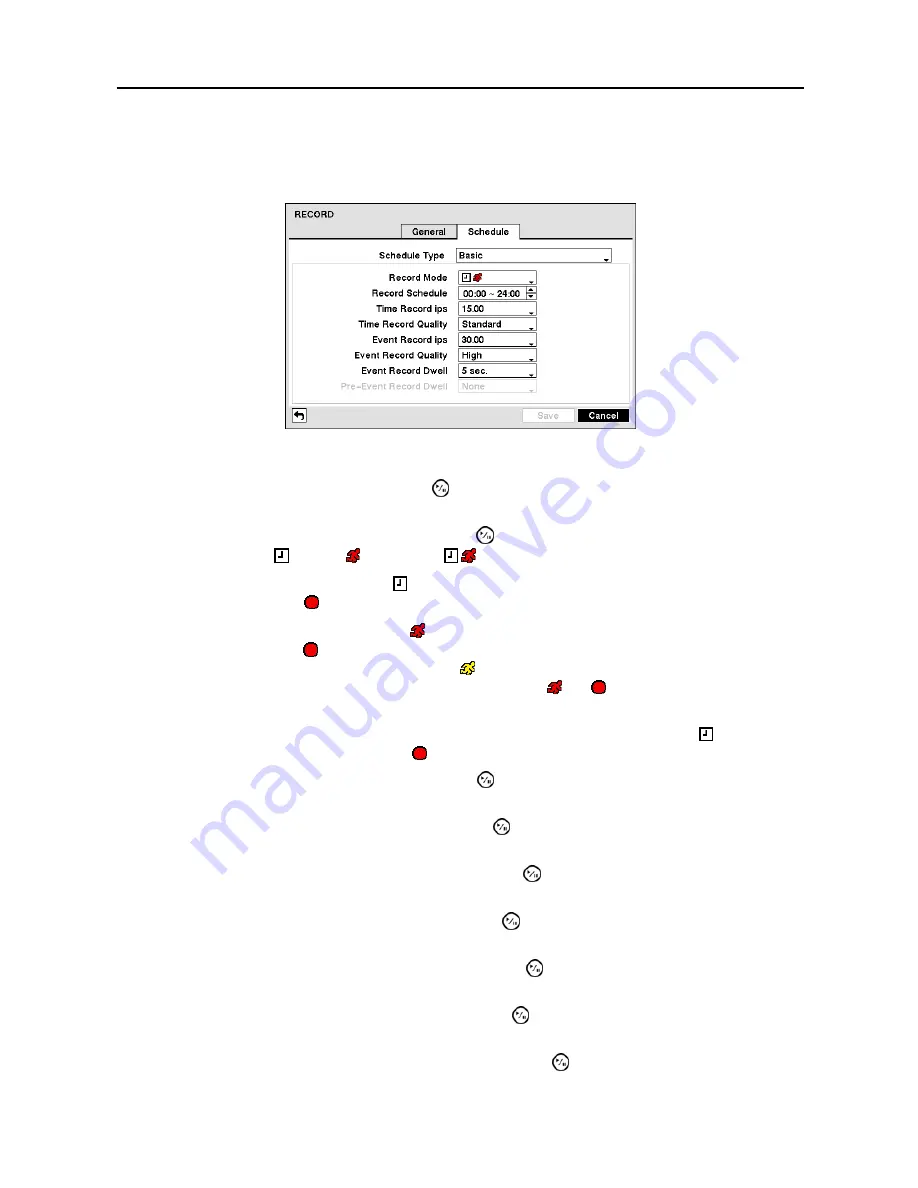
Figure 12
─
Schedule (Basic Type) screen.
Highlight the
Schedule Type
box and press the button. Select
Basic
to set up the Basic type recording
schedule.
Highlight the box beside
Record Mode
and press the button to change the recording mode that will
be used. Choose from: (Time), (Event) and (Time & Event).
When the DVR is in the
Time
mode, the icon displays at the top-left corner of the screen. The DVR
will record and displays the icon at the top-left corner of the screen during the scheduled times.
When the DVR is in the
Event
mode, the red icon displays at the top-left corner of the screen. The DVR
will record and displays the icon at the top-left corner of the screen when any event occurs. When the
DVR is in the
Pre-Event
recoding mode, the yellow icon displays when there is no event, and the DVR
is not recording. When the DVR is in the
Pre-Event
mode, the red and display when any event occurs
and the DVR starts recoding.
When the DVR is in the
Time & Event
mode, the DVR will follow the Time settings and the icon displays.
The DVR follows the Event settings and the icon displays.
Highlight the box beside
Record Schedule
and press the button to change the time range that the scheduled
recording will take place. The smallest time segment you can use is 15 minutes.
Highlight the box beside
Time Record ips
and press the button to set the images per second for Time
recording.
Highlight the box beside
Time Record Quality
and press the button to set the recorded image quality
for Time recording.
Highlight the box beside
Event Record ips
and press the button to set the images per second for the
pre- and post-event recording.
Highlight the box beside
Event Record Quality
and press the button to set the recorded image quality
for the pre- and post-event recording.
Highlight the box beside
Event Record Dwell
and press the button to set the length of time you would
like to record for the associated event.
Highlight the box beside
Pre-Event Record Dwell
and press the button to set the length of time you
would like to record prior to the associated event. Selecting
None
will disable the pre-event recording function.


