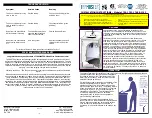
Training: Phase 1
Training-Phase 1 Setup and Introduction (1-3 days)
a) Use marker flags or tape to define more easily any new or weak boundary lines.
b) To prevent unintended stimulation, isolate the probes with plastic tape or rubber
sleeves
c) Dog wears both PAC (loosely fitted) and own collar (for attachment of lead)
d) Introduce dog to boundary (especially weak points) to hear tone warning.
e) Shout “NO”, pull him back and praise him lavishly
Dressage : Phase 1
Phase de Dressage 1 Installation et Introduction (1-3 jours)
a) Utilisez des signes de repère ou bien du ruban pour définir plus facilement les nouvelles
lignes de limite ou les lignes faibles.
b) Pour empêcher toute stimulation involontaire, isolez les sondes avec du ruban plastique ou des
manchons en caoutchouc.
c) Le chien porte à la fois le PAC (attaché sans serrer) et son collier
(pour attacher la laisse)
d) Présenter les limites au chien (surtout les points faibles) pour qu’il entende la tonalité d’avertissement.
e) Criez “NON”, tirez-le en arrière et gratifiez le généreusement
Erziehung: Phase 1
Erziehung Phase 1: Einrichtung des Systems und erstes Bekanntmachen
(1 -3 Tage)
a) Markieren Sie neue oder schwer erkennbare Zaunverläufe mit Hilfe von Markierfähnchen oder
Plastikband.
b) Damit Ihr Hund in dieser ersten Phase keine negativen Einwirkungen erhält,
kleben Sie die Kontakte mit Kunststoffband ab oder setzten Sie eine
Gummikappe auf.
c) Der Hund trägt sowohl den PAC-Empfänger (lose anliegend) als auch sein eigenes
Halsband (an dem die Leine befestigt ist).
d) Zeigen Sie Ihrem Hund nun, wo der Zaun verläuft, damit der den Warnton vernimmt.
e) Sagen Sie nachdrücklich „Nein“, ziehen Sie den Hund zurück und loben Sie ihn überschwänglich.
Addestramento: Fase 1
Addestramento - Fase 1 Impostazione e Introduzione (1-3 gg)
a) Utilizzare delle bandierine di segnalazione o del nastro per definire più agevolmente qualsiasi
linea di delimitazione nuova o piuttosto debole.
b) Per evitare delle stimolazioni non intenzionali, isolare le sonde con del nastro di
plastica o delle guaine di gomma
c) Il cane indossa sia il collare PAC (allentato) che il suo (per utilizzare il guinzaglio)
d) Inserire il cane all'interno della delimitazione (soprattutto nei punti più sensibili) per sentire il
suono di avviso.
e) Gridare “NO”, tirarlo indietro ed elogiarlo generosamente
Training: Fase 1
Trainingsfase 1 Instellen en Introductie (1-3 dagen)
a) Gebruik markeringsvlaggen of lint om nieuwe of nog niet getrainde grenzen
gemakkelijker aan te geven.
b) Om onbedoelde prikkels te vermijden kunt u de sondes isoleren met
plakband of met rubber dopjes.
c) De hond draagt zowel de PAC (los aangebracht) als de eigen halsband
(voor vastmaken van de hondenriem)
d) Maak de hond bekend met de terreingrenzen (met name zwakke punten) door het
waarschuwingssignaal te laten horen.
e) Roep “NEE”, trek hem terug aan de riem en geef overvloedige complimenten
Adiestramiento: Fase 1
Adiestramiento: Fase 1 Instalación e introducción (de 1 a 3 días)
a) Utilice banderines señalizadores o cinta para definir más fácilmente cualquier línea
de delimitación nueva o débil.
b) Con el fin de evitar cualquier estímulo involuntario, aisle las sondas con cinta de
plástico o fundas de goma.
c) El perro lleva tanto el collar PAC (ajustado sin apretar) como el suyo propio (para poner la correa)
d) Meta al perro dentro de la delimitación (sobre todo los puntos débiles) para que escuche el tono
de aviso.
e) Grite “NO”, échelo atrás y cólmelo de elogios.
22


