Error Handling and Troubleshooting
89
12.
Put on cotton gloves for the next seven steps.
13.
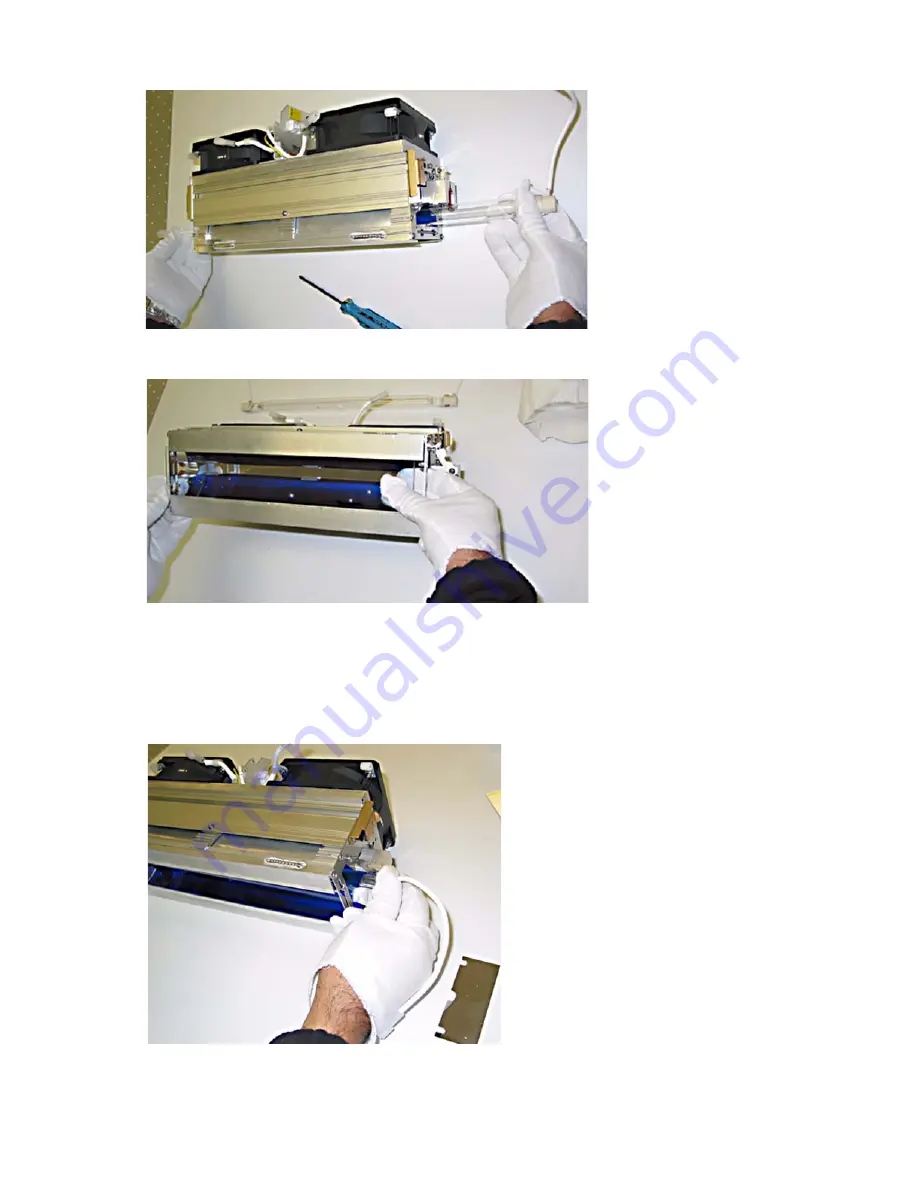
Remove the lamp bulb by carefully sliding the bulb through the housing.
[37] Remove Lamp Bulb
[37] Remove Lamp Bulb
14.
Remove the quartz window by sliding it out very carefully.
[38] Remove Quartz Window
[38] Remove Quartz Window
15.
Gently clean the window using the provided optical cleaning wipes only.
Note:
Do not scrub hard to prevent the window coating from scratching. Do not clean the interior of the illuminator.
16.
Remove the new bulb from its packaging. Only hold the bulb from its edges, not the middle. Clean the bulb using the provided
opical wipe.
17.
Slide the bulb into the illuminator. Press the bulb into place and secure the bulb by pivoting the side plates back into place
and screwing (Phillips) hand tight.
[39] Insert UV Bulb
[39] Insert UV Bulb
Summary of Contents for Arizona T220UV
Page 1: ...Arizona T220UV User Guide...
Page 5: ...5 Arizona T220UV User Guide Chapter 1 Introduction...
Page 10: ...10 T220UV User Guide...
Page 11: ...11 Arizona T220UV User Guide Chapter 2 Product Overview...
Page 15: ...15 Arizona T220UV User Guide Chapter 3 Safety Information...
Page 30: ...30 T220UV User Guide...
Page 31: ...31 Arizona T220UV User Guide Chapter 4 User Interface...
Page 40: ...40 T220UV User Guide...
Page 41: ...41 Arizona T220UV User Guide Chapter 5 How to Operate the Arizona T220UV...
Page 63: ...63 Arizona T220UV User Guide Chapter 6 Ink System Management...
Page 71: ...71 Arizona T220UV User Guide Chapter 7 Media Management...
Page 77: ...77 Arizona T220UV User Guide Chapter 8 Error Handling and Troubleshooting...
Page 92: ...92 T220UV User Guide...
Page 93: ...93 Arizona T220UV User Guide Chapter 9 Printer Maintenance...
Page 114: ...114 T220UV User Guide...


