


86
Chapter 17
Trigger
Setting the trigger condition
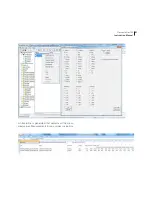
When the instrument is installed with the trigger option,
the Trigger Menu is found in the Setup menu. Press
SETUP
and
6
for “Trigger” and press
1
for measure-
ment trigger. The first four lines in the menu allow you
to select the function for triggering. The last line allows
you to set the parameters associated with the selected
function.
Use the
cursor keys below the display to select
the desired trigger function. Press
ENTER
to confirm
the selection.
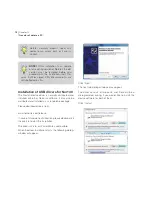
Manual trigger
When MANUAL trigger is selected, the measurement
will start immediately after the
START
key is pressed.
This corresponds to the way of operation before the
trigger option was installed.
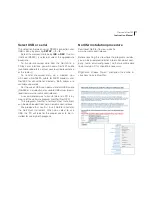
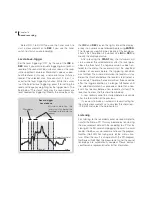
Clock trigger
Move the field cursor to “Clock”, and then press
1
to
select the menu for setting the time for starting the
measurement. The display below will be shown. Use
the
cursor keys to select the field for hour, minutes
or seconds. Modify the value by using the
INC
and
DEC
key on the right side of the display, or key in a
numeric value followed by pressing
ENTER.
When the
required time is set, press
ENTER
twice for leaving the
menus.
For making a measurement, press the
START
key. A
“Wait-indicator”
will be shown in the display instead of the “Run-indica-
tor”. When the displayed time of the day as indicat-
ed by the clock in the instrument coincides with the
triggering time, a measurement will be automatically
started.
If you want to interrupt a waiting-for-trigger opera-
tion, press the
STOP
key.
If you set the repeat measurement/store function
(Press
SETUP
>
1
>
1
), the instrument will start a new
measurement after the first is finished and wait for the
trigger condition to be satisfied again. This will occur
at the same clock the following day. In this way, you
may start a measurement at the same time every day.
The duration and time resolution of the measurement
are set as usual.
Alternatively, if you set the synchro measurement/
store function (Press
SETUP
>
1
>
1
), the instrument
will start a measurement at the pre-selected time, store
the result and start a new measurement. The duration
of the measurement will be as selected, but adjusted
so the start of the periods are synchronised with the
change of the hour for the real-time clock in the in-
strument. Example: A measurement with a duration
of ½ hour is started 09:40. The first period will end in
due time to start the next measurements 10:00, 10:30,
11:00 etc.
Setting the time for the clock trigger
Summary of Contents for nor140
Page 4: ......
Page 16: ......
Page 17: ...nor140 SOUND ANALYSER ...
Page 18: ......
Page 212: ...194 ...
Page 218: ......