101
34 - Scrub System, Disc
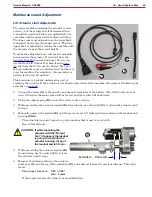
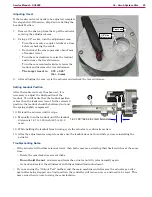
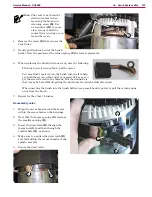
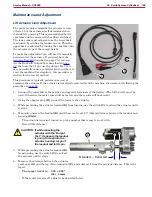
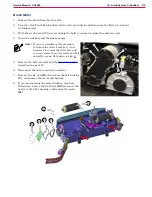
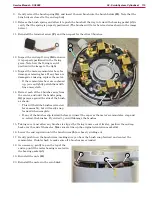
Note:
Take care to not bend the
electrical contact when
loosening the brush wire
retaining screw
(E)
. Use
a screwdriver
(D)
or some
other means to hold the
contact from twisting as you
loosen the screw.
4 Remove the screw
(E)
that secures the
brush wire
5 Gently pull the brush out of the brush
holder Note the position of the return spring
(F)
for later replacement
6
When replacing the brush with a new one, note the following:
•
The brush wire is toward the top of the motor
• You may find it easier to use the brush wire itself to help
you hold the screw on the end of your screw driver as you
get the screw started in the threads But the downside is
that it may be bore difficult getting the brush into the brush holder afterward.
•
When inserting the brush into the brush holder, use a small hook-type tool to pull the return spring
away from the brush
7 Repeat for the other 3 brushes
Reassembly notes
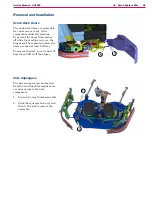
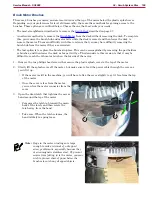
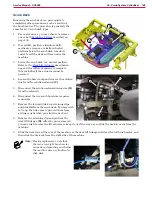
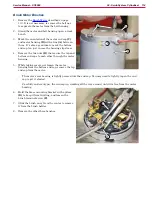
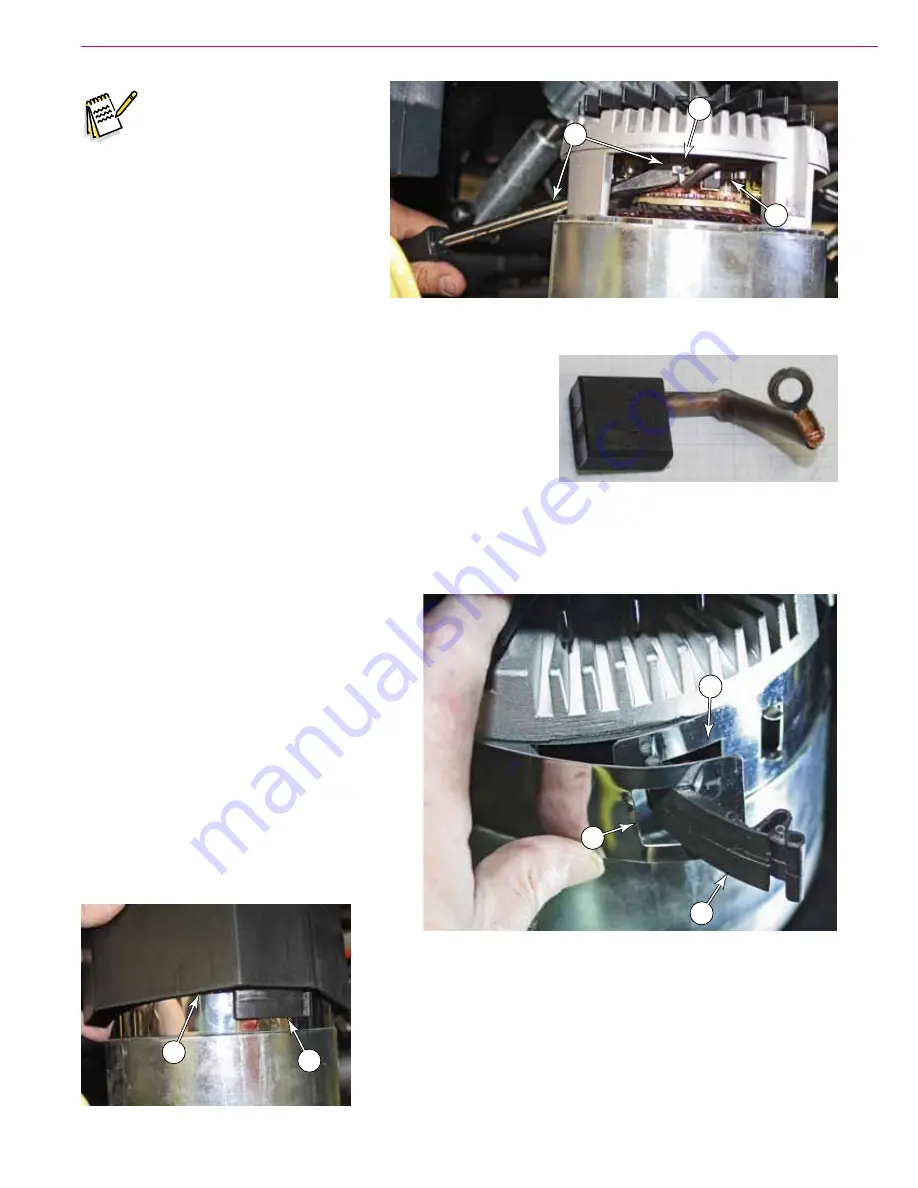
1 Wrap the access band around the motor,
within the recess between the housings
2 Note that the larger opening
(G)
overlays
the smaller opening
(H)
3 Insert the draw latch
(B)
through the
larger hole
(G)
and then through the
smaller hole
(H)
, as shown
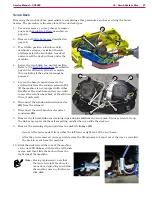
4 Make sure to position the draw latch
(B)
so it falls within the corner chamfer of the
splash cover
(J)
5 Secure the draw latch
D
E
F
B
G
H
B
J

