


37
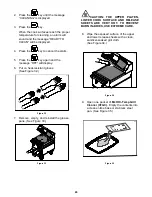
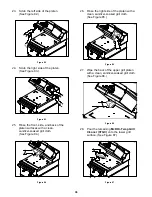
34.
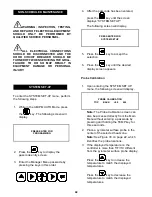
Re-install the release sheet. Secure the
sheet with the locking clips and bars.
(See Figure 93.)
Figure 93
Note:
Reverse the cooking side of the
release sheet on a daily basis (example:
black side on odd days; grey or brown
side on even days).
35.
Wipe the lower grill surface with a clean,
sanitizer-soaked grill cloth. Repeat until
no visible soil remains. (See Figure 94.)
Figure 94
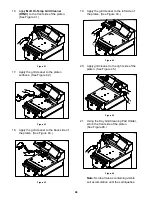
36.
Remove and empty the grease pans.
(See Figure 95.)
Figure 95
37.
Wash and rinse the grease pans in the
3-compartment sink.
38.
Re-install the grease pans.
(See Figure 96.)
Figure 96
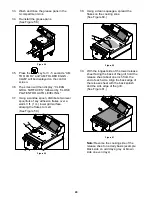
39.
Wipe the remaining grill surfaces with a
clean sanitizer-soaked grill cloth.
40.
Apply a light coat of fryer cooking oil to
the entire
lower
grill surface.
41.
Leave the upper platen in the OPEN
position overnight.
42.
Place the fan interlock switch in the OFF
position. (See Figure 97.)
Figure 97
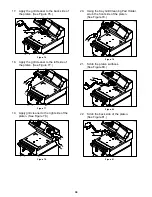
43.
After the grill pad has cooled, remove,
wash, and rinse it thoroughly at the
3-compartment sink. Turn the grill pad
over and re-install on the grill pad holder.
44.
Wash, rinse, and sanitize all utensils and
tools used to clean the grill at the
3-compartment sink.
Summary of Contents for C836
Page 2: ......
Page 7: ...5 150209 C836 Exploded View Figure 1 2015 Carrier Commercial Refrigeration Inc ...
Page 9: ...7 150209 C838 Exploded View Figure 2 2015 Carrier Commercial Refrigeration Inc ...
Page 64: ...Rev 2 15 C836 C838 WIRING DIAGRAM 083305 75 ...
Page 65: ......
Page 66: ......
Page 67: ......
Page 68: ...073530 M ...


