


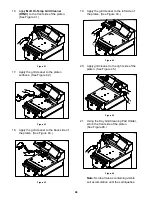


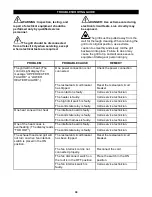
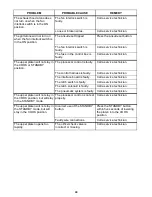


28
28.
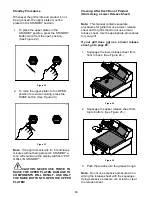
Clean the surrounding areas such as the
hood, bull nose, and back splash with a
clean, sanitizer-soaked grill cloth.
(See Figure 53.)
Figure 53
Note:
The rear of the upper platen, as
well as the tubular arm, can easily be
wiped from the front of the unit. If cleaning
is performed on a daily basis, there
should be no carbon build-up.
29.
One at a time, place the upper and lower
release sheets on the lower grill surface.
Wipe both sides of each release sheet
with a clean, sanitizer-soaked grill cloth.
(See Figure 54.)
Figure 54
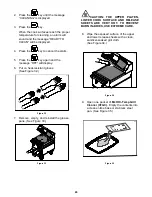
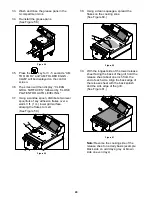
30.
Re-install the upper release sheet. Secure
the sheet with the locking clips and bars.
(See Figure 55.)
Figure 55
Note:
Reverse the cooking side of the
release sheet on a daily basis (example:
black side on odd days; grey or brown
side on even days).
31.
Wipe the lower grill surface with a clean,
sanitizer-soaked grill cloth. Repeat until
the surface is clean. (See Figure 56.)
Figure 56
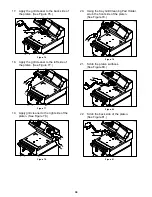
32.
Remove and empty the grease pans.
(See Figure 57.)
Figure 57
Summary of Contents for C836
Page 2: ......
Page 7: ...5 150209 C836 Exploded View Figure 1 2015 Carrier Commercial Refrigeration Inc ...
Page 9: ...7 150209 C838 Exploded View Figure 2 2015 Carrier Commercial Refrigeration Inc ...
Page 64: ...Rev 2 15 C836 C838 WIRING DIAGRAM 083305 75 ...
Page 65: ......
Page 66: ......
Page 67: ......
Page 68: ...073530 M ...


