


Using Type
241
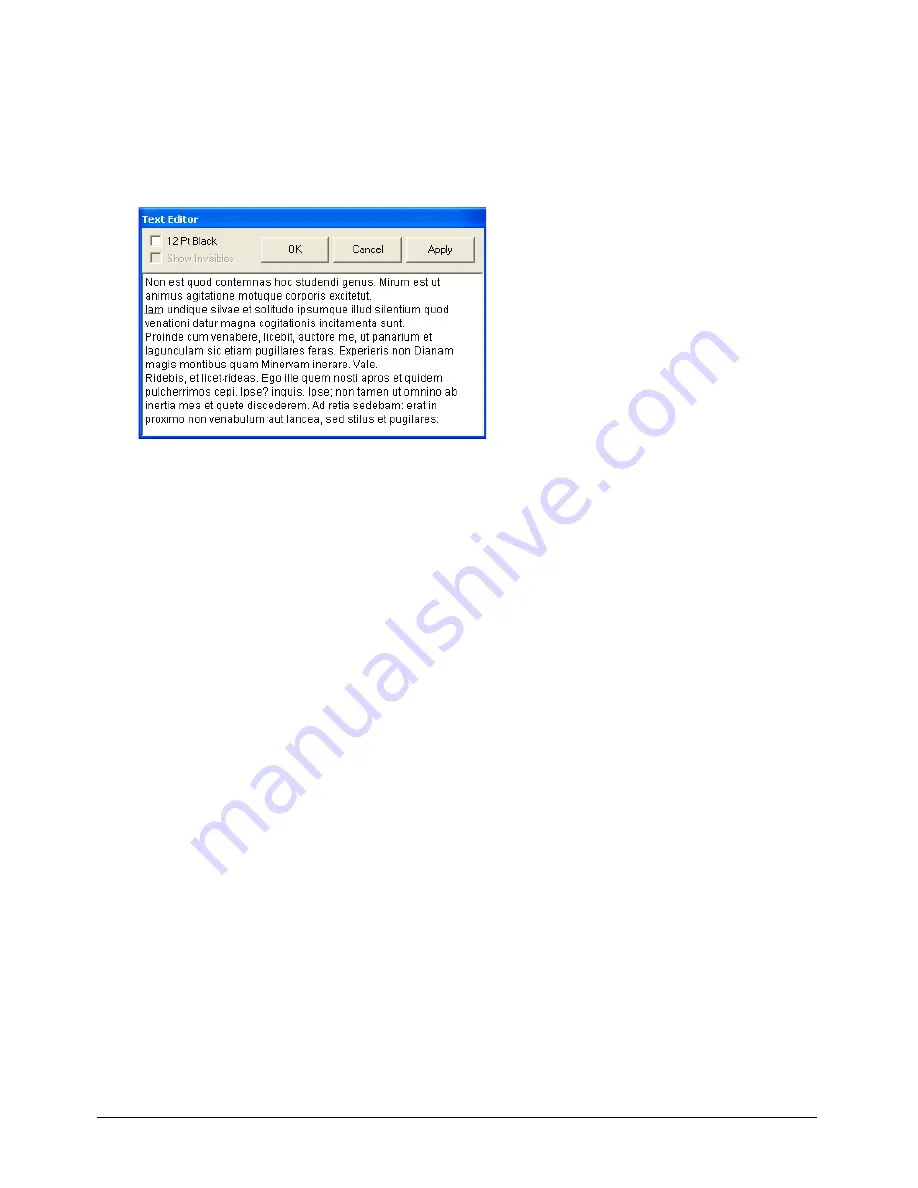
Using the Text Editor
The Text Editor lets you review and edit text that’s difficult to edit onscreen—for example, text
that includes nonprinting characters.
You can choose to always use the Text Editor for editing by selecting the appropriate option in
text preferences.
To edit text in the Text Editor:
1
Do one of the following:
•
Using the Pointer tool, select the text block you want to edit and select Text > Editor.
•
Using the Pointer tool, hold down Alt (Windows) or Option (Macintosh) and double-click a
text block.
•
Using the Text tool, Alt-click (Windows) or Option-click (Macintosh) a text block.
•
In Windows, right-click a text block with the Text tool and select Editor from the
context menu.
2
Select 12 Point Black to ignore formatting attributes and display text in 12-point black type in
the Text Editor window. This option does not affect text formatting in the document, but
makes the text more legible if you are editing text that is very large or small, or has a light color.
3
Select Show Invisibles to display nonprinting characters, such as spaces, tabs, or paragraph
breaks, in the Text Editor window.
4
Edit the text in the Text Editor window.
5
Click one of the following:
OK
applies the changes and closes the Text Editor.
Cancel
closes the Text Editor without applying changes.
Apply
applies changes to the text without leaving the Text Editor.
To always edit text in the Text Editor:
1
Display text preferences by doing one of the following:
•
In Windows, press U, then click the Text tab.
•
On the Macintosh, press U, then click the Text category.
2
Select Always Use Text Editor, then click OK.
Summary of Contents for FREEHAND MX 11
Page 1: ...Using FreeHand MX Macromedia FreeHand MX...
Page 42: ...Chapter 1 42...
Page 192: ...Chapter 6 192...
Page 232: ...Chapter 7 232...
Page 288: ...Chapter 8 288...
Page 308: ...Chapter 9 308...
Page 340: ...Chapter 11 340...
Page 362: ...Chapter 12 362...
Page 374: ...Chapter 13 374...
Page 388: ...Chapter 14 388...


