Chapter 7
206
Editing an extruded object in the workspace
To edit the extrusion effects of an extruded object, you use the Extrude tool. The Extrude tool
offers two editing modes. One mode lets you edit the position, depth, and vanishing point,
much like the process of creating an extruded object. The rotation mode of the Extrude tool
lets you rotate the extruded object in 3D space. You can edit any of these attributes using the
Object panel.
Note:
Although you can also manipulate an extruded object using the Pointer tool and basic transformation
techniques such as skewing and rotating, doing so permanently “locks” the extrusion properties. The resulting
object retains its extrusion properties, but those properties can no longer be edited.
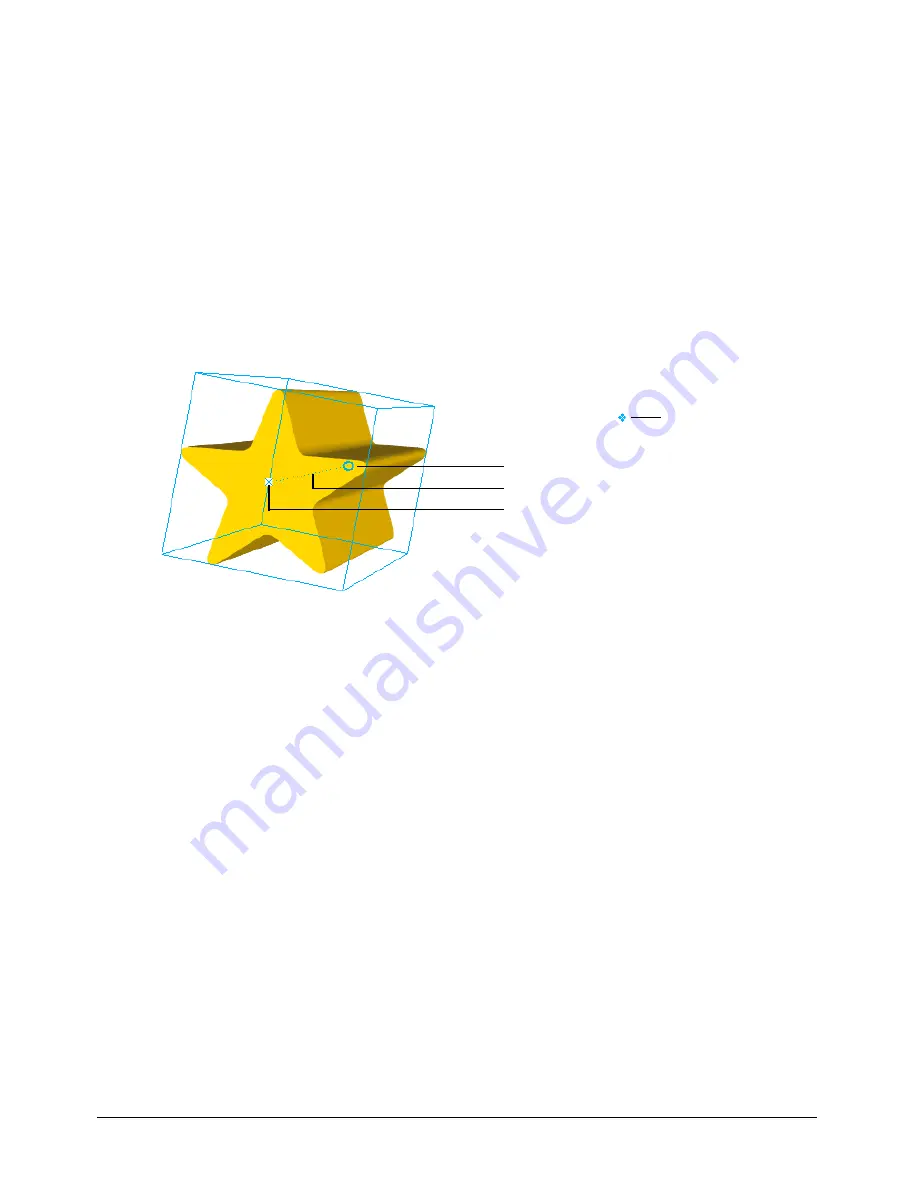
To edit the position, depth, or vanishing point of an extruded object:
1
In the Tools panel, select the Extrude tool from its pop-up menu.
2
Select the extruded object to display the extrusion controls.
3
Do any of the following:
•
Drag the object’s center point to reposition the object, leaving the vanishing point in place.
•
Drag the depth control to adjust the depth of the extrusion.
•
Drag the vanishing point to reposition it within the document.
Z axis
Object center point
Depth control
Vanishing point
Summary of Contents for FREEHAND MX 11
Page 1: ...Using FreeHand MX Macromedia FreeHand MX...
Page 42: ...Chapter 1 42...
Page 192: ...Chapter 6 192...
Page 232: ...Chapter 7 232...
Page 288: ...Chapter 8 288...
Page 308: ...Chapter 9 308...
Page 340: ...Chapter 11 340...
Page 362: ...Chapter 12 362...
Page 374: ...Chapter 13 374...
Page 388: ...Chapter 14 388...


