


3-50
Service Manual
7510
Go Back
Previous
Next
Key Repeat Initial Delay
When a key is touched repeatedly, this is the delay before the key begins repeating. The delay ranges from .25
seconds to 5 seconds. The default is 1 second. Values are given in increments of .25 seconds.
To change this setting:
1.
Touch
Key Repeat Initial Delay
from the Configuration Menu.
2.
Touch
to increase the value or
to decrease the value.
3.
Touch
Submit
to save the change.
4.
Touch
Back
to cancel and return to the Configuration Menu.
Key Repeat Rate
This is the number of times per second that a repeating key will repeat. The range is 1–100, with a default of 15
times per second.
To change this setting:
1.
Touch
Key Repeat Initial Delay
from the Configuration Menu.
2.
Touch
to increase the value or
to decrease the value.
3.
Touch
Submit
to save the change.
4.
Touch
Back
to cancel and return to the Configuration Menu.
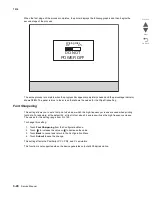
Exiting Configuration Menu
From the Configuration Menu, touch
Back
until a graphic appears with
Exit Config Menu
in the lower right
corner. Touch
Exit Config Menu
to exit the Configuration Menu.
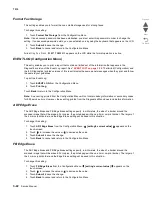
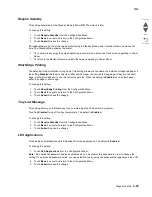
Resetting the Printer
appears on the LCD.
The printer performs a POR, and the following graphic appears on the LCD:
Copy
Fax
FTP
Menus
Ready. Toner low.
Touch any button to begin.
Status/
Supplies
Summary of Contents for X945E
Page 20: ...xx Service Manual 7510 Go Back Previous Next ...
Page 25: ...Notices and safety information xxv 7510 Go Back Previous Next ...
Page 26: ...xxvi Service Manual 7510 Go Back Previous Next ...
Page 32: ...xxxii Service Manual 7510 Go Back Previous Next ...
Page 88: ...1 56 Service Manual 7510 Go Back Previous Next TTM theory ...
Page 97: ...General information 1 65 7510 Go Back Previous Next 3TM theory ...
Page 104: ...1 72 Service Manual 7510 Go Back Previous Next 1TM theory ...
Page 111: ...General information 1 79 7510 Go Back Previous Next Duplex ...
Page 432: ...3 52 Service Manual 7510 Go Back Previous Next ...
Page 475: ...Repair information 4 43 7510 Go Back Previous Next E F ...
Page 483: ...Repair information 4 51 7510 Go Back Previous Next Connectors A ...
Page 623: ...Repair information 4 191 7510 Go Back Previous Next ...
Page 653: ...Repair information 4 221 7510 Go Back Previous Next ...
Page 714: ...4 282 Service Manual 7510 Go Back Previous Next ...
Page 715: ...Connector locations 5 1 7510 Go Back Previous Next 5 Connector locations Locations ...
Page 720: ...5 6 Service Manual 7510 Go Back Previous Next Printhead Polygon mirror motor ...
Page 725: ...Connector locations 5 11 7510 Go Back Previous Next ...
Page 726: ...5 12 Service Manual 7510 Go Back Previous Next ...
Page 729: ...Connector locations 5 15 7510 Go Back Previous Next Switch media size Switch TTM media size ...
Page 765: ...Parts catalog 7 31 7510 Go Back Previous Next Assembly 29 Electrical 1 3 5 9 2 10 6 4 8 1 7 ...
Page 770: ...7 36 MFP Service Manual 7510 Go Back Previous Next Assembly 32 Electrical 4 2 1 4 3 5 7 6 8 9 ...
Page 797: ...Parts catalog 7 63 7510 Go Back Previous Next Assembly 50 1TM feed unit assembly 4 3 5 4 1 2 ...
Page 802: ...7 68 MFP Service Manual 7510 Go Back Previous Next Assembly 53 1TM drive and electrical ...
Page 804: ...7 70 MFP Service Manual 7510 Go Back Previous Next Assembly 54 3TM covers 3 5 2 4 1 ...
Page 812: ...7 78 MFP Service Manual 7510 Go Back Previous Next Assembly 58 3TM drive and electrical ...
Page 815: ...Parts catalog 7 81 7510 Go Back Previous Next Assembly 60 TTM media trays 3 5 4 3 7 2 6 8 1 ...
Page 824: ...7 90 MFP Service Manual 7510 Go Back Previous Next Assembly 67 TTM drive and electrical ...
Page 828: ...7 94 MFP Service Manual 7510 Go Back Previous Next ...
Page 836: ...I 8 Service Manual 7510 Go Back Previous Next ...
Page 844: ...I 16 Service Manual 7510 Go Back Previous Next ...


