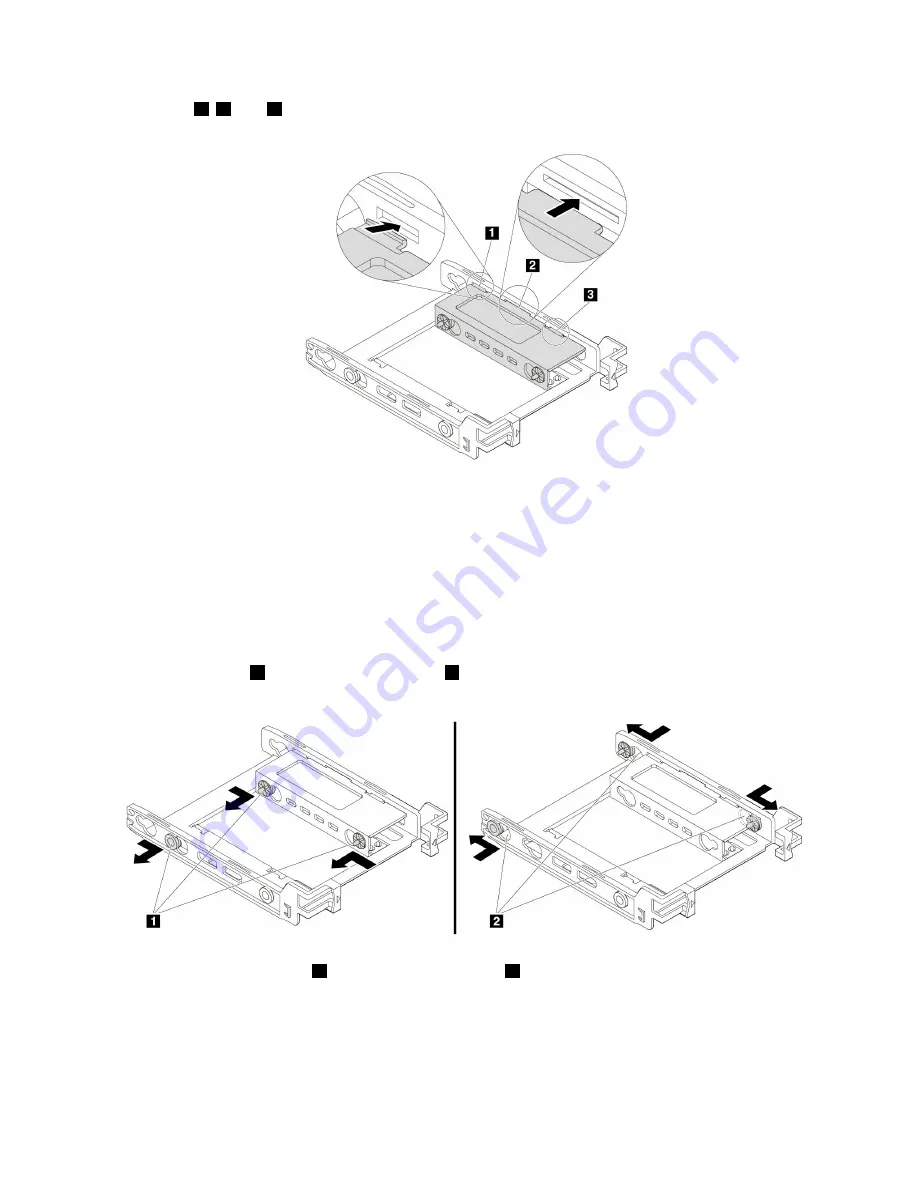
5. Insert tabs
1
,
2
, and
3
into the corresponding slots. Ensure that the tabs are secured in place.
Figure 53. Inserting the tabs into the corresponding slots
6. Install a 2.5-inch internal storage drive into the bracket. See “2.5-inch internal storage drive” on
Replacing a 2.5-inch internal storage drive with a 3.5-inch internal storage drive
To replace a 2.5-inch internal storage drive with a 3.5-inch internal storage drive, do the following:
1. Ensure that the 2.5-inch internal storage drive is removed from the bracket. See “2.5-inch internal
2. Remove three pins
1
and install them into slots
2
.
Figure 54. Removing three pins
1
and installing them into slots
2
126
P910 Hardware Maintenance Manual
Summary of Contents for ThinkStation P910
Page 1: ...P910 Hardware Maintenance Manual Machine Types 30B8 and 30B9 ...
Page 14: ...8 P910 Hardware Maintenance Manual ...
Page 18: ...12 P910 Hardware Maintenance Manual ...
Page 19: ...1 2 Chapter 1 Read this first Important safety information 13 ...
Page 20: ...1 2 14 P910 Hardware Maintenance Manual ...
Page 25: ...1 2 Chapter 1 Read this first Important safety information 19 ...
Page 26: ...1 2 20 P910 Hardware Maintenance Manual ...
Page 29: ...Chapter 1 Read this first Important safety information 23 ...
Page 39: ...b f d c e Chapter 2 Product overview 33 ...
Page 52: ...46 P910 Hardware Maintenance Manual ...
Page 64: ...58 P910 Hardware Maintenance Manual ...
Page 84: ...78 P910 Hardware Maintenance Manual ...
Page 98: ...92 P910 Hardware Maintenance Manual ...
Page 106: ...100 P910 Hardware Maintenance Manual ...
Page 224: ...218 P910 Hardware Maintenance Manual ...
Page 226: ...220 P910 Hardware Maintenance Manual ...
Page 228: ...222 P910 Hardware Maintenance Manual ...
Page 236: ...230 P910 Hardware Maintenance Manual ...
Page 240: ...4 Follow the instructions on the screen 234 P910 Hardware Maintenance Manual ...
Page 243: ......
Page 244: ......


