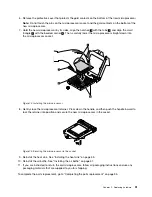
6. Remove the protective cover that protects the gold contacts on the bottom of the new microprocessor.
Note:
Do not touch the pins on the microprocessor socket and the gold contacts on the bottom of the
new microprocessor.
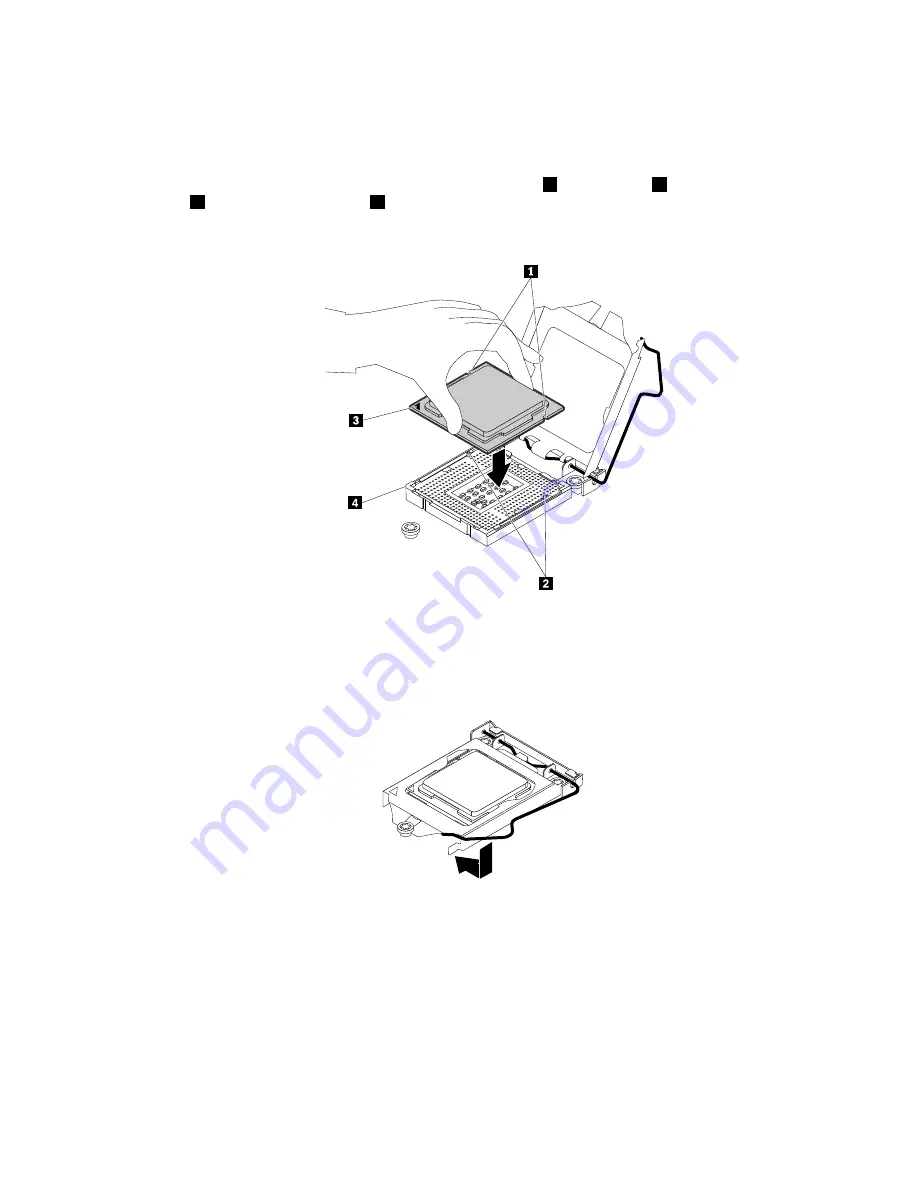
7. Hold the new microprocessor by its sides, align the notches
1
with the tabs
2
, and align the small
triangle
3
with the beveled corner
4
. Then, carefully lower the microprocessor straight down into
the microprocessor socket.
Figure 74. Installing the microprocessor
8. Gently close the microprocessor retainer. Press down the handle, and then push the handle inward to
lock the retainer into position and secure the new microprocessor in the socket.
Figure 75. Securing the microprocessor in the socket
9. Reinstall the heat sink. See “Installing the heat sink” on page 53.
10. Reinstall the air baffle. See “Installing the air baffle” on page 51.
11. If you are instructed to return the old microprocessor, follow all packaging instructions and use any
packaging materials that are supplied to you for shipping.
To complete the parts replacement, go to “Completing the parts replacement” on page 95.
.
91
Summary of Contents for ThinkServer RS160
Page 14: ...xii ThinkServer RS160 User Guide and Hardware Maintenance Manual ...
Page 18: ...4 ThinkServer RS160 User Guide and Hardware Maintenance Manual ...
Page 42: ...28 ThinkServer RS160 User Guide and Hardware Maintenance Manual ...
Page 58: ...44 ThinkServer RS160 User Guide and Hardware Maintenance Manual ...
Page 118: ...104 ThinkServer RS160 User Guide and Hardware Maintenance Manual ...
Page 130: ...116 ThinkServer RS160 User Guide and Hardware Maintenance Manual ...
Page 141: ......
Page 142: ......


