Section 5 OTHER CONVENIENT FUNCTIONS
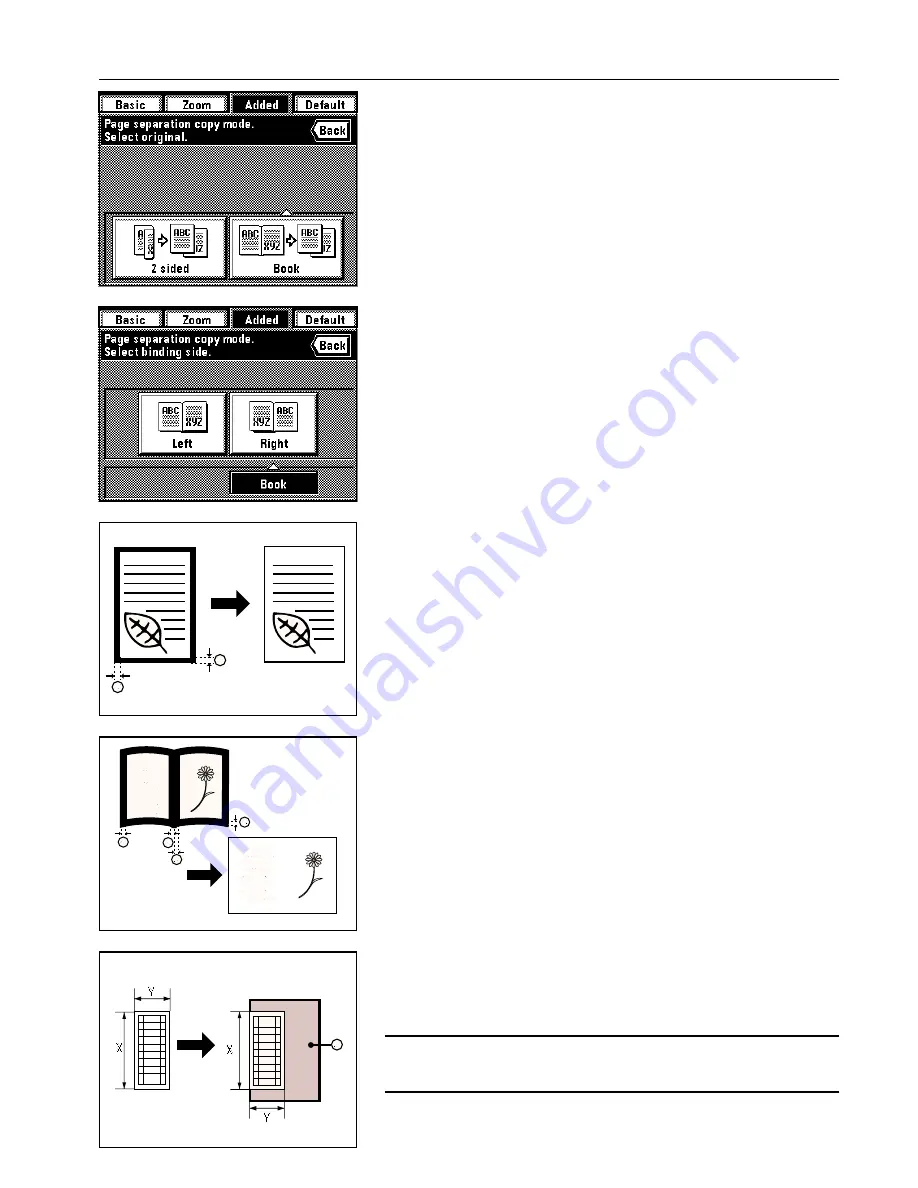
4. Specify the type of the originals that are being used by touching either the “2 sided” or
“Book” key.
If you selected “Book”, go to the next step.
If you selected “2 sided”, the touch panel will return to the basic screen.
5. Specify the binding orientation of the originals by touching either the “Left” or “Right” key.
The touch panel will return to the basic screen.
(4) Erasing the edges around copies from books, etc. [Border erase mode]
●
Erasing blemishes from the edges of copies (Sheet)
Use to erase shadows, lines, etc., which occur around the edges of copies made from sheet
originals.
(The
a
in the illustration indicates the width of the border that will be erased.)
●
Erasing blemishes from the edges and middle of copies (Book)
Use for making neat copies from thick books, etc.
(The
a
in the illustration indicates the width of the border that will be erased.)
●
Selecting the area to be erased (Custom)
For making neat, blemish-free copies from originals of non-standard sizes, i.e. sizes other
than 11" x 8-1/2" etc. (The
a
in the illustration indicates the width of the border that will be
erased)
In this case, however, the size of the originals that you will use must be registered in ad-
vance. (See “
#
Custom border erase size” on page 8-16.)
POINT OF INFORMATION
The illustration indicates how the copies will be finished when the originals are set in the DF.
When setting originals on the platen, the border area will be based on the left rear position of
the copies.
5-6
Summary of Contents for KM-6230
Page 12: ...Section 2 NAMES OF PARTS Section 2 NAMES OF PARTS 2 1 ...
Page 154: ...12 4 ...
Page 158: ...12 8 A ...


