Original operating instructions
Rotary Rake
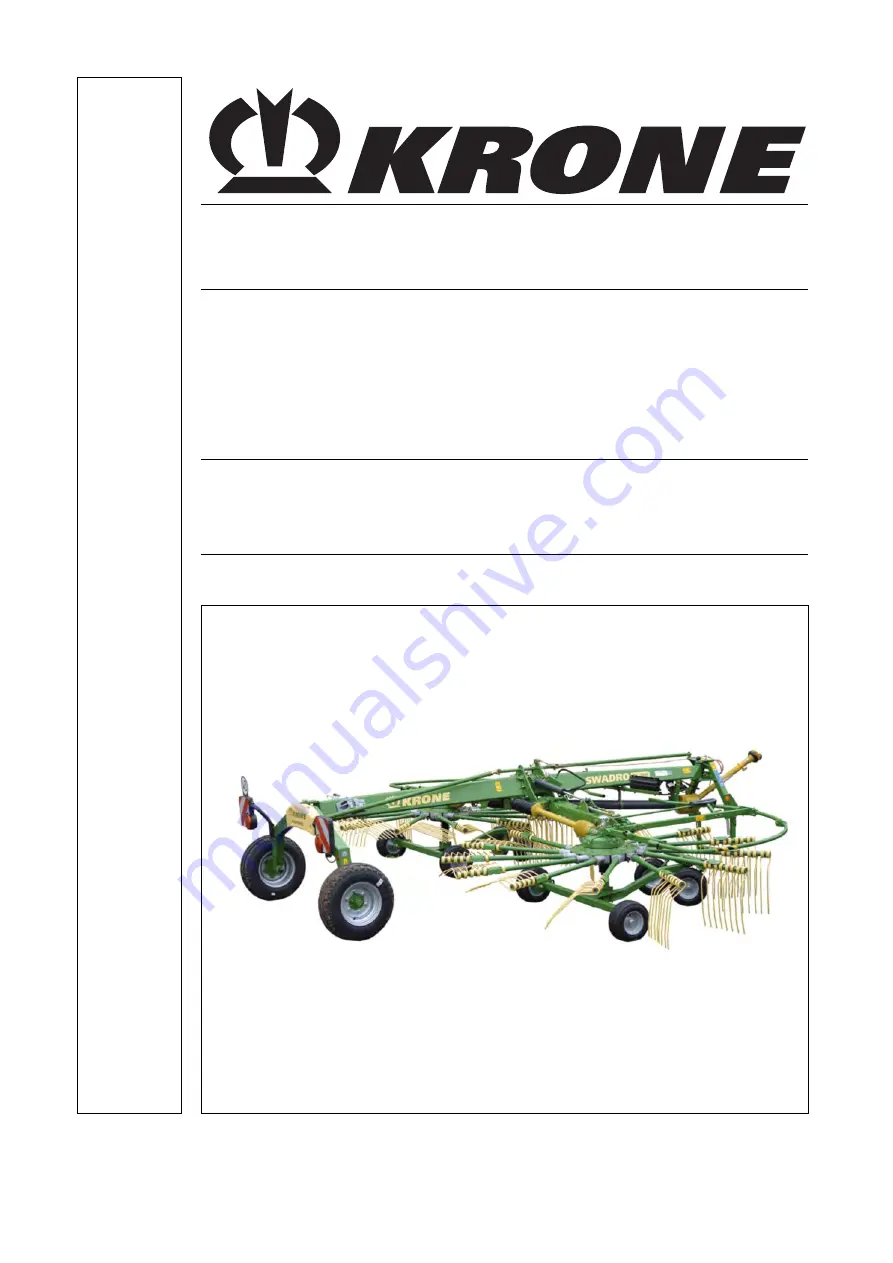
Swadro TC 680 Swadro TC 760
(from serial no.: 970 717)
Order no.: 150 000 287 05 en
30.08.2017
Page 1: ...Original operating instructions Rotary Rake Swadro TC 680 Swadro TC 760 from serial no 970 717 Order no 150 000 287 05 en 30 08 2017 ...
Page 2: ...urer of the product named below on our sole responsibility that the Machine Rotor Rake Types Swadro TC 680 Swadro TC 760 to which this declaration refers is in compliance with the following relevant provisions of EC Directive 2006 42 EC machines The undersigned Managing Director is authorised to compile the technical documents Spelle 01 08 2017 Dr Ing Josef Horstmann Managing Director Design Devel...
Page 3: ... Workstations on the Machine 14 3 4 8 Operational safety Technically perfect condition 14 3 4 9 Danger zones 16 3 4 10 Keeping safety devices functional 18 3 4 11 Personal Protective Equipment 18 3 4 12 Safety signs on the machine 19 3 4 13 Traffic safety 19 3 4 14 Parking the machine safely 20 3 4 15 Consumables 20 3 4 16 Sources of danger on the machine 21 3 4 17 Dangers associated with certain ...
Page 4: ...rection of travel 51 7 6 Checking Setting Distance Between Tine Arm and Outrigger Arm 52 7 7 Basic Setting of Rotor Inclination 53 8 Start up 54 8 1 Preparations on tractor 55 8 1 1 Adjusting the lower suspension arms 55 8 2 Connect the machine to the tractor 56 8 3 Connecting the hydraulic lines 57 8 4 Lighting connection 58 8 5 Connecting the Operation 59 8 6 Install the PTO shaft 60 8 7 Using t...
Page 5: ...port 87 10 1 Preparations for road travel 88 10 2 Driving on Slopes 89 10 3 Switching off the machine 90 11 Settings 91 11 1 Setting the Rotor Inclination 92 11 1 1 Rotor chassis serial 92 11 1 2 For the Trailing Guide Wheels Version 93 11 1 3 For the Tandem Chassis with Trailing Wheels Version 94 11 2 Fixing the Trailing Guide Wheels 95 11 3 Calibrating the Sensor with Electrical Rotor Height Adj...
Page 6: ...ystem 115 15 Maintenance Gearbox 116 15 1 Main gearbox 117 16 Special equipment 118 16 1 Tine loss safeguard 118 16 2 Chain for height restriction of suspension arms 119 17 Malfunctions Causes and Remedies 120 18 Placing in Storage 122 18 1 At the End of the Harvest Season 122 18 2 Before the Start of the New Season 123 19 Disposal of the machine 124 19 1 Disposal of the machine 124 20 Appendix 12...
Page 7: ...54_78 docx 1609723 2 1 2 4 Target group of this document Pos 12 BA Zu diesem Dokument Zielgruppe 345 mod_1434348246902_78 docx 2606935 1 This document aims at the operators of the machine fulfilling the minimum requirements of personnel qualification refer to chapter entitled Safety Personnel Qualification Pos 13 1 Überschriften Überschriften 2 P T SSo benutzen Sie dieses Dokument 188 mod_13805483...
Page 8: ...34979896995_78 docx 2611366 3 1 2 5 5 Scope of Document Pos 13 11 BA Zu diesem Dokument Umfang des Dokuments_alle Beipacks und Varianten enthalten_Text 346 mod_1434979460226_78 docx 2611335 1 In addition to standard equipment accessories kits and versions of the machine are described in this document Your machine may deviate from this document Pos 13 12 Überschriften Überschriften 3 A E D Darstell...
Page 9: ...e g move from pos I to pos II X Dimensions e g B width H height L length Action step Tighten screws with torque key with specified tightening torque Direction of motion Direction of travel opened closed enlargement of display detail Framings dimension line dimension line limitation reference line for visible parts or visible mounting material Framings dimension line dimension line limitation refer...
Page 10: ...revention Caution CAUTION Type and source of hazard Effect Damage to property Measures for risk prevention Pos 13 21 Überschriften Zwischenüberschriften F J Hinweise mit Informationen und Empfehlungen_Zu diesem Dokument 337 mod_1430721734582_78 docx 2563548 1 Notes with information and recommendations Pos 13 22 BA Zu diesem Dokument Hinweise mit Informationen und Empfehlungen_Text 337 mod_14307213...
Page 11: ...eter per hour m h 4 4029 Force newton N 0 2248 pound force lbf Length millimeter mm 0 03937 inch in meter m 3 2808 foot ft Power kilowatt kW 1 3410 horsepower hp Pressure kilopascal kPa 0 1450 pound per square inch psi megapascal MPa 145 0377 bar non SI bar 14 5038 Torque newton meter Nm 0 7376 pound foot or foot pound ft lbf 8 8507 pound inch or inch pound in lbf Temperature degree Celsius C Cx1 ...
Page 12: ...e checked thoroughly for wear and other damage Damaged and worn parts must be replaced before placing the machine into service again After the machine has been used for five years carry out full technical inspection of the machine According to the results of this inspection a decision concerning the possibility of reuse of the machine should be taken Theoretically the service life of this machine ...
Page 13: ... Children cannot assess danger and behave unpredictably As a result children are especially at risk Keep children away from the machine Keep children away from consumables Especially before starting up and moving the machine ensure that there are no children in the danger zone Pos 16 9 10 Überschriften Überschriften 3 A E A Ankuppeln 12 mod_1224678928406_78 docx 152806 3 1 3 4 4 Coupling Pos 16 9 ...
Page 14: ... Passengers Passengers may be seriously injured by the machine or fall off the machine and get run over Ejected objects may strike and injure passengers Never let people ride on the machine Pos 16 9 20 Überschriften Überschriften 3 A E B Betriebssicherheit Technisch einwandfreier Zustand 187 mod_1380012216128_78 docx 1606877 3 1 3 4 8 Operational safety Technically perfect condition Pos 16 9 21 BA...
Page 15: ...ate potential causes of damage for example heavy soiling or tighten slack screws If possible repair the damage according to these operating instructions In the case of damage which may affect operational safety and cannot be repaired according to these operating instructions Have damage repaired by a qualified service centre Pos 16 9 25 BA Sicherheit 1 Grundlegende Sicherheitshinweise Betriebssich...
Page 16: ...162229_78 docx 2313568 1 If the danger zone is not observed people may be seriously injured or killed Keep people away from the danger zone of the tractor and the machine Do not switch on the drives and engine until there is nobody in the danger zone The safety clearance is 30 metres in front of the machine while in operation 5 metres in front of the machine when at a standstill 3 metres on either...
Page 17: ...hing on the PTO shaft Make sure that all safety devices are fitted and in the protection position Ensure that there is nobody in the danger zone of PTO shaft and universal shaft Switch off the drives if they are not necessary Pos 16 9 34 BA Sicherheit 1 Grundlegende SicherheitshinweiseGefahrenbereich Gelenkwelle_fuer alle 453 mod_1463993075614_78 docx 3077842 1 Danger zone universal shaft People m...
Page 18: ... of personal protective equipment is an important safety measure Missing or unsuitable personal protective equipment increases health risks and injuries Personal protective equipment is for example Suitable protective gloves Safety boots Tight fitting protective clothing Hearing protection Protective goggles Specify and provide personal protective equipment for the particular job Use only personal...
Page 19: ...mod_1404804875368_78 docx 2076345 1 Dangers when driving on roads and in fields The mounted or attached work machine changes the handling characteristics of the tractor The handling characteristics also depend on the operational state and on the ground If the driver does not consider changed handling characteristics he may cause accidents Observe procedures for driving on roads and in fields see c...
Page 20: ...riebsstoffe 187 mod_1380021996500_78 docx 1607250 3 1 3 4 15 Consumables Pos 16 9 54 BA Sicherheit 1 Grundlegende Sicherheitshinweise Betriebsstoffe Ungeeignete Betriebsstoffe Verweis auf Technische Daten 321 mod_1424858173088_78 docx 2481119 1 Unsuitable operating materials Operating materials that do not correspond to the requirements of the manufacturer may impair the operational safety of the ...
Page 21: ... 1906831 1 Liquids under pressure The following liquids are under high pressure Hydraulic oil Liquids under high pressure may penetrate the body through the skin and cause serious injuries If a damaged pressure system is suspected immediately contact a qualified service centre Never search for leaks with bare hands Even a pin sized hole may cause serious injuries Keep body and face away from leaks...
Page 22: ...afeguard the machine see chapter Safety Shutting down and safeguarding the machine All other maintenance and repair work may be performed by a qualified service centre only Pos 16 9 66 BA Sicherheit 1 Grundlegende Sicherheitshinweise Gefahren bei best Tätigkeiten Angehobene Maschinen 273 mod_1404141383470_78 docx 2059826 1 Raised machine and machine parts The raised machine may accidentally drop r...
Page 23: ...wheel rim could explode and or burst see chapter Technical Data When fitting the wheels tighten the wheel nuts to the stipulated torque see chapter Maintenance Tyres Pos 16 9 71 Überschriften Überschriften 3 U Z Verhalten in Gefahrensituationen und bei Unfällen 187 mod_1380023393504_78 docx 1607682 3 1 3 4 19 Behaviour in hazardous situations and when accidents occur Pos 16 9 72 BA Sicherheit 1 Gr...
Page 24: ... Maschinenteile sicher unterbauen 190 mod_1381323662799_78 docx 1624809 3 1 3 5 2 Supporting lifted machine and machine parts securely Pos 16 11 5 BA Sicherheit 3 Sicherheitsroutinen Angehobene Maschine und Maschinenteile sicher unterbauen_ALTE FORM 277 mod_1404810762702_78 docx 2077603 1 WARNING Risk of injury due to movement of the machine or machine parts If the machine is not supported securel...
Page 25: ...ge and filter element change safely Lower raised machine parts or secure them against falling refer to chapter Safety Securely Supporting Raised Machine and Machine Parts Shut down and safeguard the machine refer to chapter Safety Shutting Down and Safeguarding the Machine Observe the intervals for oil level check oil change and filter element change refer to chapter Maintenance Maintenance Table ...
Page 26: ...he position of these safety signs and what they mean is given below Pos 16 16 BA Sicherheit Aufkleber Schwader Sicherheitsaufkleber Schwader TC 680_TC 760 Bild 504 mod_1497442987213_78 docx 3466411 1 L 1 2 5 SW700081_4 6 7 6 RH LH RH LH RH LH 3 RH LH 4 RH LH 4 RH LH 8 Fig 1 RH right hand machine side LH left hand machine side Pos 16 17 Layout Module Leerzeile 240 mod_1395147357027_0 docx 1890988 1...
Page 27: ...ts when the machine is running Move guards into protective position before start up Pos 16 25 BA Sicherheit 4 Sicherheitsaufkleber EU ISO 939 939 472 2 2x Bestell Nr 283 mod_1407496139786_78 docx 2242867 1 4 Order No 939 472 2 2x Pos 16 26 BA Sicherheit 4 Sicherheitsaufkleber EU ISO 939 939 472 2 bei Ausführung hydraulische Breitenverstellung 2 302 mod_1413876787880_78 docx 2352275 1 in case of hy...
Page 28: ...ber Schwader TC 680_TC 760 Bild 504 mod_1497442987213_78 docx 3466411 1 L 1 2 5 SW700081_4 6 7 6 RH LH RH LH RH LH 3 RH LH 4 RH LH 4 RH LH 8 Fig 2 RH right hand machine side LH left hand machine side Pos 16 32 Layout Module Seitenumbruch 0 mod_1196175311226_0 docx 4165 1 ...
Page 29: ...mod_1381224258524_78 docx 1622743 1 Danger due to electric shock Life threatening injuries caused by a flashover if machine parts come too close to power transmission lines Maintain the prescribed safe distance from power transmission lines Pos 16 37 BA Sicherheit 4 Sicherheitsaufkleber EU ISO 27 021 27 021 591 0 1x Bestell Nr 501 mod_1495521437364_78 docx 3451031 1 8 Order no 27 021 591 0 1x Pos ...
Page 30: ... is a risk of being crushed Pos 16 44 BA Sicherheit 4 Sicherheitsaufkleber EU ISO 939 939 574 0 1x Bestell Nr 203 mod_1386060956421_78 docx 1698083 1 10 Order no 939 574 0 1x Pos 16 45 BA Sicherheit 4 Sicherheitsaufkleber EU ISO 939 939 574 0 Bild Text 203 mod_1386060938931_78 docx 1698054 1 L 939 574 0 Danger from shock There is a danger of injury due to moving machine parts when the machine is r...
Page 31: ...ering Safety Labels and Information Labels Note Each safety and information label is provided with an order number and can be ordered directly from the manufacturer or from authorised dealer refer to chapter Contact Person 3 6 3 Attaching Safety Labels and Information Labels Note Attaching a label Effect Adhesion of label The attachment area must be clean dry and free from dirt oil and grease Pos ...
Page 32: ...P T S SMV Kennzeichnungstafel 508 mod_1500894961101_78 docx 3490263 2 1 3 7 2 SMV Emblem Pos 16 55 6 2 Überschriften Zwischenüberschriften A E Bei Ausführung SMV Kennzeichnungstafel 506 mod_1499755565154_78 docx 3479802 1 For version with SMV emblem Pos 16 55 6 3 BA Sicherheit SMV Kennzeichnung_für alle MaschinenSMV Kennzeichungstafel_Bild 503 mod_1496825928811_78 docx 3460830 1 1 Fig 5 Pos 16 55 ...
Page 33: ...ine when it is not connected to the tractor Pos 16 55 12 Überschriften Überschriften 3 P T S Sicherungskette 508 mod_1500885936774_78 docx 3489847 3 1 3 7 4 Safety chain Pos 16 55 13 BA Inbetriebnahme Sicherungskette USA Sicherungskette an der Maschine montieren_Bild_SW 800 907 1 TC 680_760 304 mod_1414672909325_78 docx 2364064 1 1 SW9000042_1 Fig 7 Pos 16 55 14 BA Sicherheit Sicherheitsausstattun...
Page 34: ...ion systems can also engage if the speed is low or when approaching the rotors A vibrating noise results The torque is then transferred by pulsation The brief engaging of the star ratchet couplings does not affect the function of the machine To prevent an early wear of the overload protection system switch of the P T O shaft if the vibrating noise can be heard for a longer duration Pos 16 55 20 Üb...
Page 35: ...Pos 19 Layout Module Diese Seite ist bewusst freigelassen worden 1 mod_1201783680373_78 docx 54443 1 This page has been left blank deliberately Pos 20 Layout Module Seitenumbruch 0 mod_1196175311226_0 docx 4165 1 ...
Page 36: ...riften 2 K O MMaschinenübersicht 0 mod_1195565731130_78 docx 555 2 1 4 1 Machine overview Pos 21 3 BA Maschinenbeschreibung Maschinenübersicht Schwader Maschinenübersicht Swadro TC 680_TC 760_Bild 509 mod_1501238330860_78 docx 3493831 1 SW700059_3 1 2 4 3 5 6 7 8 9 11 17 14 22 21 20 19 18 12 13 10 15 16 Fig 10 Pos 21 4 Layout Module Seitenumbruch 0 mod_1196175311226_0 docx 4165 1 ...
Page 37: ...cal rotor height setting 3 Frame rear 14 Rotor 4 Warning panel 15 Running gear 5 Wheel chock 16 Lighting 6 Tine arm 17 Transverse link 7 Universal shaft drive 18 Main gearbox 8 Universal shaft bracket 19 Overload protection 9 Support jack 20 Universal shaft rotor drive 10 Document storage tube 21 Rotor gearbox 11 Frame front 22 Rotor chassis only for Plus version Pos 21 6 Layout Module Seitenumbru...
Page 38: ...uidance of additional rotor The rotor lifting mechanism is controlled via hydraulic lifting of rotors As soon as the rotor is lifted the rotor drive switches off automatically Pos 21 9 BA Maschinenbeschreibung Maschinenübersicht Schwader Maschinenübersicht Swadro 800 26 Zusatzkreisel 427 mod_1455025116963_78 docx 2958354 1 SW700112_1 9 4 1 4 4 4 5 4 3 4 1 4 2 Fig 11 1 Support jack 4 3 Adjustment s...
Page 39: ...Vehicle ID number Note The entire identification plate represents a legal document and should not be altered or rendered illegible When asking questions concerning the machine or ordering spare parts be sure to provide type designation vehicle ID number and the year of manufacture To ensure that these data are always available we recommend that you enter them in the fields above Note Authentic KRO...
Page 40: ...Technische Daten Bild Swadro TC 680_TC 760_TC 760 X tr Transportabmessungen 367 mod_1441354709616_78 docx 2697197 1 B SW700058_2 H L Fig 13 Pos 24 6 BA Einleitung Technische Daten Schwader Schwader 700 _800 Technische Daten Abmessungen in Transportstellung Swadro TC 680_TC 760 361 mod_1439452022098_78 docx 2667838 1 Dimensions in transport position Height with tine arms rigid 3 995 mm Height with ...
Page 41: ...ng der Maschine Serie Swadro TC 680 362 mod_1439561256172_78 docx 2670428 1 Equipment of the machine series Lower link hitch Cat I and II Tine arms rigid Series Number of arms per rotor 10 Number of the double tines per arm 4 Rotor diameter 3 300 mm Lighting Series Warning panels Series Universal shaft Wide angle Pos 24 13 BA Einleitung Technische Daten Schwader Schwader 700 _800 Technische Daten ...
Page 42: ...lung Swadro TC 680_TC 760 361 mod_1439452022098_78 docx 2667838 1 Dimensions in transport position Height with tine arms rigid 3 995 mm Height with tine arms folding 3 580 mm Length 5 900 mm Width 2 900 mm Pos 24 20 BA Einleitung Technische Daten Schwader Schwader 700 _800 Technische Daten Abmessungen in Arbeitsstellung Swadro TC 760 355 mod_1438668463952_78 docx 2651158 1 Dimensions in Working Po...
Page 43: ...chine series Lower link hitch Cat I and II Number of rotors 2 Number of arms per rotor 13 Number of the double tines per arm 4 Rotor diameter 3 300 mm Universal shaft Wide angle Lighting Warning panels Working width adjustment Mechanical rotor height adjustment Pos 24 26 BA Einleitung Technische Daten Schwader Schwader 700 _800 Technische Daten Ausrüstung der Maschine Variante Swadro TC 760 294 mo...
Page 44: ... Dispose of used consumables according to statutory provisions Pos 24 37 BA Einleitung Technische Daten Schwader Schwader 700 _800 Technische Daten Betriebsstoffe Swadro TC 680 760 504 mod_1498717312485_78 docx 3474429 1 Designation Filling quantity Specification Initial filling ex works Rotor gearbox 0 5 L Fluid gear grease GFO 35 RENOLIT SO GFO 35 Main gearbox 1 0 L SAE 90 Wiolin ML 4 SAE 90 Gea...
Page 45: ...at position red 1 Lowers the machine from transport position to working position Headland position Pressure red 1 Raises the machine from working position to headland position Float position red 1 Lowers the machine from headland position to working position From working position to transport position Switch off PTO drive Pull the operating cable and keep it under tension Pressure red 1 Raises the...
Page 46: ...determines the rotor to be raised or lowered The actual movement is made via the single action control unit Position Function I Single rotor lifting mechanism of left rotor The right rotor remains in its position The left rotor is raised or lowered II Twin rotor lifting mechanism Both rotors are raised or lowered III Single rotor lifting mechanism of right rotor The left rotor remains in its posit...
Page 47: ...n 1 Warning light red Lit when operation panel is switched on 2 Main switch Switch operation panel on 1 and off 0 3 Toggle switch inching Set the working height on right rotor 4 Toggle switch Selects the rotor that is to be raised or lowered The actual movement is made via the single action control unit Pos I Single rotor lifting mechanism of left rotor The right rotor remains in its position The ...
Page 48: ...afety routines are not adhered to people may be seriously injured or killed To avoid accidents the safety routines in the chapter Safety must be read and followed see chapter Safety Safety routines Pos 28 5 BA Sicherheit 2 Vorangestellte Warnhinweise Warnung Maschine sicher abstellen ohne Traktor_Unterlegkeile 278 mod_1404972644211_78 docx 2083305 1 WARNING Risk of injury due to the unsecured mach...
Page 49: ...p evtl Anhängekupplung abbauen 172 mod_1370506026261_78 docx 1479993 1 CAUTION Collision with the trailer coupling Effect Damage to the tractor or machine Depending on the type of tractor the top link of the tractor and or the universal shaft of the machine could collide with the trailer coupling To prevent damage it may be necessary to detach the trailer coupling For further information refer to ...
Page 50: ...ength must be adapted Connect the machine to the tractor without universal shaft Drive the three point hitch in all the way Move the machine in the shortest position for the universal shaft and lower the lower links if necessary The shortest position is reached when the PTO shaft end of the tractor and the drive journal of the machine are at the same height horizontal Park the machine on the suppo...
Page 51: ...must be readjusted Only service technicians are authorized to carry out work on the steering Pos 28 21 BA Einstellungen Schwader Fahrtrichtung regulieren Bild TC 680_TC 760_TC 760 X tr 213 mod_1389858127134_78 docx 1744088 1 SW700078_1 1 2 Fig 20 Pos 28 22 BA Einstellungen Schwader Fahrtrichtung regulieren Text 36 mod_1263302390731_78 docx 338727 1 If the swather is not running in the centre behin...
Page 52: ...in TS 680T Twin TS 740 Twin Einstellung der Zugstrebe Swadro TS 620 TS 680 TS 740 TC 880 _Voraussetzung 382 mod_1444216295678_78 docx 2754329 1 Prerequisite The machine is in headland position and the outrigger arms are completely retracted Pos 28 30 Layout Module Leerzeile 5 Pt 120 mod_1342592918145_0 docx 1092566 1 Pos 28 31 BA Erstinbetriebnahme Schwader Swadro TC 880 Abstand Zinkenarm zu Aushu...
Page 53: ...6 1 The rotor rake must be put down on level and firm ground Move rotor rake into working position In doing so make sure that the running direction of the guide wheels shows in the direction of travel If necessary drive up until the running direction of the guide wheels shows in the direction of travel The rotor inclination is set via guide wheels on the chassis individually for each rotor When pe...
Page 54: ...e Warnhinweise WARNUNG Nichtbeachtung der Sicherheitsroutinen alte Form 273 mod_1404117435996_78 docx 2058712 1 WARNING If the safety routines are not adhered to people may be seriously injured or killed To avoid accidents the safety routines in the chapter Safety must be read and followed see chapter Safety Safety routines Pos 30 4 BA Inbetriebnahme Wender Prüfen Sie vor der Inbetriebnahme dass K...
Page 55: ...erlenker 2 mod_1202364126303_78 docx 58751 1 Note The tractor lower suspension arms must always be installed so that the lifting points of the lower suspension arms are all at the same distance from the ground In order to prevent swivelling of the machine during transport or operation the lower suspension arms must be secured by limiting chains or bars Pos 30 7 BA Erstinbetriebnahme Wender Hinweis...
Page 56: ...tor manufacturer s operating instructions Pos 30 11 BA Inbetriebnahme Schwader Hinweis Maschine befindet sich in Transportstellung 291 mod_1410425539165_78 docx 2294265 1 Note In the following description one assumes that the machine after final assembly is in the transport position Pos 30 12 BA Inbetriebnahme Schwader Anbau an den Traktor Unterlenker ankuppeln_Bild_SW 700 173 mod_1371109817897_78...
Page 57: ... 30 21 Abkürzungen Abkürzungen sprachneutral Schwader Swadro TC 680 Swadro TC 760 204 mod_1386149582296_0 docx 1701748 1 Swadro TC 680 Swadro TC 760 Pos 30 22 BA Inbetriebnahme Hydraulikkupplungen anschließen alle Maschinen Hydraulikkupplungen anschließen rot 1 213 mod_1390207396349_78 docx 1749335 1 Connect the hydraulic coupling red 1 of the machine to a single action control unit of the tractor...
Page 58: ...euchtung Anschluss Beleuchtung Bild SW TC 680_TC 760_TC 760 X tr 214 mod_1390396347380_78 docx 1755543 1 SW700089_1 2 3 1 Fig 27 Pos 30 36 BA Inbetriebnahme Schwader Anschluss Beleuchtung Anschluss Beleuchtung Text 36 mod_1260783798936_78 docx 336718 1 The lighting system is connected via the 7 pin connection cable 1 To do this Insert the 7 pin plug of the connection cable 1 into the relevant sock...
Page 59: ...in short circuits Pos 30 41 BA Inbetriebnahme Schwader Anschluss elektrische Bedienung Anschluss elektrische Bedienung Swadro TC 680_760 302 mod_1414052075029_78 docx 2355917 1 SW700089 2 3 1 4 Fig 28 The connection for operation is made via power supply cable 1 Note If need be mount socket for power supply and support for operation panel on the tractor beforehand To do this Connect power supply c...
Page 60: ...sting the length of the PTO shaft Pos 30 45 BA Inbetriebnahme Schwader Anbau Gelenkwelle Anbau Gelenkwelle Bild SW 700 _800 134 mod_1350458386270_78 docx 1186264 1 2 SW700083 3 3 1 1 Fig 29 Pos 30 46 BA Inbetriebnahme Schwader Anbau Gelenkwelle Anbau Gelenkwelle angehängte Schwader Text 37 mod_1263463772393_78 docx 339645 1 Switch off the engine and remove the ignition key Install the PTO shaft 1 ...
Page 61: ... the safety chain Attachment of the safety chain is not stipulated in all countries Pos 30 48 5 BA Sicherheit 8 Voraussetzungen Handlungsanweisung für alle Maschinen Handlungsanweisung Maschine stillsetzen und sichern 274 mod_1404365253849_78 docx 2065151 1 Shut down and safeguard the machine see chapter Safety Safety routines Shutting down and safeguarding the machine Pos 30 48 6 BA Inbetriebnahm...
Page 62: ...1 TC 680_760 304 mod_1414672909325_78 docx 2364064 1 1 SW9000042_1 Fig 31 Pos 30 48 11 BA Inbetriebnahme Sicherungskette USA Sicherungskette an der Maschine montieren_Text 168 mod_1368510725089_78 docx 1456755 1 Install the safety chain 1 on the machine Pos 31 Layout Module Seitenumbruch 0 mod_1196175311226_0 docx 4165 1 ...
Page 63: ...fety routines Pos 32 4 BA Bedienung Schwader Achtung Maschine ist für Vorwärtsfahrt konzipiert 291 mod_1410427944026_78 docx 2294406 1 CAUTION Do not drive in reverse when using the machine for work Effect Damage to the machine The machine is designed to travel forwards Never reverse while the machine is in switched on and in working position Lift rotors first Pos 32 5 Layout Module Leerzeile 240 ...
Page 64: ... BA Bedienung Schwader Kreiselarme senken heben Kreiselarme senken bei Ausführung ohne Einkreiselaushebung SW 700 _800 Bild 156 mod_1364201932285_78 docx 1381253 1 2 1 SW700065 Fig 33 Pos 32 13 BA Bedienung Schwader Kreiselarme senken heben Kreiselarme senken bei Ausführung ohne Einkreiselaushebung SW TC 680_760 Text 214 mod_1390377372123_78 docx 1754835 1 Switch on the tractor To relieve the lock...
Page 65: ...ic control unit 4 into the bracket in the tractor cabin Switch the switching valve 3 to the central position II Switch on the tractor To relieve the locks 1 actuate the single action control unit at the tractor and pressurise the hydraulic cylinders To release the locks 1 pull the actuating rope 2 and keep it tensioned Set the single action control unit red 1 of the tractor to the float position W...
Page 66: ...ingle action control unit on the tractor and pressurize the hydraulic cylinders To release the lockings 1 pull the actuating rope 2 and keep it tensioned Set the single action control unit red 1 of the tractor to float position If the rotors are in the working position release the actuating rope 2 To switch off the operation panel move switch 3 to position 0 Switch off tractor and secure it agains...
Page 67: ...ard the machine see chapter Safety Safety routines Shutting down and safeguarding the machine Pos 32 25 BA Bedienung Schwader Zinkenarme in Arbeitsstellung schwenken Zugfeder lösen Swadro TS 620_680_740 Twin 359 mod_1439216112485_78 docx 2663423 1 SW9070082 1 2 3 3 1 Fig 36 Lower outrigger arms into working position Switch off tractor and secure it against rolling away Loosen the tension spring 1 ...
Page 68: ...e not inserted from above and secured Insert the bolt 2 from above Secure the bolt with the linch pin 1 Make sure that the linch pin 1 engages properly the ring of the linch pin must be in the groove of the shaft Pos 32 29 Überschriften Überschriften 2 P T SSchutzbügel in Arbeitsstellung bringen 2 mod_1202972231499_78 docx 63393 2 1 9 4 Move the hoop guards to the working position Pos 32 30 BA Sic...
Page 69: ...ocx 2960352 1 SW700111_1 1 2 I II 1 1 Fig 39 Pos 32 36 BA Bedienung Schwader Zusatzkreisel in Arbeitsstellung bringen Text SW 800 26 Zusatzkreisel 167 mod_1367328133388_78 docx 1445589 1 Turn the shut off valve to position II to open the shut off valve 1 Turn on the tractor Move the single acting control unit to float position to lower the additional rotor 2 to working position Activate the double...
Page 70: ...tstiefe Einstellen der Arbeitshöhe mechanisch SW TC 640 Arretierung der Handkurbel 443 mod_1459756135677_78 docx 3026565 1 TC640 014 1 2 Fig 40 Lower outrigger arms into working position Raise lower links until the lower link pinions are approx 63 cm above the ground Switch off tractor and secure it from rolling away Fold up the locking 2 To increase spacing of tines to the ground turn crank handl...
Page 71: ...ng height can be adapted to crops and terrain while the machine is in operation or in headland position To do this Raise lower links until the lower link pinions are approx 63 cm above the ground Move outrigger arms to headland position or working position Move switch 1 to position 1 The operation panel is switched on Setting the working height on left rotor To increase the working height of left ...
Page 72: ...uide wheel Pos 32 48 BA Einstellungen Schwader Arbeitstiefe Zusatzkreisel Einstellung Arbeitstiefe_Bild_SW 800 26 Zusatzkreisel 427 mod_1455093447131_78 docx 2960598 1 SW700109_1 1 2 I II Fig 42 Pos 32 49 BA Einstellungen Schwader Arbeitstiefe Zusatzkreisel Einstellung Arbeitstiefe_Text_SW 800 26 Zusatzkreisel 428 mod_1455098942828_78 docx 2961192 1 Pull the linch pin 1 and remove the bolt 2 Move ...
Page 73: ...A Bedienung Schwader Ausführung mechanische Arbeistbreitenverstellung Swadro TC 680_760 303 mod_1414132276881_78 docx 2356856 1 In order to set the working width lower the rotors until the guide wheels are located a little above the ground Stop and secure the machine refer to chapter Safety Safety Routines Stopping and Securing the Machine Remove special key 1 from threaded spindle 2 Loosen counte...
Page 74: ...ulische Arbeitsbreitenverstellung Swadro TC 680_760 215 mod_1390819656579_78 docx 1762373 1 In order to lift the rotors to the headland position actuate the single action control unit red 1 In order to increase the working width actuate the double action control unit blue 2 In order to reduce the working width actuate the double action control unit blue 2 Pos 32 61 BA Bedienung Schwader Ausführung...
Page 75: ...of the rotating points Pos 32 66 BA Bedienung Schwader Schutzbügel Schutzbügel in Transportstellung bringen Bild TC 680_760 213 mod_1389938420161_78 docx 1747045 1 SW700071_1 1 Fig 44 Pos 32 67 BA Bedienung Schwader Schutzbügel Schutzbügel in Transportstellung bringen Text SW700 _800 _900 133 mod_1350286101208_78 docx 1181065 1 Lower rotor arms into working position Turn off the tractor and secure...
Page 76: ... mod_1313495329521_78 docx 691511 3 1 9 9 1 With rigid tine arms design Pos 32 72 BA Bedienung Schwader Zinken ZinkenarmeZinkenarme in Transportstellung_Ausführung starre Zinkenarme_Bild_TC und TS Maschinen 359 mod_1439215612757_78 docx 2663361 1 4 6 5 5 4 SW9070083 Fig 45 Pos 32 73 BA Bedienung Schwader Zinken ZinkenarmeZinkenarme in Transportstellung_Ausführung starre Zinkenarme_Text 359 mod_143...
Page 77: ... and hook it on the tine 6 rotor locking device if necessary Then Turn the right rotor far enough in the working direction until the folding tine arms are extended outwardly as well Pull linch pin 1 Pull out bolts 2 Swivel tine arms 3 to transport position when turning the rotor ensure that the swivelling tine arms do not collide with the guard Insert bolt 2 and secure with linch pin 1 To prevent ...
Page 78: ...rotor lifting mechanism Pos 32 82 BA Bedienung Schwader Kreiselarme senken heben Kreiselarme heben ohne Einkreiselaushebung Bild SW 700 _800 133 mod_1350286904276_78 docx 1181094 1 2 SW700072 1 1 Fig 47 Pos 32 83 BA Bedienung Schwader Kreiselarme senken heben Kreiselarme heben mit und ohne Einkreiselaushebung Text Swadro TC 680_TC 760_TC 760 X tr 221 mod_1391690340653_78 docx 1798756 1 Switch on t...
Page 79: ...ch on the tractor In order to lift the locks 1 pull the operating rope 2 and keep it tensioned Actuate the single action control unit until the rotors have been lifted to the transport position Release the operating rope Actuate the single action control unit until the locks 1 on the right and left hand side engage in the retaining bolts Set all hydraulic control units to the neutral position Visu...
Page 80: ...aise the lockings 1 Activate the single action control unit until the rotors are raised to transport position Release the operating cable Actuate the single action control unit until the lockings on right and left engage in the retaining bolt Move all hydraulic control units to neutral position Make certain via visual inspection that the retaining bolts are correctly engaged in the lockings 1 To s...
Page 81: ... Zinkenarme Zinken unter 2 m mit Zinkenschutze sichern Text 36 mod_1263218917700_78 docx 338477 1 The tines must be fitted with guards which are positioned at less than 2 m in transport position or when the machine is switched off The tine guards are located on the front supports right and left side of the machine Raise the rotor arms into transport position Turn off the tractor and secure it agai...
Page 82: ...t 1 to the rear by 90 and fix it in place in this position by using the tension bar Pos 32 103 Überschriften Zwischenüberschriften A E Bei Ausführung Zusatzkreisel 504 mod_1498545699491_78 docx 3472908 1 For version with additional rotor Pos 32 104 BA Inbetriebnahme Schwader Abstellstütze hochschwenken_Bild_SW 800 26 Zusatzkreisel 427 mod_1455092359119_78 docx 2960321 1 SW700102_1 1 2 Fig 52 Pos 3...
Page 83: ...3 Pos 32 109 BA Bedienung Schwader Zusatzkreisel in Transportstellung bringen Text SW 800 26 Zusatzkreisel 167 mod_1367507758370_78 docx 1446569 1 Turn on the tractor Move the double acting control unit to float position to stop the drive of the additional rotor 1 to ensure that the rotor comes to a stop Lift the additional rotor to transport position to activate the single acting control unit Tur...
Page 84: ...I I II III Fig 54 Prerequisite The rotors are in the working position Single rotor operation with right rotor In order to use just the right rotor for swathing proceed as follows Move the switching valve 1 to position I To raise the left rotor to headland position actuate the single action control unit 1 Move control unit to neutral position Move the switching valve 1 to position III Move single a...
Page 85: ...Move switch 2 to position I Actuate the single action control unit in order to raise the left rotor into headland position To switch off operation panel move switch 1 to position 0 Twin rotor operation In order to swath with both rotors proceed as follows Move outrigger arms into working position To switch on the operation panel move switch 1 to position 1 Move switch 2 to position II Move the sin...
Page 86: ...ahrten während des Arbeitseinsatzes 443 mod_1459839481203_78 docx 3028265 1 CAUTION Property damage due to collision between tractor and guards for rotors When cornering while using the machine for work the machine may be damaged Choose the minimum curve radius so that the tractor does not touch the guards for rotors Pos 32 123 BA Bedienung Schwader SchwadenSchwaden 444 mod_1459946814949_78 docx 3...
Page 87: ... read and followed see chapter Safety Safety routines Pos 34 4 BA Sicherheit Fahren und Transport Warnung Straßenfahrt Unfallgefahr durch nicht verriegelte Steuerventile des Traktors 274 mod_1404213302399_78 docx 2060724 1 WARNING There is a risk of accidents if the control valves on the tractor are not locked If the control valves are not locked machine components may be activated unintentionally...
Page 88: ...locked the outrigger arms are fully retracted for the hydraulic working width adjustment version the operation panel is switched off for the electrical hydraulic single rotor lifting mechanism the stop cock of the additional rotor is closed for the additional rotor version the machine is in the transport position all hydraulic control units are in neutral position the retaining bolts are correctly...
Page 89: ...as the machine is positioned across an incline KS102325 Fig 57 Pos 34 11 Layout Module Leerzeile 5 Pt 120 mod_1342592918145_0 docx 1092566 1 Pos 34 12 Überschriften Zwischenüberschriften A EBei Ausführung nachlaufende Tasträder 305 mod_1415614256614_78 docx 2370335 1 For the version with trailing guide wheels Pos 34 13 BA Bedienung Schwader Nachlaufende Tasträder festsetzen Verweis Kap Einstellung...
Page 90: ...bbau vom Traktor Text Swadro TC 680_760 303 mod_1414138461498_78 docx 2357341 1 Choose a level dry and adequately stable surface Set control unit s to float position Switch off tractor and secure it against the possibility of rolling away Secure the machine against the possibility of rolling away by means of wheel chocks 8 To swivel the parking support 1 downward pull the bolt 2 swivel parking sup...
Page 91: ...ructions Pos 36 3 BA Sicherheit 2 Vorangestellte Warnhinweise WARNUNG Nichtbeachtung der Sicherheitsroutinen alte Form 273 mod_1404117435996_78 docx 2058712 1 WARNING If the safety routines are not adhered to people may be seriously injured or killed To avoid accidents the safety routines in the chapter Safety must be read and followed see chapter Safety Safety routines Pos 36 4 BA Sicherheit 7 Ge...
Page 92: ...342592918145_0 docx 1092566 1 Pos 36 6 8 BA Einstellungen Schwader KreiselfahrwerkKreiselneigung einstellen Text Position_äußeres Tandemfahrwerk 466 mod_1467970075772_78 docx 3140777 1 Pos I reduce rotor inclination Pos II increase rotor inclination Pos 36 6 9 BA Einstellungen Schwader KreiselfahrwerkKreiselfahrwerk Vorgehensweise Swadro diverse TC und TS 427 mod_1455032842030_78 docx 2959284 1 Do...
Page 93: ...on refer to chapter Initial Operation Rotor Inclination Basic Setting Pos 36 6 19 BA Einstellungen Schwader Kreiselfahrwerk Kreiselneigung einstellen über Langloch_Mittel und Seitenschwader 247 mod_1396418696967_78 docx 1924755 1 Vernier adjustment by the screw on the oblong hole 3 Reducing rotor inclination Increasing rotor inclination Pos 36 6 20 BA Einstellungen Schwader KreiselfahrwerkKreiseln...
Page 94: ...s Only raise the outrigger arms as far as necessary to perform the changeover work To set rotor inclination dismount the rear guide wheels and move them in the hole pattern For better orientation observe the basic setting of rotor inclination refer to chapter Initial Operation Rotor Inclination Basic Setting Pos 36 6 28 BA Einstellungen Schwader Kreiselfahrwerk Kreiselneigung einstellen über Platt...
Page 95: ...095 4 5 3 4 Fig 62 Pos 36 10 BA Einstellungen Schwader Kreiselfahrwerk Festsetzen der nachlaufenden Tasträder_Text 305 mod_1415605983523_78 docx 2370181 1 In order to prevent the machine from drifting off when driving on the slope fix the trailing guide wheels To do this Loosen counter nut 5 Press guide wheel to the outside until the stop is reached and hold it Unscrew the screw 4 until it rests a...
Page 96: ...ig 63 Pos 36 12 4 BA Einstellungen SchwaderSensor kalibrieren Anzeigen nullen und Kalibriervorgang 391 mod_1445846105479_78 docx 2799563 1 Resetting the displays to zero Lay permanent magnet on the display Calibration was successful when the display flashes three times If the display does not flash perform calibration again Calibration process Move each of the both rotors down to the ground Hold p...
Page 97: ...098717747_78 docx 2961131 1 The rotational speed of the additional rotor can be set via three way flow control valve 1 Readjustment via three way flow control valve may be necessary due to different tractor types and oil pressures You can find numbers on the setting screw 3 of the three way flow control valve If 0 is set next to the marking 4 the rotor does not rotate The higher the number next to...
Page 98: ...ge less than 40 moisture content Pos 36 23 BA Einstellungen Wender Steilster Streuwinkel 20 mod_1238594946738_78 docx 223860 1 Steepest spreading angle I high discharge distance long crop better spreading effect with swaths wilted silage forage more than 40 moisture content Pos 36 24 BA Einstellungen Schwader Streuwinkel Zusatzkreisel Streuwinkel einstellen_Zwischenüberschrift_SW 800 26 Zusatzkrei...
Page 99: ... Einstellungen Wender Zinkeneinstellung_Text 279 mod_1405414881295_78 docx 2151495 1 The tines 3 must be aligned vertically to the surface The setting of the tines can be changed by turning the eccentrics For setting Unscrew fastening screw 1 Turn eccentrics 2 one level further Tighten the fastening screw to 95 Nm Pos 36 31 BA Einstellungen Wender Zinkeneinstellung_Bild 279 mod_1405414876433_78 do...
Page 100: ... Pos 38 Layout Module Diese Seite ist bewusst freigelassen worden 1 mod_1201783680373_78 docx 54443 1 This page has been left blank deliberately Pos 39 Layout Module Seitenumbruch 0 mod_1196175311226_0 docx 4165 1 ...
Page 101: ...followed see chapter Safety Safety routines Pos 40 4 Überschriften Überschriften 2 A E EErsatzteile 0 mod_1196782991234_78 docx 14927 2 1 12 1 Spare Parts Pos 40 5 BA Sicherheit 7 Gefahrenhinweise alt MähwerkeWARNUNG Verwendung von nicht zugelassenen Ersatzteilen 308 mod_1417011577394_78 docx 2392925 1 Warning Using non approved spare parts Effect Danger to life serious injuries or loss of warrant...
Page 102: ...the beginning of the season Every 10 hours but at least 1x daily Once after 50 hours Every 50 hours After 1000 ha Rotor gearbox Maintenance free permanently lubricated with grease Main gearbox Oil level check X Oil change X Tyres Check tyres for cuts and breaks visually X Check tyre pressure X X X Wheel nuts X X Crown nut chassis X X Tighten screws nuts All screws X X Screws on the tines X X X Che...
Page 103: ...gewinde Tabelle 321 mod_1424760222607_78 docx 2477725 1 NOTICE The table does not apply to countersunk screws with hexagonal socket in case the countersunk screw is tightened via hexagonal socket Tightening torque in Nm unless otherwise stated A thread size stability class can be seen on screw head A Stability class 5 6 8 8 10 9 12 9 Tightening torque Nm M4 3 0 4 4 5 1 M5 5 9 8 7 10 M6 10 15 18 M8...
Page 104: ...11 7 Überschriften Überschriften 3 K O MMetrische Gewindeschrauben mit Senkkopf und Innensechskant 323 mod_1424945970760_78 docx 2484818 3 1 12 3 3 Metric Thread Screws with Countersunk Head and Hexagonal Socket Pos 40 11 8 BA Wartung Drehmomente Anziehdrehmomente Anziehdrehmomente Metrische Gewindeschrauben mit Senkkopf und Innensechskant Tabelle 321 mod_1424843938347_78 docx 2480155 1 NOTICE The...
Page 105: ...ell as the ventilation and breather filters Pos 40 11 12 BA Wartung Drehmomente Anziehdrehmomente Anziehdrehmomente Verschlussschrauben an Getrieben_Tabelle 454 mod_1464167170747_78 docx 3083045 1 This table applies only to locking screws with external hex in connection with copper seal ring for bleed valves made of brass with shaped seal ring Thread Locking screw and viewing glass with copper rin...
Page 106: ... Schwader Zinken Zinkenarme Prüfen der Schrauben an den Zinken_Vorgehen bei abweichendem Anzugsdrehmoment 240 mod_1395147752001_78 docx 1891022 1 When having released the screws remove the nut apply adhesive high strength on the threading overhang of the screw lift the tines on the tine end and tighten the nut to the torque specified below Pos 40 16 BA Wartung Reifen Schwader Anziehdrehmoment der ...
Page 107: ...tion about how to fit tyres onto agricultural machinery can be obtained from the tyre manufacturers Pos 40 20 Überschriften Überschriften 3 P T RReifen prüfen und pflegen 0 mod_1197358037214_78 docx 18094 3 1 12 5 1 Checking and maintaining tyres Pos 40 21 BA Wartung Reifen Reihenfolge Bild 6 Loch 4 mod_1213086131413_78 docx 86197 1 1 KS 0 034 6 2 4 5 3 Fig 69 Pos 40 22 BA Wartung Reifen Reifen pr...
Page 108: ...8 docx 338320 2 1 12 6 Replacing the tine arms in case of repair Pos 40 25 2 BA Wartung Schwader Zinken Zinkenarme Austausch der Zinkenarme im Reparaturfall Bild außer Swadro TS 800_TC 1000 224 mod_1392272631028_78 docx 1814375 1 SW700041_1 6 3 1 2 Fig 70 Pos 40 25 3 Layout Module Seitenumbruch 0 mod_1196175311226_0 docx 4165 1 ...
Page 109: ...e glued to each other before installation with high strength adhesive Apply glue high strength Part No 939 042 0 on the front of the control arm shaft 4 Mount the tine arm 3 and secure with clamping sleeves 5 While installing the tine arm make certain that the cam follower roller is inserted into the running track of the cam track Note The cam follower roller is securely inserted into the running ...
Page 110: ...s 40 27 3 BA Wartung Schwader Zinken ZinkenarmeZinken tauschen im Reparaturfall mit ohne Abweisblech_Text 381 mod_1444051432268_78 docx 2750485 1 To remove the broken tine remove all tines in front of the broken tine Remove the broken tine Mounting new tine Insert tine holder into tine In doing so make sure that the tine holder is positioned according to the figure Slide tine with tine holder on t...
Page 111: ...ple may be seriously injured or killed To avoid accidents the safety routines in the chapter Safety must be read and followed see chapter Safety Safety routines Pos 40 29 4 BA Sicherheit 8 Voraussetzungen Handlungsanweisung für alle Maschinen Handlungsanweisung Maschine stillsetzen und sichern 274 mod_1404365253849_78 docx 2065151 1 Shut down and safeguard the machine see chapter Safety Safety rou...
Page 112: ...inweis aus Gründen der Übersicht 2 mod_1202799283498_78 docx 61453 1 Note To make the illustration easier to read the greasing points have only been shown on one side of the machine The greasing same points are present on the other side of the machine mirror image Pos 40 29 10 BA Wartung Schwader SchmierplanSchmierplan Swadro TC 680_TC 760 367 mod_1441363994767_78 docx 2698184 1 SW700080_2 1 2 3 5...
Page 113: ...on chart 113 Lubricate the lubrication points every 20 operating hours Lubricate the lubrication points every 250 operating hours Pos 40 30 Layout Module Seitenumbruch 0 mod_1196175311226_0 docx 4165 1 1 2 3 4 5 6 7 8 9 10 ...
Page 114: ... Rotor Pos 40 32 BA Wartung Schmierstellen alle 20 Betriebsstunden 134 mod_1350390318825_78 docx 1183874 1 Lubricate the lubrication points every 20 operating hours Pos 40 33 BA Wartung Schwader Schmierplan Schmierplan Swadro 800 26 Zusatzkreisel 427 mod_1455092692489_78 docx 2960413 1 SW700105_1 1 2 3 4 5 1 2 3 4 5 Fig 74 Pos 40 34 Layout Module Seitenumbruch 0 mod_1196175311226_0 docx 4165 1 ...
Page 115: ... the manufacturer Before the pressure in the system builds up again ensure that all line connections are tight Pos 40 37 BA Sicherheit Hydraulik WARNUNG Hydraulikschlauchleitungen unterliegen einer Alterung 256 mod_1397735975770_78 docx 1965100 1 WARNING Hydraulic hose lines are subject to ageing Effect Danger to life or serious injuries The characteristics of the lines change depending on pressur...
Page 116: ...ntenance Maintenance Table Pos 40 49 Layout Module Leerzeile 5 Pt 120 mod_1342592918145_0 docx 1092566 1 Pos 40 50 BA Wartung Ölkontrolle_Wechsel Ölqualität Ölmenge siehe Kapitel Maschinenbeschreibung Betriebsstoffe 280 mod_1405427683970_78 docx 2152735 1 Oil quality quantity see Consumables in the Description of the machine section Pos 40 51 Layout Module Leerzeile 5 Pt 120 mod_1342592918145_0 do...
Page 117: ...483605921_78 docx 1188115 1 Interval for oil level check and oil change refer to chapter Maintenance Maintenance Table Pos 40 61 BA Wartung Ölkontrolle_Wechsel Ölqualität Ölmenge siehe Kapitel Technische Daten der Maschine 371 mod_1441958324612_78 docx 2710777 1 Oil quality amount of oil refer to chapter entitled Technical Data of Machine Operating Materials Pos 40 62 BA Wartung Ölkontrolle_Wechse...
Page 118: ...996_78 docx 2058712 1 WARNING If the safety routines are not adhered to people may be seriously injured or killed To avoid accidents the safety routines in the chapter Safety must be read and followed see chapter Safety Safety routines Pos 42 4 BA Sonderausstatung Schwader Zinkenverlustsicherung 2 mod_1202806976420_78 docx 61592 2 1 16 1 Tine loss safeguard KS 0 098 3 2 4 1 5 Figure 76 Mounting th...
Page 119: ... 2 3 Figure 77 Secure chains 1 with a spring type slotted straight pin 3 and a washer 2 at the suspension arm seats Attach chain hooks 4 to the tractor Select chain length according to desired max lowering level Note Spare tine loss safeguards Order No 153 479 0 Chain for height restriction of suspension arms Order No 250 759 0 Pos 43 Layout Module Seitenumbruch 0 mod_1196175311226_0 docx 4165 1 ...
Page 120: ...ay be seriously injured or killed To avoid accidents the basic safety instructions in the chapter Safety must have been read and followed see chapter Safety Basic safety instructions Pos 44 3 BA Sicherheit 2 Vorangestellte Warnhinweise WARNUNG Nichtbeachtung der Sicherheitsroutinen alte Form 273 mod_1404117435996_78 docx 2058712 1 WARNING If the safety routines are not adhered to people may be ser...
Page 121: ... set too low Raise working height Tine arm s bent Replace tine arms Swath width too large Working width too long Change working width Swadro TC 760 Speed is too low Increase speed In headland position one rotor goes down and the other one goes up Rotors are not swivelled up into headland position Actuate hydraulics until the rotor arms rest against the stops It is not possible for the rotor to ada...
Page 122: ...brication points Do not wipe off any grease that comes out of bearing points The hardened grease will provide additional protection against moisture Check all movable components such as deflector rollers joints tension rollers etc to make certain they move easily If necessary remove clean grease and remount If necessary replace with new parts Use only original KRONE replacement parts Disassemble t...
Page 123: ...k oil level in the gearbox es and top up if necessary Check hydraulic hoses and lines for leaks and replace them where necessary Check the air pressure in the tyres and refill if necessary Check all screws to make certain they are tight or retighten them if necessary Check all electrical connection cables and the lighting Repair or replace it if necessary Check all settings on the machine and corr...
Page 124: ...ing centre The components must be freed from operating fluids and lubricants gear oil oil from hydraulic system before being scrapped The operating fluids and lubricants must be brought separately to an environmentally friendly disposal point or recycling centre Operating fluids and lubricants Operating fluids and lubricants diesel fuel coolant gear oil oil from hydraulic system must be brought to...
Page 125: ...Appendix 125 Pos 51 Überschriften Überschriften 1 A E Anhang 1 mod_1202278612285_78 docx 58360 1 1 20 Appendix Pos 52 Layout Module Seitenumbruch 0 mod_1196175311226_0 docx 4165 1 ...
Page 126: ...1 0 1 0 2 0 2 0 3 0 3 0 4 0 4 0 5 0 5 0 6 0 6 0 7 0 7 0 8 0 8 0 9 0 9 0 0 1 0 1 1 1 1 1 2 1 2 1 3 1 3 1 4 1 4 1 5 1 5 1 A A B B C C D D E E F F G G H H I I J J 150101964_00 1 1 Swadro TC 680 3 4 1 2 3 4 ...
Page 127: ...1 0 1 0 2 0 2 0 3 0 3 0 4 0 4 0 5 0 5 0 6 0 6 0 7 0 7 0 8 0 8 0 9 0 9 0 0 1 0 1 1 1 1 1 2 1 2 1 3 1 3 1 4 1 4 1 5 1 5 1 A A B B C C D D E E F F G G H H I I J J 150101965_00 1 Swadro TC 760 3 4 ...
Page 128: ... 0 1 0 2 0 2 0 3 0 3 0 4 0 4 0 5 0 5 0 6 0 6 0 7 0 7 0 8 0 8 0 9 0 9 0 0 1 0 1 1 1 1 1 2 1 2 1 3 1 3 1 4 1 4 1 5 1 5 1 A A B B C C D D E E F F G G H H I I J J 150101965_00 1 2 2 Swadro TC 760 3 4 5 6 3 4 ...
Page 129: ...2 0 2 0 3 0 3 0 4 0 4 0 5 0 5 0 6 0 6 0 7 0 7 0 8 0 8 0 9 0 9 0 0 1 0 1 1 1 1 1 2 1 2 1 3 1 3 1 4 1 4 1 5 1 5 1 A A B B C C D D E E F F G G H H I I J J 150101965_00 1 2 2 1 2 A1 A 2 2 Swadro TC 760 3 4 7 6 3 4 ...
Page 130: ... 5 Hydraulic single rotor lifting mechanism 2 Series 6 Hydraulic working width adjustment 3 L left 7 Electro hydraulic single rotor lifting mechanism 4 R right Pos 54 BA Anhang SchwaderIm Anhang finden Sie den Stromlaufplan 341 mod_1432632144723_78 docx 2586505 1 The circuit diagram can be found in the Appendix Ende der Liste für Textmarke Inhalt ...
Page 131: ... LUFXLW GLDJUDP GRFXPHQW QR YHUVLRQ WZLQ URWRU UDNH FHQWUH VZDWKLQJ 6ZDGUR IURP VHULHV 7 1 ...
Page 132: ...UHDWRU GDWH RS ULJKW UHVHUYHG FRS ULJKW QRWLFH GDWH 6ZDGUR IURP VHULHV 7 7DEOH RI FRQWHQWV OEHUV 1 7DEOH RI FRQWHQWV RFXPHQW W SH 6KHHW GHVFULSWLRQ RYHU VKHHW WZLQ URWRU UDNH FHQWUH VZDWKLQJ TXLSPHQW OLVW TXLSPHQW OLVW D RXW SODQ D RXW SODQ LUFXLW GLDJUDP 6WURPODXISODQ ...
Page 133: ...VHULHV 7 TXLSPHQW OLVW OEHUV 1 TXLSPHQW OLVW RSHUDWLQJ HTXLSPHQW LGHQWLILFDWLRQ IXQFWLRQ 6KHHW SDWK FHQWUDO HOHFWULF ERDUG ORFN YDOYH URWRU ULJKW ORFN YDOYH URWRU OHIW 0 ZRUNLQJ KHLJKW OHIW 0 ZRUNLQJ KHLJKW ULJKW 3 FRQWURO V VWHP 21 6 FRQWURO V VWHP 21 2 6 VLQJOH URWRU OLIWLQJ PHFKDQLVP 6 ZRUNLQJ KHLJKW OHIW 6 ZRUNLQJ KHLJKW ULJKW ...
Page 134: ...QDPH GDWH PRGLILFDWLRQ GRFXPHQW QR UHYLHZHG FUHDWRU GDWH RS ULJKW UHVHUYHG FRS ULJKW QRWLFH GDWH 0 1 6KHHW SODQW ORFDWLRQ 6ZDGUR IURP VHULHV 7 D RXW SODQ 5 FNHQ OEHUV 1 D RXW SODQ 3 6 3 0 0 6 6 6 ...
Page 135: ... 3 FRQWURO V VWHP 21 2 ORFN YDOYH URWRU OHIW 3 ORFN YDOYH URWRU ULJKW 3 6 B 6 B 6 B 6 B B B B B B B B B B B B B B B B B B 8E FHQWUDO HOHFWULF ERDUG 3 8E 3 FRQWURO V VWHP 21 UHG EODFN 6 B 6 B 3 6 B 6 6 B 6 B 6 B 6 B 0 ZRUNLQJ KHLJKW OHIW 3 0 ZRUNLQJ KHLJKW ULJKW 3 6 3 ZRUNLQJ KHLJKW OHIW 6 3 ZRUNLQJ KHLJKW ULJKW 6 3 VLQJOH URWRU OLIWLQJ PHFKDQLVP 6 B 0 0 0 0 FRQWURO XQLW SRZHU VXSSO IURP WKH WUDFWR...
Page 136: ...Slopes 89 F First installation 48 Fixing the Trailing Guide Wheels 95 Further applicable documents 7 H How to use this document 7 I Identification Plate 39 Importance of the operating instructions 12 Information Required for Questions and Orders 39 Install the PTO shaft 60 Intended use 12 K Keeping safety devices functional 18 L Lighting connection 58 Lowering Additional Rotor to Working Position ...
Page 137: ...ting Rotor Operation 84 Service life of the machine 12 Setting of the tines 99 Setting the Rotor Inclination 92 Setting the Speed of the Additional Rotor 97 Setting the Spreading Angle of the Additional Rotor 98 Setting the Working Height 70 Settings 91 SMV Emblem 32 Sources of danger on the machine 21 Spare Parts 101 Special equipment 118 Start up 54 Stop cocks on the machine 32 Stopping and secu...
Page 138: ...chinenfabrik Bernard Krone GmbH Co KG Heinrich Krone Straße 10 D 48480 Spelle Postfach 11 63 D 48478 Spelle Phone 49 0 59 77 935 0 Fax 49 0 59 77 935 339 Internet http www krone de eMail info ldm krone de ...