


Dividing an Image into Right and Left Pages (Dual Page) (continued)
9-23
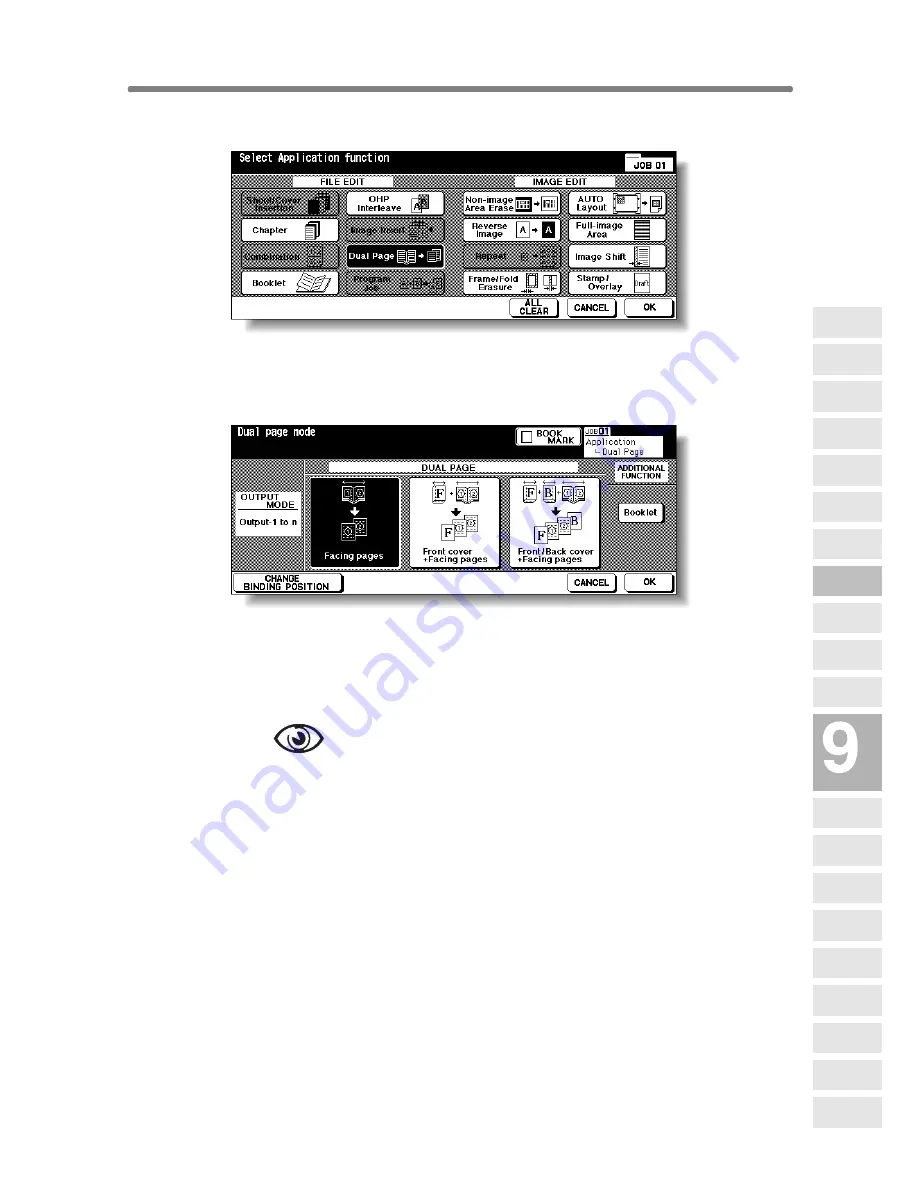
2.
Touch
Dual Page
on the Application Selection Screen.
The Dual Page Screen will be displayed.
3.
Select the desired Dual Page mode.
Touch to highlight the desired mode key.
4.
Touch
CHANGE BINDING POSITION
to select the output order
according to the original pagenation.
OPTION
Touch
Booklet
on the Dual Page Screen to use this function.
5.
Touch
OK
.
The Application Selection Screen will be restored.
6.
Touch
OK
on the Application Selection Screen.
The Basic Screen will be restored.
APS and AMS are automatically released, and the
STORE
key appears high-
lighted to show that the Store mode is automatically selected.
Applications
Reverse
Image
Non-Image
Area Erase
Program Job
Dual Page
Image Insert
OHP
Interleave
Booklet
Combination
Chapter
Sheet/Cover
Insertion
Application
Selection Screen
Repeat
Frame/Fold
Erasure
AUTO
Layout
Full-Image
Area
Image Shift
Reduce &
Shift
Stamp
Overlay
Overlay
Memory
Summary of Contents for 7255
Page 1: ...Basic Advanced 7255 7272 INSTRUCTION MANUAL INSTRUCTION MANUAL...
Page 16: ...Features of the Konica 7255 7272 continued xiv...
Page 17: ......
Page 18: ...Features of the Konica 7255 7272 continued xvi...
Page 20: ......
Page 36: ......
Page 132: ......
Page 164: ......
Page 166: ......
Page 212: ......
Page 429: ...Index...
Page 430: ......
Page 435: ...56QN97350 00...


