HD Intelligent Speed Dome Camera User Manual
119
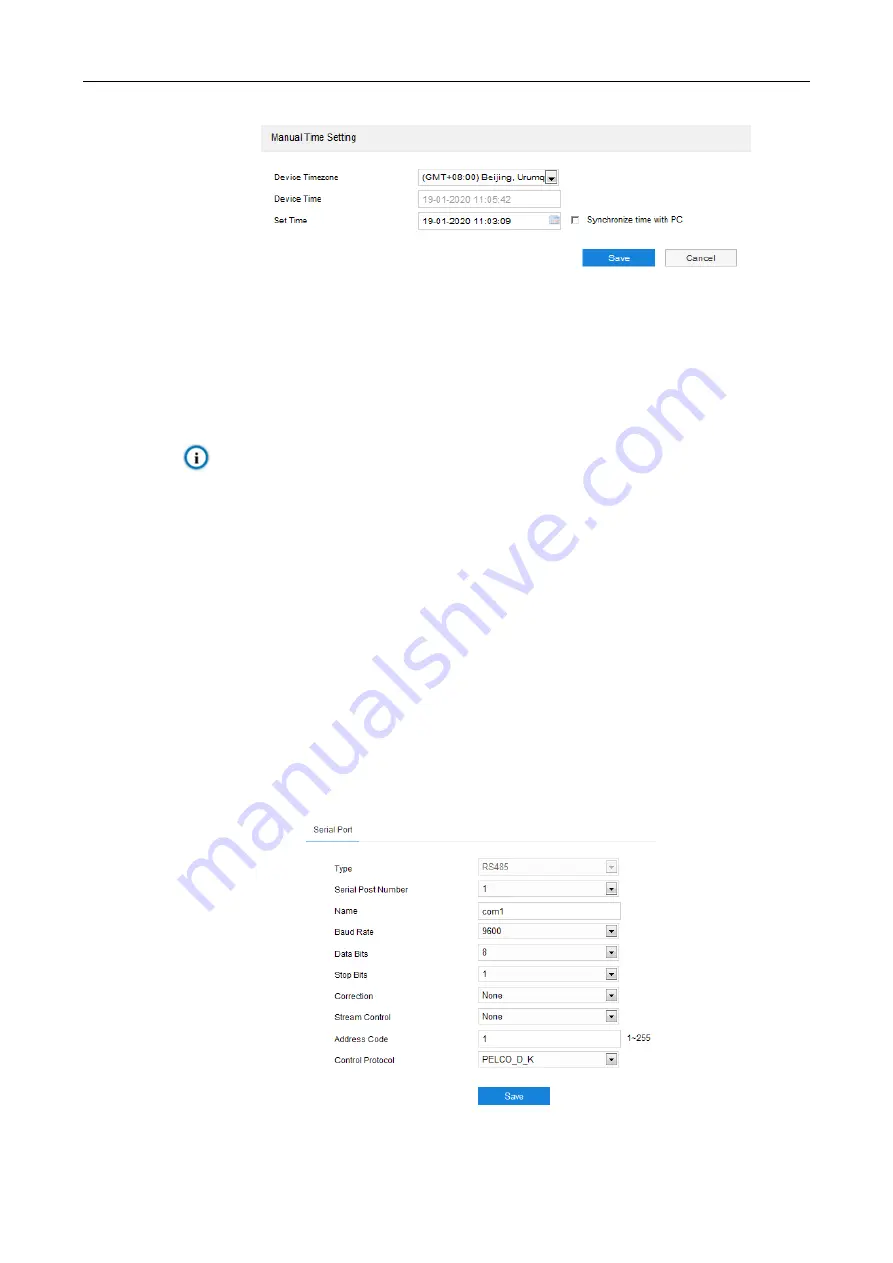
Set device time zone and device time: Click "
Manual Setting
", select time zone and set time on the popup
interface. You can select "Synchronize time with PC" and click "
Save
" to validate setting.
Picture 9-11 Manual setting of time
Auto Time Correction: Select "Auto Timing" and the system will correct time automatically according to the
selected access protocol (including NTP server, VSIP, ONVIF, GB28181) or adaptive. Configure the timing
protection time.
Adaptive: When selecting
“Adaptive”, select necessary adaptive protocols, set the Timing Priority
sequence and enter current Timing Protection Time (i.e. the save time during protocol switching).
Access protocol: the protocol of the device accessing to t platform or a server. When selecting a
protocol, the system will correct time automatically according to the protocol.
Note:
In the box of “Timing Priority”, the priority level decreases from top to bottom.
Select a protocol and click “Up” to improve its priority and “Down” to decrease its priority;
click “Default” to apply the default priority levels.
If selecting “NTP Server”, configure the parameters thereof.
NTP Clock Synchronization: Select “Enable” and configure “Server Address”, “NTP Port” (certain to be
“123”) and “Time Correction Interval”. When it is enabled, the camera will correct time on a time basis of
the configured interval.
DST: DST (daylight saving time) is the practice of advancing clocks during summer months so that evening
daylight lasts longer, while sacrificing normal sunrise times and the time applied during DST is called DST
time. Select "Enable DST" and set “Start Time”, “End Time” and “Time Deviation”.
9.4 Serial Port
Go to
Settings > System > Serial Port
, and configure the serial port.
Serial port is used to control camera rotation, extended alarm input or device adjustment (subject to devices).
Usually serial port is identified as RS485 A/B. Pair the ports by configuring RS485 port parameters. Please
configure the parameters such as “Baud Rate”, “Data Bits” and “Address Code” according to the actual
conditions.
Click “Save” to validate settings.
Picture 9-12 Serial port


