Telephone: 1 (450) 444-2030
•
Toll free: 1 (888) 222-1560
•
Fax: 1 (450) 444-2029
•
Internet: www.kantech.com
2006 Tyco Safety Products, Canada, Ltd. All rights reserved
•
Specifications may change without notice
page 23 of 39
DN1656
-
0606
3.
From the
Gateway(s)
drop-down list, select the KT-NCC gateway that you would like to configure.
•
You can rename the KT-NCC gateway in the
French
and
English
fields.
4.
Select the
General
tab
:
•
Enter the
Number of controller loops
that connect to the KT-NCC. The system supports up to 7
loops (2 RS-485 loops, 1 RS-232 loop and 4 IP loops).
•
If necessary, check the box
Automatically adjust clock for daylight saving changes
.
Note:
It is advisable to check with the Network Administrator if the site where you are installing the
KT-NCC is situated in an area where daylight saving time is in effect.
5.
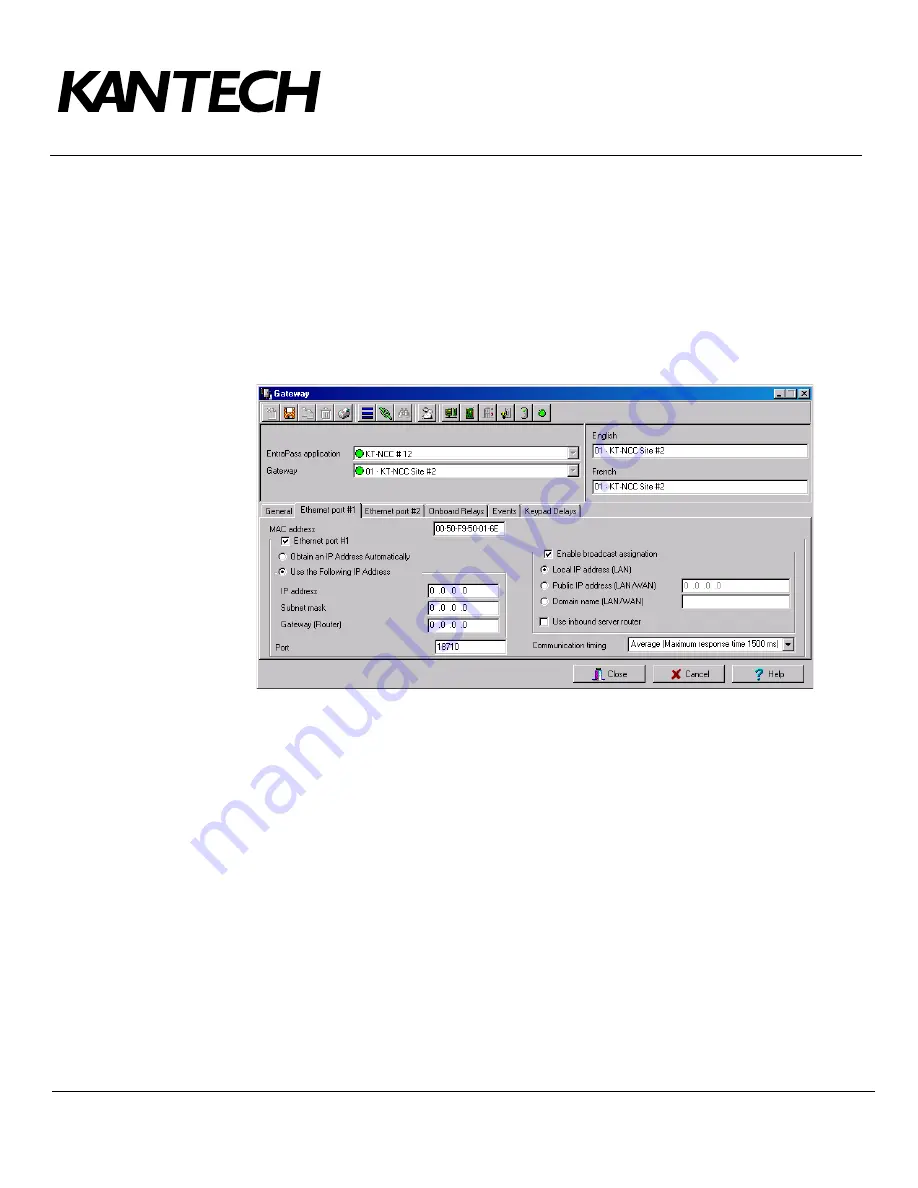
Select the
Ethernet Port #1
tab. The section
Use the Following IP Address
will be empty.
•
Enter the
MAC Address
of the KT-NCC. (No. 1 in the diagram on page 20).
•
Check the box
Ethernet port #1
.
•
Select the option
Use the following IP Address Automatically
.
•
Enter the KT-NCC
IP Address
(No. 2 in the diagram on page 20).
•
Enter the KT-NCC
Subnet mask
(No. 3 in the diagram on page 20).
•
Port
18710
is automatically assigned to the KT-NCC by default. It is advisable not to modify it.
•
The box
Enable broadcast assignation
is selected by default. Leave this option as is.
•
Select the appropriate
Communication timing
. (Consult Table 2 on page 11).
6.
Click the save icon.
7.
Close the Gateway dialog.
Connecting the KT-NCC to the Network
1.
Connect the KT-NCC to the network via KT-NCC Ethernet port #1. The KT-NCC will place a request to
obtain the IP address of the EntraPass DHCP server automatically.
•
The blue pilot light (Vital LED) of the KT-NCC will blink quickly to signal that the controller is in
reset mode.
•
The blue pilot light (Vital LED) of the KT-NCC will remain lit for 15 seconds to signal that the
controller is in startup mode.


