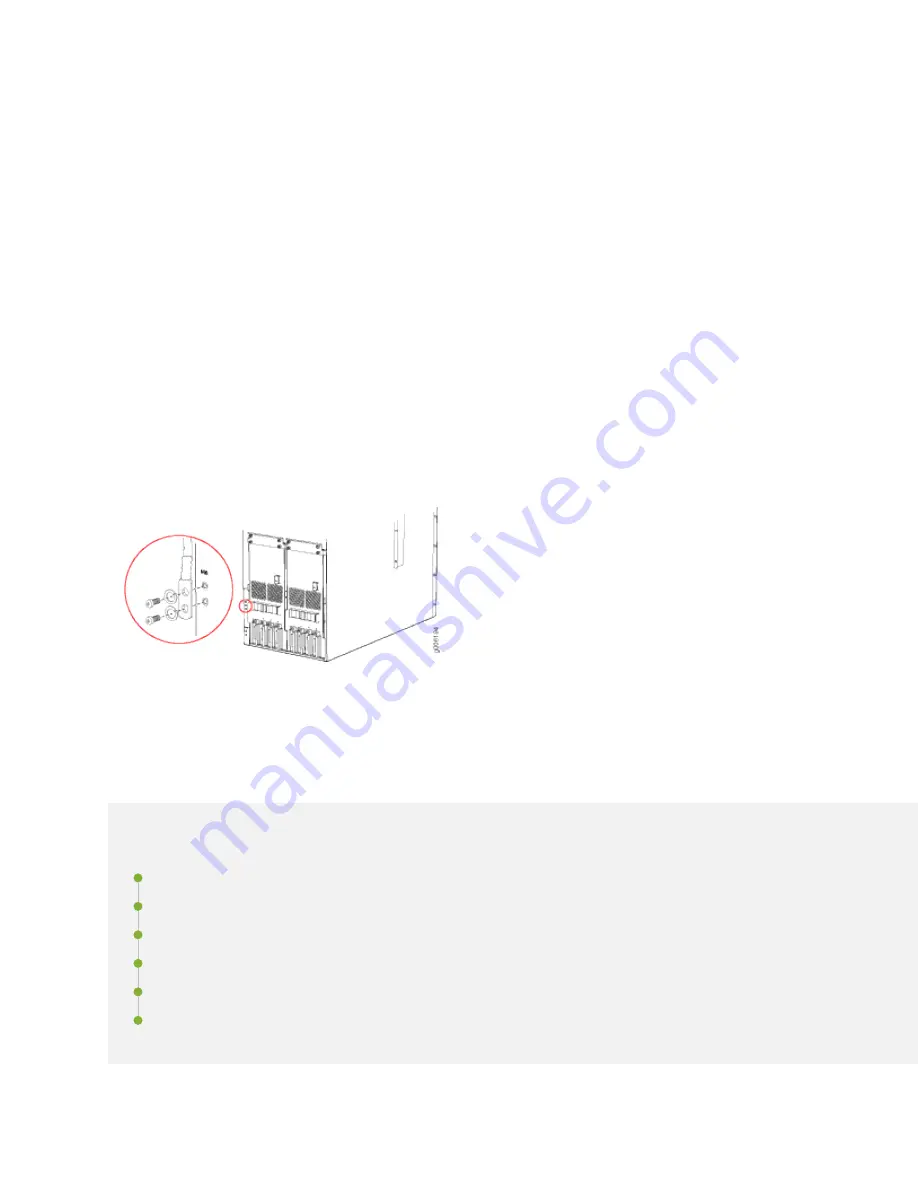
To ground the PTX5000 (see
):
1. Connect the grounding cable to a proper earth ground.
2. Verify that a licensed electrician has attached the cable lug provided with the PTX5000 to the
grounding cable.
3. Make sure that grounding surfaces are clean and brought to a bright finish before grounding
connections are made.
4. Place the grounding cable lug over the grounding points on the bottom rear of the chassis. The top
pair is sized for M6 screws, and the bottom pair is sized for UNC 1/4-20 screws. You can use either
pair of grounding points. UNC 1/4-20 screws are provided in the accessory kit.
5. Secure the grounding cable lug to the grounding points, first with the washers, then with the screws.
6. Verify that the grounding cabling is correct, that the grounding cable does not touch or block access
to the PTX5000 components, and that it does not drape where people could trip on it.
Figure 86: Connecting the Grounding Cable
Connecting the PTX5000 to AC Power
IN THIS SECTION
Tools and Parts Required to Provide AC Power to the PTX5000 | 222
Connecting Power to the PTX5000 Three-Phase Delta AC PDUs | 222
Connecting Power to the PTX5000 Three-Phase Wye AC PDUs | 229
Connecting Power to the PTX5000 High Capacity Delta AC PDUs | 235
Connecting Power to the PTX5000 High Capacity Wye AC PDUs | 244
Connecting Power to the PTX5000 High Capacity Single-Phase AC PDUs | 249
221
Summary of Contents for PTX5000
Page 1: ...PTX5000 Packet Transport Router Hardware Guide Published 2022 12 04...
Page 59: ...NOTE The PDUs contain no fans but are cooled by the fans in the power supply modules 41...
Page 63: ...NOTE The PDUs contain no fans but are cooled by the fans in the power supply modules 45...
Page 77: ...High Capacity Delta AC PDU LEDs 66 High Capacity Wye AC PDU 68 59...
Page 78: ...Three Phase Delta AC PDU LEDs Figure 29 on page 61 shows the three phase delta AC PDU LEDs 60...
Page 81: ...Three Phase Wye AC PDU LEDs Figure 30 on page 64 shows the three phase wye AC PDU LEDs 63...
Page 228: ...2 Remove each bracket Figure 81 Removing the Center Mounting Bracket 210...
Page 234: ...8 Move the lift away from the rack 216...
Page 235: ...Figure 83 Loading the PTX5000 onto the Lift 217...
Page 270: ...Figure 119 Connecting 20 A Inputs to a High Capacity Single Phase AC PDU 252...
Page 304: ...Figure 140 Installing the Front Door on a PTX5000 in a Four Post Rack 1 Side panels 2 Door 286...
Page 349: ...6 Discard the air filter Figure 154 Removing a Horizontal Air Filter Tray 331...
Page 352: ...Figure 157 Installing the Horizontal Air Filter 334...
Page 354: ...6 Discard the air filter Figure 158 Removing a Vertical Air Filter Tray 336...
Page 357: ...Figure 161 Installing a Vertical Air Filter Tray 339...
Page 428: ...Figure 216 Connecting 20 A Inputs to High Capacity Single Phase AC PDU 410...
Page 429: ...Figure 217 Connecting 30 A inputs to High Capacity Single Phase AC PDU 411...
Page 447: ...8 Insert the input power tray into the PDU Figure 228 Installing a 60 A Input Power Tray 429...
Page 448: ...Figure 229 60 A DC Input Power Terminals 430...
Page 531: ...Figure 276 Do Not Carry an FPC with Only One Hand 513...
Page 584: ...5 CHAPTER Troubleshooting Hardware Troubleshooting PTX5000 Components 567...
Page 651: ...6 CHAPTER Returning the Chassis or Components Returning the PTX5000 Chassis or Components 634...
Page 662: ...Figure 303 FPC2 PTX P1A Serial Number Label 644...
Page 663: ...Figure 304 FPC3 PTX U2 and FPC3 PTX U3 Serial Number Label 645...
Page 669: ...Figure 309 DC PDU Serial Number Label 651...
Page 670: ...Figure 310 AC PDU Serial Number Label 652...


