Intel
®
Server System R1000WF Product Family System Integration and Service Guide
14
2.2
System Cover Removal / Installation
2.2.1
System Cover Removal
The server system must be operated with the system cover in place to ensure proper cooling. The cover
must be removed to add or replace components inside of the system. Before removing the system cover,
power off the system and unplug all peripheral devices and power cable(s).
Note:
A non-skid surface or a stop behind the server system may be needed to prevent the server system
from sliding on your work surface. A screw driver may be needed to loosen the system cover thumb screws.
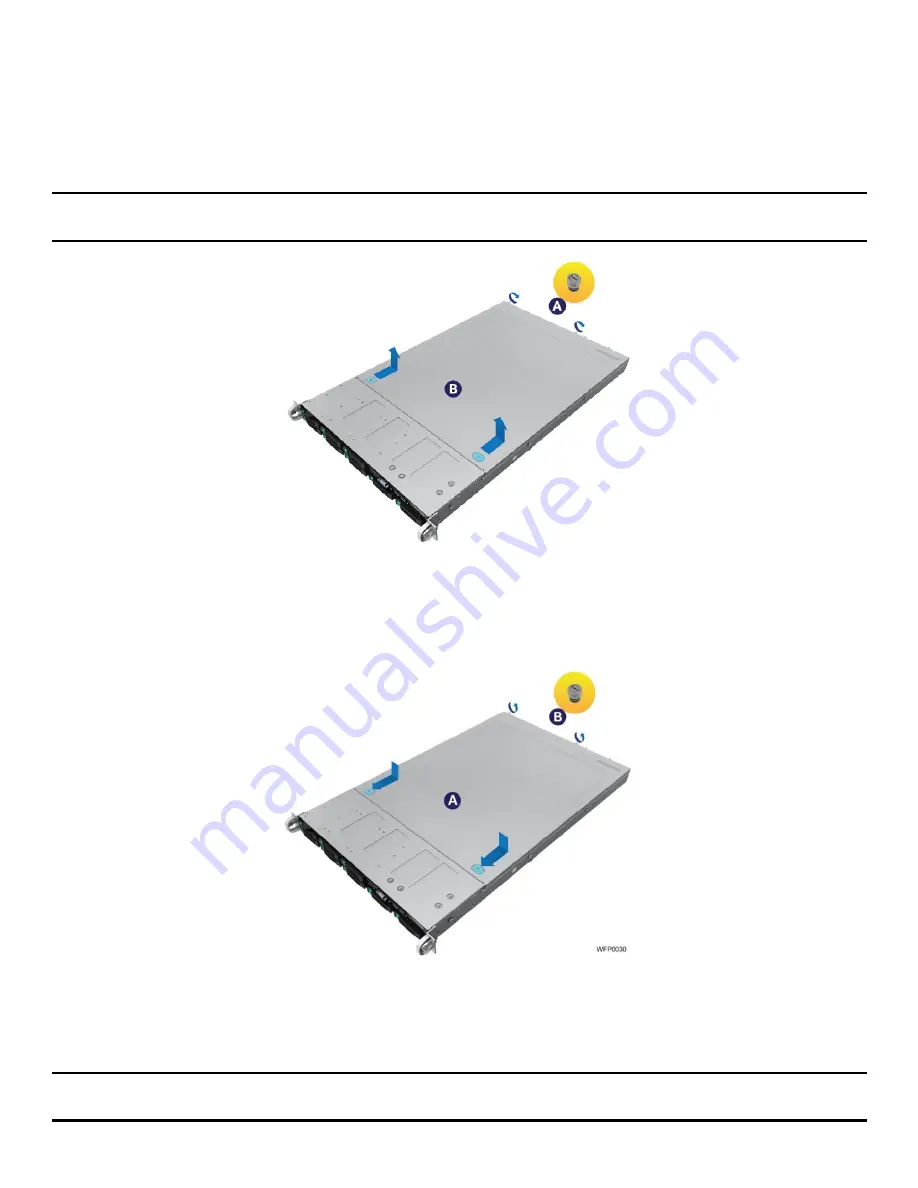
Figure 19. System Cover Removal
1.
Loosen the two captive thumb screws located on the back edge of the system cover (See Letter “A”)
2.
Slide cover back and lift upward (see Letter “B”)
2.2.2
System Cover Installation
Figure 20. System Cover Installation
1.
Place the system cover onto the chassis and slide forward until the front edge of the system cover is
pressed up against the back edge of the front drive bay. (See Letter “A”)
2.
Hand tighten the two captive thumb screws at the back of the chassis (see Letter “B”)
Note:
For safety after performing service inside of the system, the top cover must be reinstalled and the
thumbscrews tightened to 8in/lb torque or to where the use of a tool is required to re-enter the server.


