


9
D-STAR OPERATION <ADVANCED>
9-45
A Your (destination) call sign can be manually pro-
grammed.
The Your (destination) call sign is set to “TO,” you can
make a call to a station, even if you don’t know where
the station is currently located.
Up to 200 Your call signs can be programmed.
Push
q
SET
(
C
) to enter the Set mode.
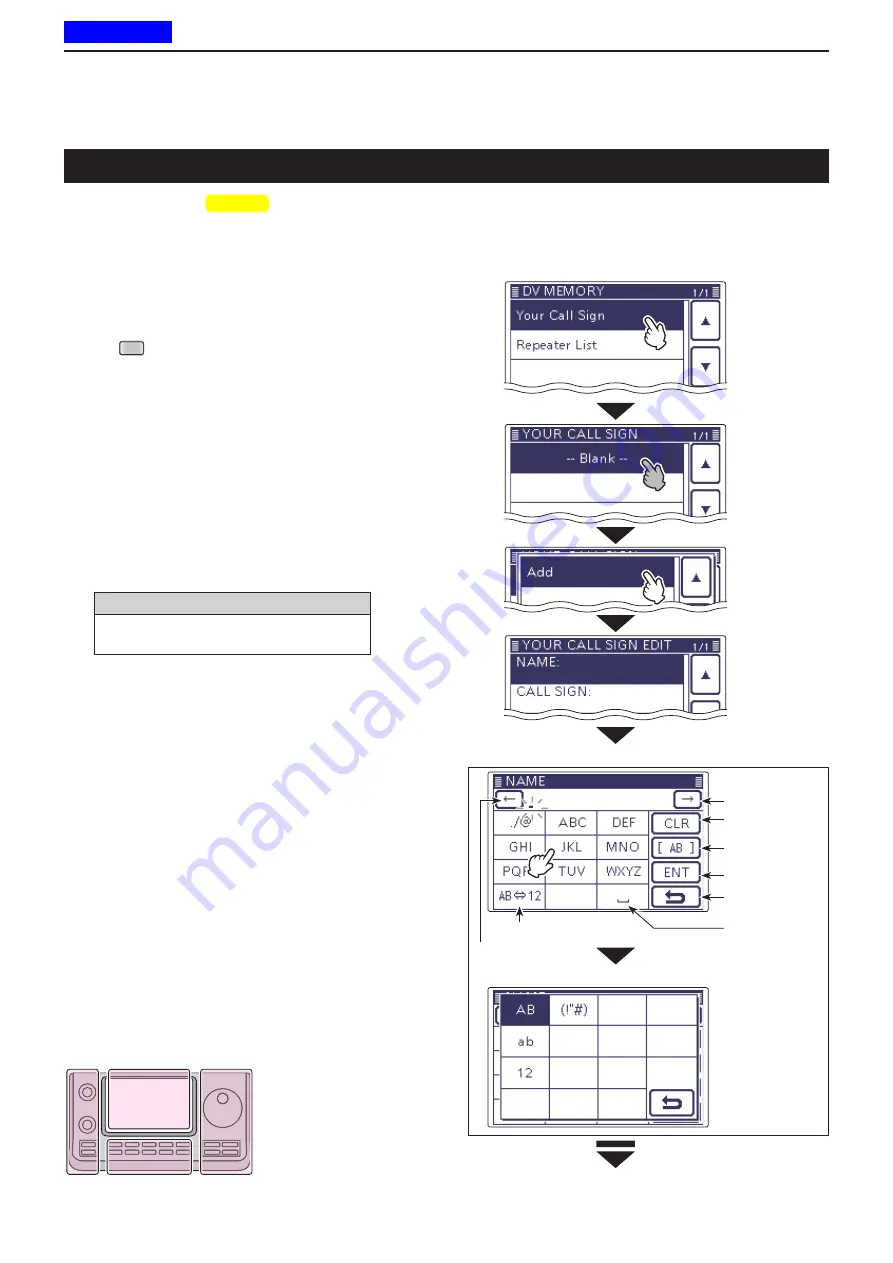
Touch the “Your Call Sign” item of the “DV Memory”
w
Set mode.
DV Memory >
Your Call Sign
• If the specified item is not displayed, touch [
∫
] or [
√
](
D
)
one or more times to select the page
.
• The your call sign list are displayed.
Touch the list for 1 second.
e
Touch “Add” to enter the edit mode.
r
Touch “NAME” to enter the name edit mode.
t
• A cursor appears and blinks.
Touch the desired block one or more times to select
y
the desired character or symbol.
(Example: T)
Selectable characters and symbols
A to Z, a to z, 0 to 9,
! # $ % & \ ?
"
’ ` ^
+ –
✱
⁄ . , : ; = < > ( ) [ ] { } ¦ _ ¯
@ (space)
• Touch “AB
⇔
12” to toggle between the Alphabet input
and Number input mode.
• Touch [CLR](
D
) to delete the selected character, symbol
or number.
• Touch [ [AB] ](
D
) to open the Input mode selection win-
dow.
• Touch “
” to input a space.
Touch [
u
f
](
D
) to move the cursor backwards, or
touch [
g
](
D
) to move the cursor forwards.
Repeat steps
i
y
and
u
to enter a name of up to 16
characters, including spaces.
(Example: First, T, then O, then M.)
After entering the name, touch [ENT](
o
D
).
• The programmed name are stored to the your call sign
list, and the display returns to the YOUR CALL SIGN
EDIT screen.
☞
Continued on the next page
Example:
Program “TOM/JM1ZLK” to the Your Call
Sign memory.
Your (destination) call sign programming
Touch the list
for 1 second.
Touch
“Your Call
Sign.”
Touch “Add.”
Touch
“NAME.”
Input mode selection screen
Name edit screen
Input a space
Move the cursor
Move the cursor
Delete a character
Select an input mode
Enter
Cancel edit
Open an input
mode window
The
L
,
R
,
C
or
D
in the
instructions indicate the
part of the controller.
L
: Left side
R
: Right side
C
: Center bottom
D
: Display (Touch screen)
L
eft
R
ight
C
enter
D
isplay
Previous view


