6.
Align the four mounting screws with the mounting holes in the system board and carefully place
the heatsink on the CPU.
Ensure that the heatsink is placed properly with the fan positioned toward the front, facing the
memory DIMMs.
CAUTION:
Do not overtighten the heatsink screws. If you overtighten them, you might strip the
threads in the system board tray.
Do
not
fully tighten one screw and then move on to the next. Instead, tighten all screws a little at a
time, ensuring that the CPU heatsink remains level.
7.
Tighten all screws partially so the CPU heatsink remains level.
8.
Tighten each set of diagonally opposed screws a little at a time to 6 in.-lbs. of torque.
9.
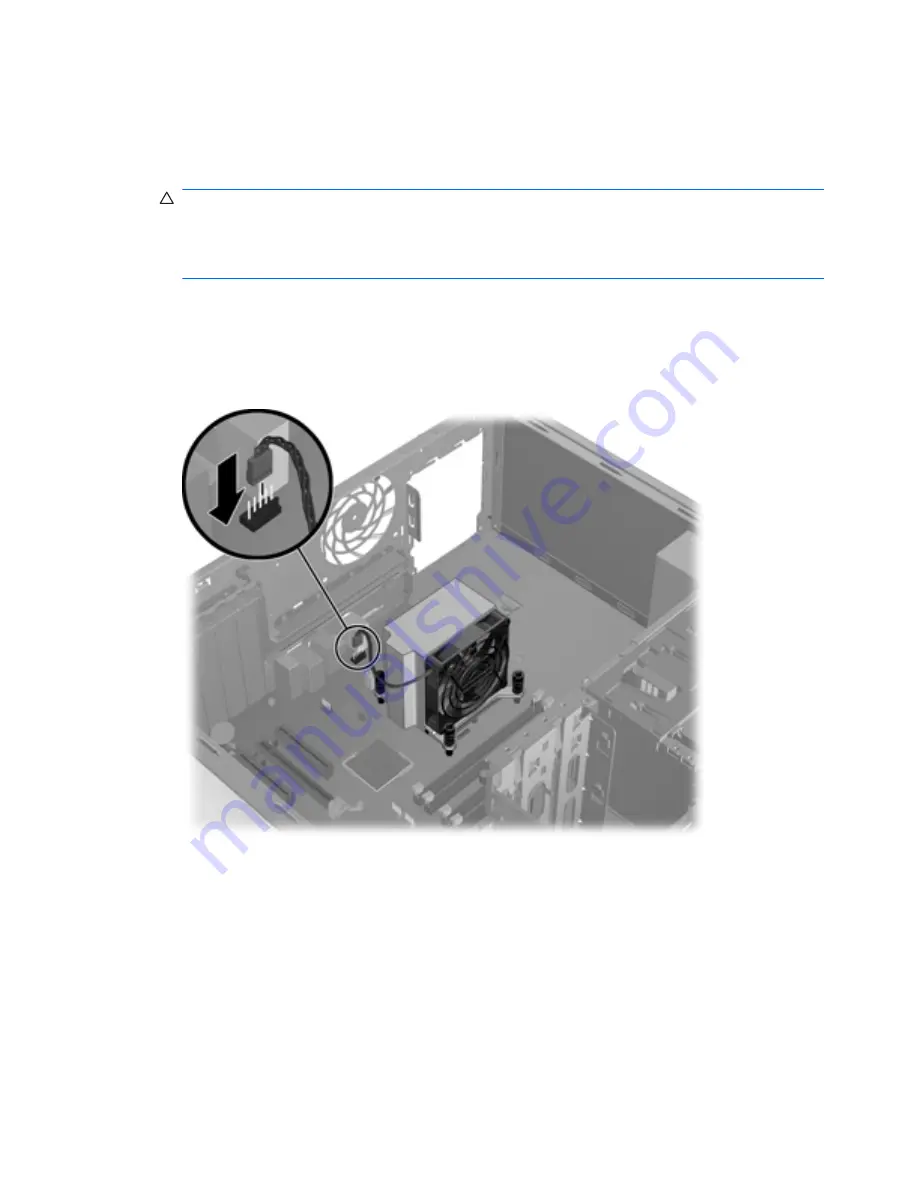
Connect the CPU heatsink fan connector to the system board.
Figure 5-81
Connecting the heatsink fan cable
156
Chapter 5 Replacing components
ENWW


