


NOTE:
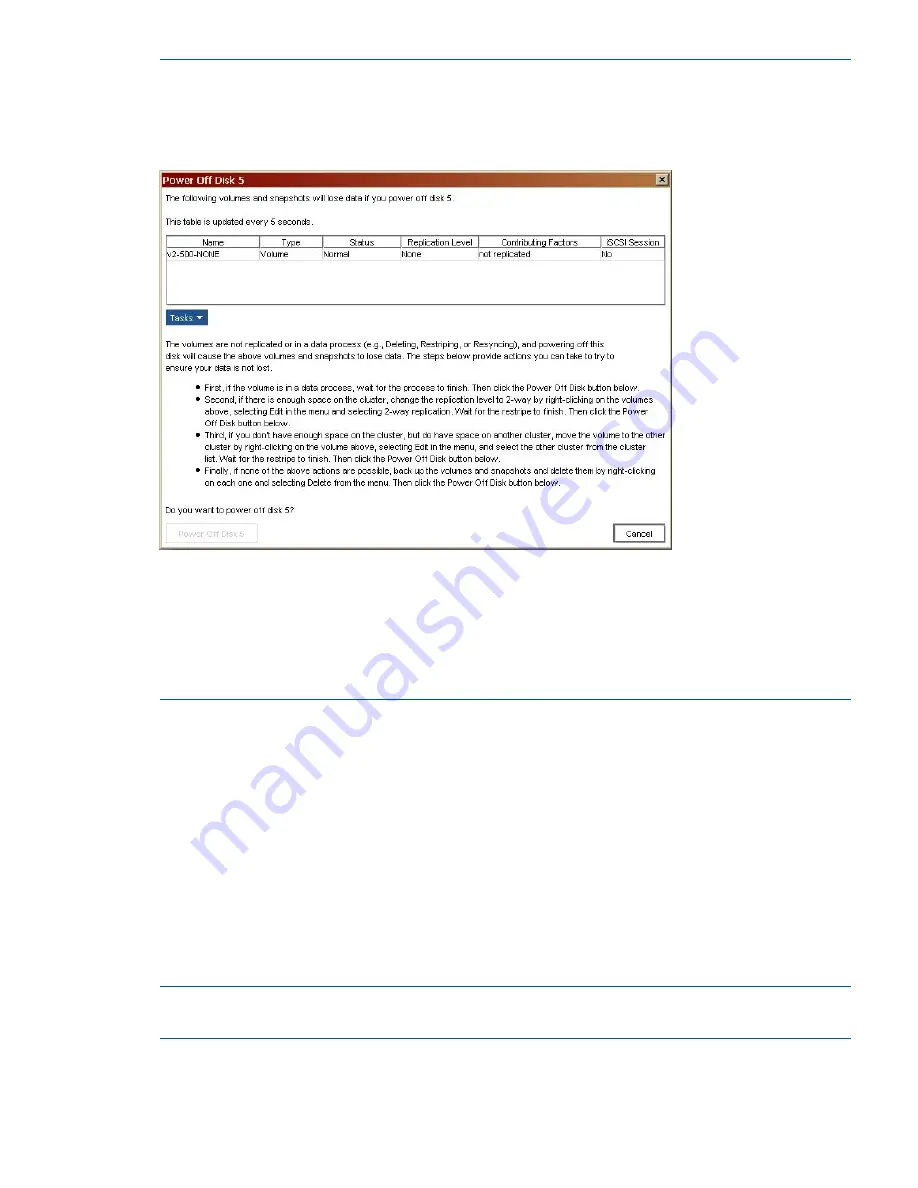
If there are Network RAID-0 volumes that are offline, the message shown in
Figure 110
(page 245)
is displayed. You must either replicate or delete these volumes before you can proceed.
You see the message shown in this case.
Figure 110 Warning if volumes are Network RAID-0
Right-click the storage system in the navigation window, and select
Repair Storage System
. A
“ghost” image takes the place of the storage system in the cluster, with the IP address serving as
a place holder. The storage system moves from the management group to the Available Systems
pool.
If the storage system does not appear in the Available Systems pool, use the Find menu option to
relocate it.
To replace the disk
For the DL320s (NSM 2120), HP LeftHand P4300, HP LeftHand P4500, and HP P4900 G2 see
“Replacing a disk in a hot-swap storage system ” (page 43)
.
Rebuilding data
The following steps take you through the steps to first reconfigure RAID on the storage system and
then to rebuild data on the storage system after it is added to the management group and cluster.
Reconfigure RAID
1.
Select the
Storage
category, and select the
RAID Setup
tab.
2.
Click
RAID Setup Tasks
, and select
Reconfigure RAID
.
The RAID Status changes from Off to Normal.
NOTE:
If RAID reconfigure reports an error, reboot the storage system, and try reconfiguring the
RAID again. If this second attempt is not successful, call HP Support.
Checking the progress of the RAID reconfiguration
Use the Hardware Information report to check the status of the RAID rebuild.
Replacing disks and rebuilding data 245