Hardware options installation 50
9.
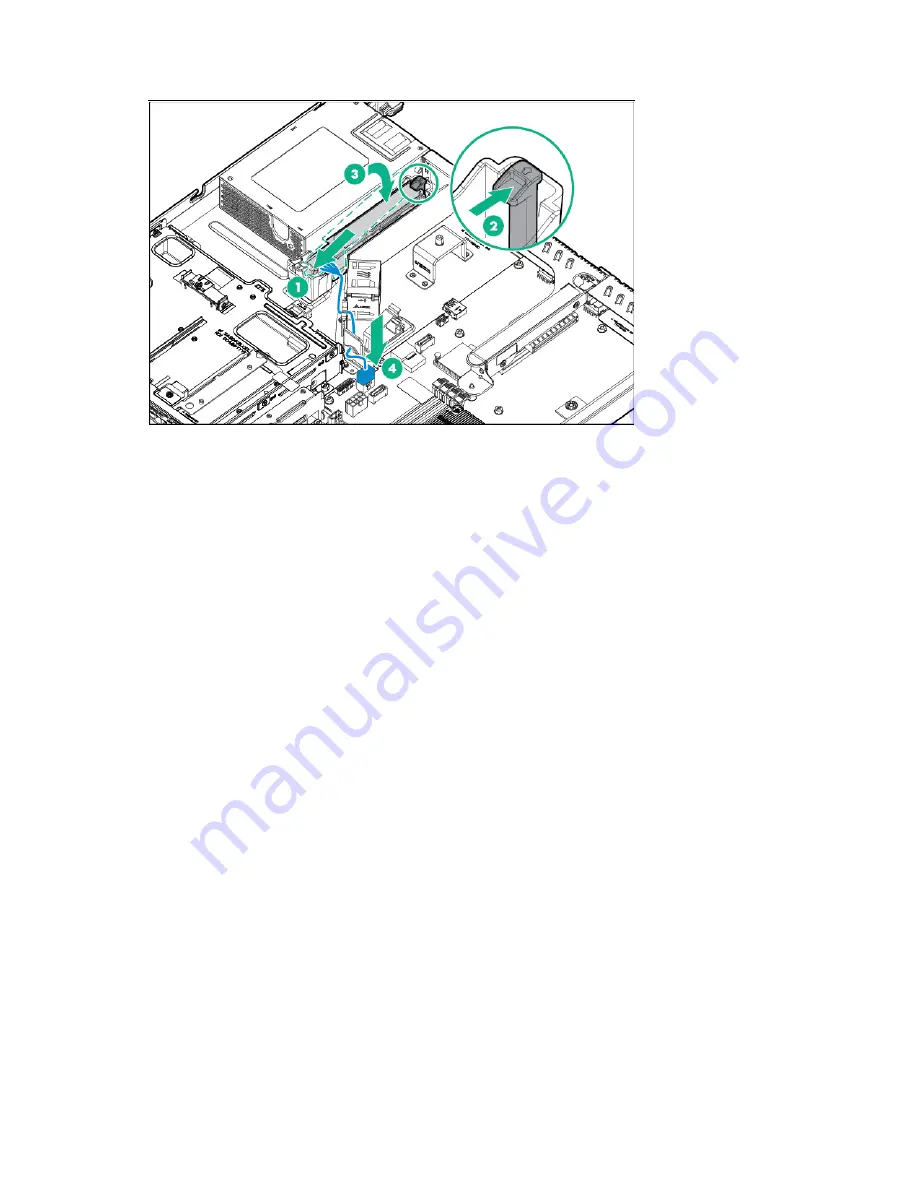
Install the Smart Storage Battery, and then connect the battery cable to the system board connector.
10.
Install the air baffle (on page
24
).
11.
Install the access panel (on page
21
).
12.
Do one of the following:
o
Slide the server into the rack.
o
Install the server into the rack ("
Installing the server into the rack
" on page
30
).
13.
Connect each power cord to the server.
14.
Connect each power cord to the power source.
15.
Power up the server (on page
17
).
16.
If removed, install the security bezel ("
Security bezel option
" on page
36
).
M.2 SSD SATA cable and optical drive extension
power cable option
Installing one M.2 SSD and one optical drive
For more information about product features, specifications, options, configurations, and compatibility,
see the product QuickSpecs on the Hewlett Packard Enterprise website (
http://www.hpe.com/info/qs
).
To install the component:
1.
If installed, remove the security bezel (on page
17
).
2.
Power down the server (on page
17
).
3.
Remove all power:
a.
Disconnect each power cord from the power source.
b.
Disconnect each power cord from the server.
4.
Do one of the following:
o
Extend the server from the rack (on page
18
).
o
Remove the server from the rack (on page
19
).
5.
Remove the access panel (on page
20
).
Summary of Contents for hpe proliant dl20 gen9
Page 14: ...Component identification 14 2 bay LFF non hot plug drive model 2 bay LFF hot plug drive model ...
Page 88: ...Cabling 88 2 bay LFF non hot plug configuration Optical drive cabling 2 LFF configuration ...
Page 92: ...Cabling 92 2 bay LFF hot plug drive configuration ...
Page 120: ...Support and other resources 120 ...
Page 121: ...Support and other resources 121 ...


