Camera Link Line Scan Camera
·
User Manual
3
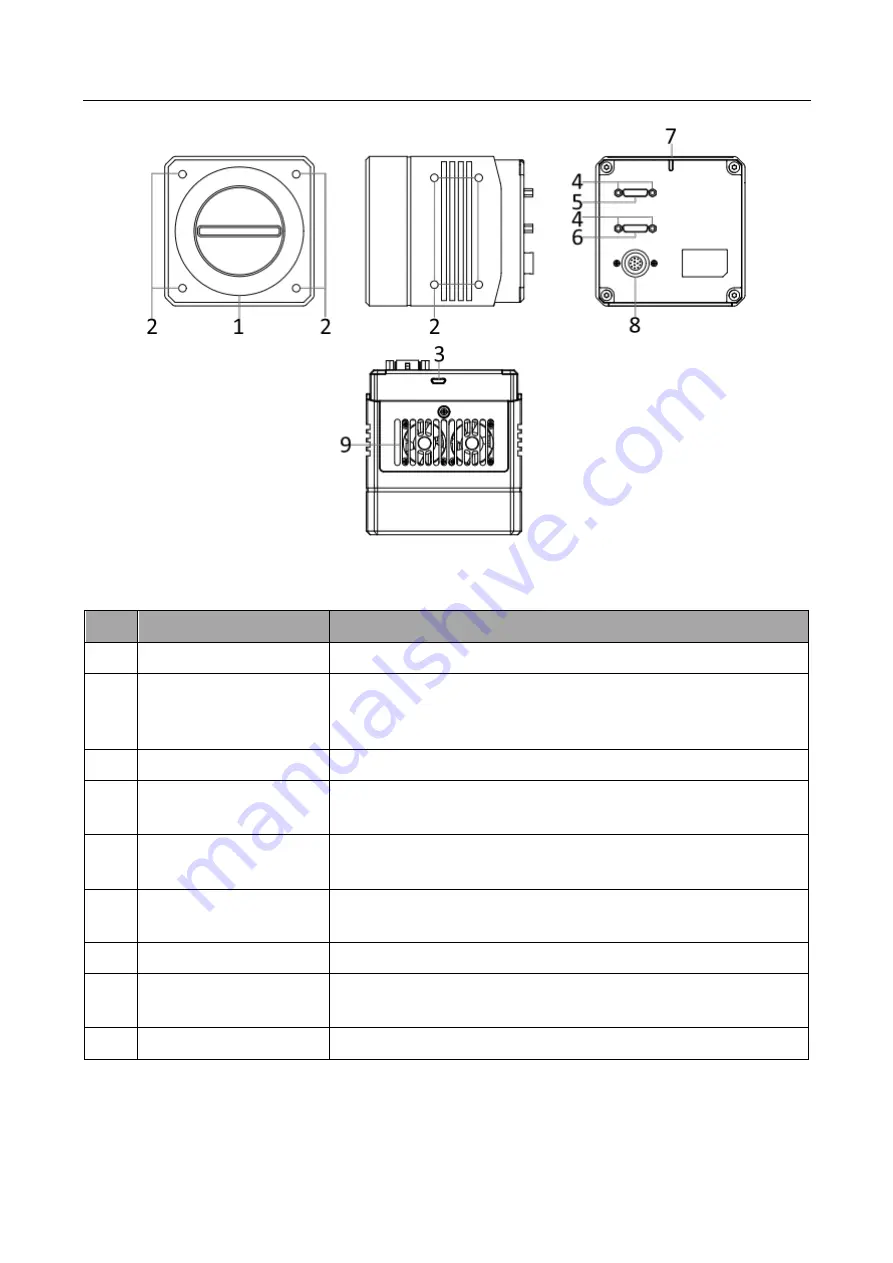
Figure 2-3
Appearance (Type III)
Table 2-1
Component Description
No.
Name
Description
1
Lens Mount
It is used to install lens.
2
Screw Hole
It is used to fix the camera to the installation position.
●
For type I and type III cameras, you should use M4 screw.
●
For type II camera, you should use M3 screw.
3
USB Interface
It is used to update the camera’s firmware.
4
Screw Hole for Camera
Link Interface
It is used to fix Camera Link cables.
5
CL1 Interface
It refers to the Camera Link1 with SDR interface, and it is used
to transmit data.
6
CL2 Interface
It refers to the Camera Link2 with SDR interface, and it is used
to transmit data.
7
LED Indicator
It indicates the camera's status.
8
Power and I/O Interface
It refers to the 12-pin P10 connector that provides power,
input/output signal, etc.
9
Fan
It is used to cool the camera.


