GE
D
IRECTION
FQ091019, R
EVISION
2
V
IVID Q
N S
ERVICE
M
ANUAL
3-106
Section 3-10 - Connectivity Setup
3-10-3-9
Configuring the Vivid q N and Network PC for a LAN Connection
NOTE:
The following steps are performed on the
Vivid q N
scanner.
The instruction Select = trackball to the specific item and press the Set button on the control
panel.
1.) On the Vivid q N control panel, press the
Config
button.
2.) From the System Configuration window, click the
Connectivity
tab at the bottom of the window.
The Connectivity dialog box opens.
3.) Select the
TCPIP Tab.
4.) Trackball to the
Advanced
tab and press the
Set
button on the control panel.
5.) Select the
Local Area Connection
.
6.) Press the
Menu
button on the control panel.
7.) From the drop-down menu, select
Properties
.
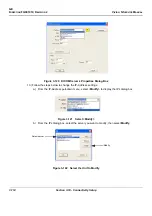
Figure 3-110 Connectivity Dialog Box - TCPIP Advanced Tab


