3.6 Changing Carrier Sheet Settings
ScanSnap S500 Operator's Guide
89
Basic Scanner Operations
3
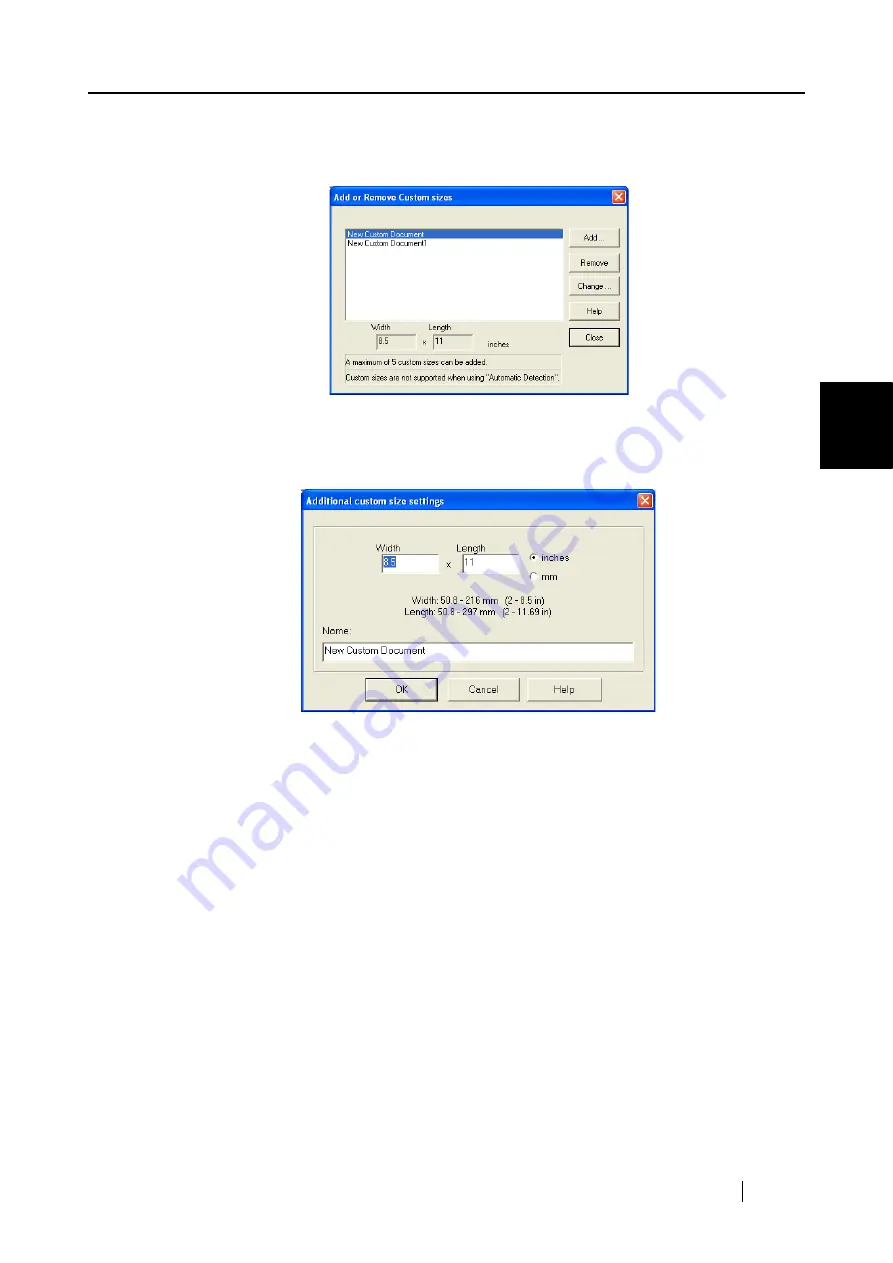
[Add custom size] button
You can create up to 5 custom sizes.
When you click the button, the following settings screen appears.
To add custom size documents
1) Click the [Add] button.
2) The following screen appears.
•
Enter the document sizes.
You can set within these range:
Width: 50.8 - 216 mm (2 - 8.5 in)
Length: 50.8 - 297 mm (2 - 11.69 in)
•
Enter a name you want to display in [Name:].
⇒
The entered name is displayed on [Add or Remove Custom sizes].
3) When you complete the settings, click the [OK] button.
⇒
A new custom document size is created.
4) Click the [Close] button, and the "Add or Remove custom sizes" screen
closes.
To delete custom size documents
1) On the "Add or Remove custom sizes" screen, select the document size you
want to delete, and click the [Delete] button.
2) When the confirmation screen appears, click the [Yes] button.
3) On the [Add or Remove custom sizes] screen, check that the document size is
deleted, and click the [Close] button.
Summary of Contents for ScanSnap S500
Page 1: ...P3PC 1522 03ENZ0 SCAN POW ER Color Image Scanner S500 Operator s Guide ...
Page 2: ......
Page 4: ...ii ...
Page 7: ...ScanSnap S500 Operator s Guide v Index 179 ...
Page 46: ...28 ...
Page 64: ...46 5 Select Automatic Detection in Paper size on the Paper size tab and click the OK button ...
Page 156: ...138 ...
Page 194: ...176 ...
Page 196: ...178 ...
Page 200: ...182 ...


