background image

51

  Operating the Mobile Camera System

• 

COLOR

: Adjusts the amount of color information in the monitor 

image on a scale of 0 to 30.

• 

VOLUME

:

 Adjusts the volume of the sound from the selected 

camera microphone on a scale of 0 to 30, as applicable.

• 

LANGUAGE

: Selects the language used in the monitor menu. 

Available languages are English, French, German, Spanish, Por-

tuguese, Italian, and Polish. Select 

RETURN

 to return to the pre-

vious menu.

• 

MIRROR

: Selects mirror or normal mode for each of the four 

monitor inputs. Set the applicable input to 

ON

 when a mirror im-

age is required and to 

OFF

 when a normal view is desired. Select 

RETURN

 to return to the previous menu.

• 

VIDEO

: Selects the video standard for the monitor. Select 

PAL


for use with PAL-compatible cameras (European market) and 

NTSC

 for use with NTSC-compatible cameras (North American 

market). Select 

RETURN

 to return to the previous menu.

• 

POWER BUTTON

: Selects the operation of the   

/CAM SEL 

(power/camera select) button. 


ACTION

 activates this button and 

CAM

 disables it. See the 

description at the beginning of this section regarding operation.

• 

EXIT

: Exits the menu.

Summary of Contents for CAMLCD-AHD-70

Page 1: ...Mobile Camera Systems Installation and Operation Manual 2562397C REV C 812...

Page 2: ...blank page...

Page 3: ...CCD FLSHPAL 17 Installing the Ball Camera CAMCCD BALLNTSC CAMCCD BALLPAL 22 Installing the Dome Camera CAMCCD DOMENTSC CAMCCD DOMEPAL 27 Installing the Truck Trailer Kit CAMCABLE TRK 31 Installing the...

Page 4: ...44 Option 1 System Configured with CAMLCD INT 56 CAMLCD INT 70 Monitor as in the CAMSET56 NTSC 2 CAMSET56 PAL 2 44 Option 2 System Configured with a CAMLCD 70 Monitor and CAMBOX 4NTSC CAMBOX 4PAL as i...

Page 5: ...with proficiency in the installation and use of safety warning equipment The mobile camera system is only a supplement to the rear view side view mirrors of the vehicle The system is not a substitute...

Page 6: ...vice the monitor camera element or control box There are no user serviceable parts inside Opening or servicing any component will void the component s warranty Filetheseinstructionsinasafeplaceandrefe...

Page 7: ...CAMSET70 NTSC4B CAMSET70 PAL4B Each system includes a monitor a standard rear view camera a camera to monitor extension cable and accessories Components and systems that are NTSC compatible include N...

Page 8: ...commercial applications that require a waterproof and dustproof camera CAMSET70 NTSC 4 CAMSET70 PAL 4 This system includes a 7 0 diagonal color TFT LCD monitor CAMLCD 70 a high resolution rear view ca...

Page 9: ...ncludes a 7 0 diagonal color TFT LCD monitor CAMLCD INT 70 B a high resolution rear view camera with infrared low light vi sion capability and a microphone with a mounting hardware kit CAMCCD REARNTSC...

Page 10: ...corder is also required as described under Monitors below For technical details see Product Specifications and Part Numbers on page 54 Monitors 5 6 diagonal monitor CAMLCD INT 56 up to two cameras can...

Page 11: ...DEPAL Ball camera CAMCCD BALLNTSC CAMCCD BALLPAL Dome camera CAMCCD DOMENTSC CAMCCD DOMEPAL Camera to monitor extension cables one per camera 4 in 0 1 m CAMCABLE SHORT 16 5 ft 5 m CAMCABLE 5 33 ft 10...

Page 12: ...luded hardware can accommodate many different vehicle installations However it is recommended that you exercise judgment when drilling holes into vehicle surfaces When drilling into a vehicle structur...

Page 13: ...w insulators an insulating pad an Allen wrench waterproofing tape 2 Use the Allen wrench to remove the sun shield and camera from the mounting bracket so that the bracket can be used as a tem plate fo...

Page 14: ...rd control box and digital video recorder as applicable so the VEHICLE and SYSTEM can be operated safely under all driving conditions Failure to heed this caution could result in driver distraction or...

Page 15: ...ess CAMADP INT 2 of the CAMLCD INT 56 CAMLCD INT 70 monitor or one of the four camera inputs on the CAMBOX 4NTSC CAMBOX 4PAL control box for use with the CAMLCD 70 monitor or one of the four camera in...

Page 16: ...a plastic insulator then through one of the two chan nels in the mounting bracket and into the drilled holes Fas ten the screws tightly to the vehicle body b If you are using the machine screws guide...

Page 17: ...e is turning The camera is also equipped with night vision and audio capability When drilling into a vehicle structure be sure that both sides of the surface are clear of anything that could be damage...

Page 18: ...tion of the camera in its housing before the installation connect the camera to the monitor and turn on the system You can adjust the camera assembly inside the housing for either the left or right si...

Page 19: ...nitor keyboard control box and digital video recorder as applicable so the VEHICLE and SYSTEM can be operated safely under all driving conditions Failure to heed this caution could result in driver di...

Page 20: ...machine screws drill 0 116 in 3 0 mm holes a 32 drill bit can be used at the marked positions for the four mounting holes 3 Drill a 3 4 in 19 0 mm hole at the mark for the camera output cable Smooth...

Page 21: ...vehicle surface The material properties and thickness of vehicle bodies vary widely The included hardware can accommodate many different vehicle installations However it is recommended that you exerci...

Page 22: ...te wiring in the deployment path of an airbag Failure to observe this warning will reduce the effectiveness of the airbag or potentially dislodge the equipment causing serious injury to you or others...

Page 23: ...e 3 4 in 19 0 mm hole for the output ca ble Once you drill this larger hole you can route the camera output cable through it to a a camera to monitor extension cable that can be either one CAMCABLE SH...

Page 24: ...WASHERS AND NUTS Figure 3 Options for mounting flush mount camera CAMCCD FLSHNTSC CAMCCD FLSHPAL Option 2 Marking and drilling holes for mounting the flush mount camera flush to the vehicle surface 1...

Page 25: ...he rubber grommet of the cable in the hole 3 To affix the mounting bracket to the vehicle choose the appropri ate screws for the holes you drilled a If you are using the self tapping screws guide each...

Page 26: ...ll the camera barrel while adjusting it to the desired view ing angle 4 Connect the camera to the monitor via a camera extension cable one CAMCABLE SHORT 5 10 15 20 40 or two connected in series with...

Page 27: ...n permanently installed The included Allen wrench is all that is needed to rotate the ball camera within its mount A typical installation might be mounting the ball camera on a side view mirror assemb...

Page 28: ...gital video recorder as applicable so the VEHICLE and SYSTEM can be operated safely under all driving conditions Failure to heed this caution could result in driver distraction or driver error while o...

Page 29: ...or use with the CAMLCD 70 monitor or one of the four camera inputs on the input power trigger wiring harness CAMADP INT 4 of the CAMLCD INT 70 B or b a special DVR system camera extension cable that i...

Page 30: ...or the mounting holes you drilled a If you are using the self tapping screws guide each screw through the bottom half of the camera mounting bracket then into the drilled holes Fasten the screws tight...

Page 31: ...s of vehicle bodies vary widely The included hardware can accommodate many different vehicle installations However it is recommended you exercise judgment when drilling holes into vehicle surfaces Whe...

Page 32: ...ecure the camera at the desired angle Marking and Drilling the Mounting Holes for the Dome Camera AIRBAG DEPLOYMENT Do not install equipment or route wiring in the deployment path of an airbag Failure...

Page 33: ...one CAMCABLE SHORT 5 10 15 20 40 or two CAMCABLE SHORT 5 10 15 20 connected in series with adapter CAMCABLE EXT that is then connected to either the CAM1 or CAM2 input on the input pow er trigger wiri...

Page 34: ...e drilled mounting holes and guide the camera output cable into the 3 4 in 19 0 mm hole 2 To affix the camera to the vehicle choose the appropriate screws for the mounting holes you drilled a If you a...

Page 35: ...g Holes for the Heavy Duty 7 Pin Connectors AIRBAG DEPLOYMENT Do not install equipment or route wiring in the deployment path of an airbag Failure to observe this warning will reduce the effectiveness...

Page 36: ...ill the holes 4 Attach the connector with user supplied hardware Installing the Monitor CAMLCD INT 56 CAMLCD INT 70 CAMLCD INT 70 B CAMLCD 70 Before the installation find an appropriate location for t...

Page 37: ...70 B This monitor has an input power trigger wiring harness that has four camera inputs power ground and four trigger wires To install the monitor follow these steps Mounting the Monitor in the Vehicl...

Page 38: ...unting bracket for the monitor as a template to mark the five mounting holes for the self tapping mount ing screws Figure 6 If you are using the optional heavy duty mount use the mount as a template f...

Page 39: ...4NTSC CAMBOX 4PAL control box with the in cluded self tapping hardware The control box should be centrally located within the vehicle in relative proximity to the monitor The control box is not intend...

Page 40: ...the CAMSET56 NTSC 2 CAMSET56 PAL 2 CAMSETMIR 4RW For an illustration of a typical installation see Figure 7 on page 40 1 The included input power trigger wiring harness CAMADP INT 2 has the following...

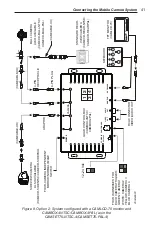
Page 41: ...stem configured with CAMLCD 70 monitor and CAMBOX 4NTSC CAMBOX 4PAL as in the CAMSET70 NTSC 4 CAMSET70 PAL 4 A example system is shown in Figure 8 on page 41 1 One to four cameras can be connected to...

Page 42: ...s Each switch can be set to the driver s preference 7 RCA connections for audio and composite video are included for connection to a VCR or DVR system 8 Any connections made outside of the vehicle int...

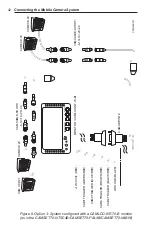
Page 43: ...propriate wire to signal when the monitor should display Camera 1 2 3 or 4 8 Any connections made outside of the vehicle interior should be wrapped in waterproofing tape Option 4 System configured wit...

Page 44: ...PAL 2 CAMLCD INT 70 monitor or CAMLED MIR as in the CAMSETMIR 4RW CAMCCD 1 CAM SEL MENU MODE ON IR CAMCCD 2 CAMCABLE SHORT 5 10 15 20 40 CAM1 INPUT CAM2 INPUT MONITOR CAMLCD INT 56 OR CAMLCD INT 70 C...

Page 45: ...FOUR CAMERA INDEPENDENT MIRROR NORMAL IMAGE SWITCH QUAD CONTROL BOX CAMBOX 4NTSC CAMBOX 4PAL CAMERA RCA CONNECTOR VIDEO AUDIO OUT TFT MONITOR CAMLCD 70 KEYBOARD STANDARD REAR VIEW CAMERA CAMCCD REAR...

Page 46: ...CD 2 CAM CCD 1 290A6301B 12 24 Vdc RED CAM2 TRIGGER BLUE RED CAM3 TRIGGER BROWN RED CAM4 TRIGGER BLACK RED CAM1 TRIGGER GREEN RED GROUND BLACK CAMCABLE SHORT 5 10 15 20 40 CAMCABLE SHORT 5 10 15 20 40...

Page 47: ...installation has not affected the vehicle operation or changed any vehicle safety functions or circuits Do not test the sound and light system of the vehicle while driving Oper ating the vehicle warn...

Page 48: ...ET56 NTSC 2 CAMSET56 PAL 2 When you turn on the camera system by turning the vehicle ignition key to either the accessory or on position the red LED on the monitor turns on Figure 10 on page 47 The LE...

Page 49: ...T Adjusts the amount of contrast in the monitor im age on a scale of 0 to 30 VOLUME Adjusts the volume of the sound from microphone in the selected camera on a scale of 0 to 30 as applicable RETURN Re...

Page 50: ...e left half of the screen while the other two are displayed on the right side of the screen in a split screen or vice versa If four cameras are connected the screen is split into four sections with ea...

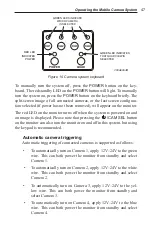
Page 51: ...he system is powered on and an image is displayed Please note that pressing the CAM SEL button on the monitor can also turn the monitor on and off in this system but using the keypad is recommended Au...

Page 52: ...adjust the scale that appears with the decrease and increase buttons The scale disappears after approximately eight seconds of inactivity The MIR NOR button on the monitor enables you to temporarily s...

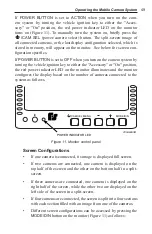
Page 53: ...r indicator LED on the monitor illuminates and the monitor configures the display based on the number of cameras connected to the system as follows 290A6053B CAM SEL MENU MODE D N IR POWER INDICATOR L...

Page 54: ...een red wire This can both power the monitor from standby and se lect Camera 1 To automatically turn on Camera 2 apply 12V 24V to the blue red wire This can both power the monitor from standby and se...

Page 55: ...or normal mode for each of the four monitor inputs Set the applicable input to ON when a mirror im age is required and to OFF when a normal view is desired Select RETURN to return to the previous men...

Page 56: ...mail empserviceinfo fedsig com For service or technical assistance in Europe Phone 32 50 373534 Fax 32 50 375411 E mail info fedsig be Returning a Product to Federal Signal Before returning a product...

Page 57: ...tems Reference the RMA number on your paperwork inside of the box Write the RMA number down so that you can easily check on status of the returned equipment Send all material with the issued RMA Numbe...

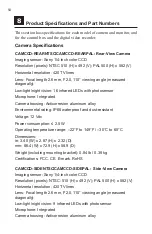
Page 58: ...d Camera housing Anticorrosion aluminum alloy Environmental rating IP68 waterproof and dust resistant Voltage 12 Vdc Power consumption 2 5 W Operating temperature range 22 F to 149 F 30 C to 65 C Dime...

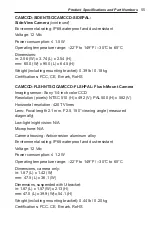
Page 59: ...ensor Sony 1 4 inch color CCD Resolution pixels NTSC 510 H x 492 V PAL 500 H x 582 V Horizontal resolution 420 TV lines Lens Focal length 2 1 mm F2 5 150 viewing angle measured diagonally Low light ni...

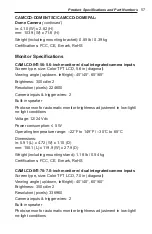
Page 60: ...sions in 3 05 W x 2 50 H x 2 01 D mm 77 5 W x 63 5 H x 51 1 D Weight including mounting bracket 0 34 lb 0 15 kg Certifications FCC CE E mark RoHS CAMCCD DOMENTSC CAMCCD DOMEPAL Dome Camera Imaging sen...

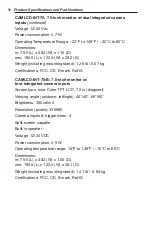
Page 61: ...speaker Photo sensor for automatic monitor brightness adjustment in low light no light conditions Voltage 12 24 Vdc Power consumption 5 W Operating temperature range 22 F to 149 F 30 C to 65 C Dimensi...

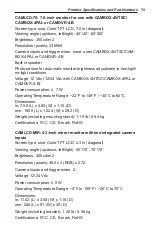
Page 62: ...ons FCC CE E mark RoHS CAMLCD INT 70 B 7 0 inch monitor w four integrated camera inputs Screen type size Color TFT LCD 7 0 in diagonal Viewing angle up down left right 40 40 60 60 Brightness 350 cd m2...

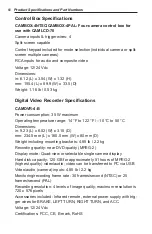
Page 63: ...B Power consumption 7 W Operating Temperature Range 22 F to 149 F 30 C to 65 C Dimensions in 7 50 L x 4 82 W x 1 15 D mm 190 5 L x 122 4 W x 29 2 D Weight including mounting stand 1 19 lb 0 54 kg Cer...

Page 64: ...122 F 10 C to 50 C Dimensions in 9 23 L x 6 52 W x 3 15 D mm 234 5 mm L x 165 5 mm W x 80 mm D Weight including mounting brackets 4 85 lb 2 2 kg Recording quality near DVD quality MPEG 2 Display mode...

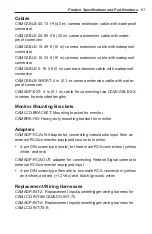
Page 65: ...ies for extended lengths Monitor Mounting Brackets CAMLCD BRACKET Mounting bracket for monitor CAMBRK HD Heavy duty mounting bracket for monitor Adapters CAMADP RCA IN Adapter for connecting video aud...

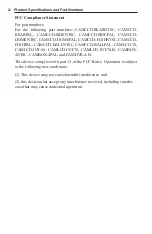
Page 66: ...FLSHNTSC CAMCCD FLSHPAL CAMCCD BALLNTSC CAMCCD BALLPAL CAMLCD 70 CAMLCD INT 56 CAMLCD INT 70 CAMLCD INT 70 B CAMBOX 4NTSC CAMBOX 4PAL and CAMDVR 4 B This device complies with part 15 of the FCC Rules...

Page 67: ...blank page...

Page 68: ...2645 Federal Signal Drive University Park IL 60484 3167 Tel 800 264 3578 Fax 800 682 8022 www fedsig com 2009 Federal Signal Corporation...

Reviews: