28
Installing the Mobile Camera System
•
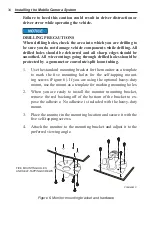
Waterproofing tape
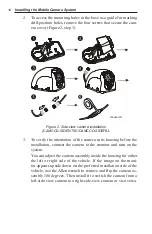
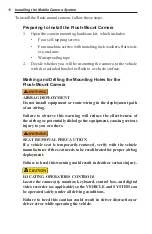
2. Remove the four screws that secure the camera housing cover/
dome to its base (Figure 5 on page 30).
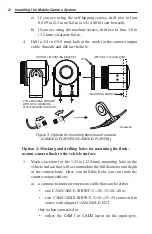
3. The holes in the base can be used as a template for marking drill-
holes for mounting screws. To access the mounting holes in the
base, disconnect the cable that connects the built-in microphone
and record indicator LED to the internal PCB assembly.
4. Before the installation, connect the camera to the monitor and turn
on the system to verify the orientation of the camera in the hous-
ing. The angle of the camera within the dome can be adjusted by
loosening the two miniature screws at its base within the housing.
Secure the camera at the desired angle.
Marking and Drilling the Mounting Holes
for the Dome Camera
AIRBAG DEPLOYMENT
Do not install equipment or route wiring in the deployment path
of an airbag.
Failure to observe this warning will reduce the effectiveness of
the airbag or potentially dislodge the equipment, causing serious
injury.
SEAT REMOVAL PRECAUTION
If a vehicle seat is temporarily removed, verify with the vehicle
manufacturer if the seat needs to be recalibrated for proper airbag
deployment.
Failure to heed this warning could result in death or serious injury.
LOCATING OPERATORS CONTROLS
Locate the camera(s), monitor, keyboard, control box, and digital
video recorder (as applicable) so the VEHICLE and SYSTEM can
be operated safely under all driving conditions.
Failure to heed this caution could result in driver distraction or
driver error while operating the vehicle.

