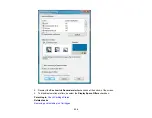
3.
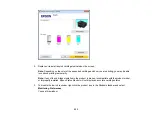
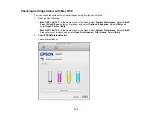
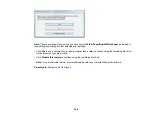
Do the following as necessary:
• You can update the ink cartridge status by clicking
Update
.
• Replace or reinstall any ink cartridge indicated on the screen.
Note:
If any of the cartridges installed in the product is broken, incompatible with the product model,
or improperly installed, Epson Status Monitor will not display an accurate cartridge status.
Parent topic:
Related tasks
Removing and Installing Ink Cartridges
Purchase Epson Ink Cartridges
You can purchase genuine Epson ink and paper at Epson Supplies Central at
(U.S. sales) or
(Canadian sales). You can also purchase supplies from an Epson
authorized reseller. To find the nearest one, call 800-GO-EPSON (800-463-7766).
Note:
We recommend that you use genuine Epson cartridges and do not refill them. The use of other
products may affect your print quality and could result in printer damage.
The printer ships with full cartridges and part of the ink from this first set of cartridges is used for priming
the printer. Yields vary considerably based on images printed, print settings, paper type, frequency of
use, and temperature. For print quality, a variable amount of ink remains in the cartridge after the
"replace cartridge" indicator comes on.
Parent topic:
Ink Cartridge Part Numbers
Use these part numbers when you order or purchase new ink cartridges, and use the cartridges within
six months of installing them.
Ink color
Part number
High-capacity
Extra High-capacity
Black
126
127
Cyan
126
127
236
Summary of Contents for WorkForce 545
Page 1: ...WorkForce 545 645 Series User s Guide ...
Page 2: ......
Page 13: ...WorkForce 545 645 Series User s Guide Welcome to the WorkForce 545 645 Series User s Guide 13 ...
Page 29: ...4 Slide the edge guide shown below to your paper size 29 ...
Page 34: ...2 Pull out the paper cassette 3 Slide the edge guides outward 34 ...
Page 39: ...2 Pull out the paper cassette 3 Slide the edge guides outward 39 ...
Page 52: ...Parent topic Placing Originals on the Product Related topics Copying Scanning 52 ...
Page 116: ...3 Adjust the scan area as necessary 116 ...
Page 123: ...123 ...
Page 131: ...3 Adjust the scan area as necessary 131 ...
Page 164: ...You see this window 5 Select Fax Settings for Printer You see this window 164 ...
Page 175: ...5 Select Fax Settings for Printer You see this window 175 ...
Page 249: ...249 ...
Page 254: ...254 ...
Page 290: ...6 Lower the document cover 7 Raise the ADF input tray 8 Carefully remove the jammed paper 290 ...

