Note:
Do not open the front cover during the cleaning cycle.
Caution:
Never turn off the product during a cleaning cycle or you may damage it.
6.
When the cleaning cycle is finished, you can check to see if the nozzles are clean; click
Print Nozzle
Check Pattern
and click
.
7.
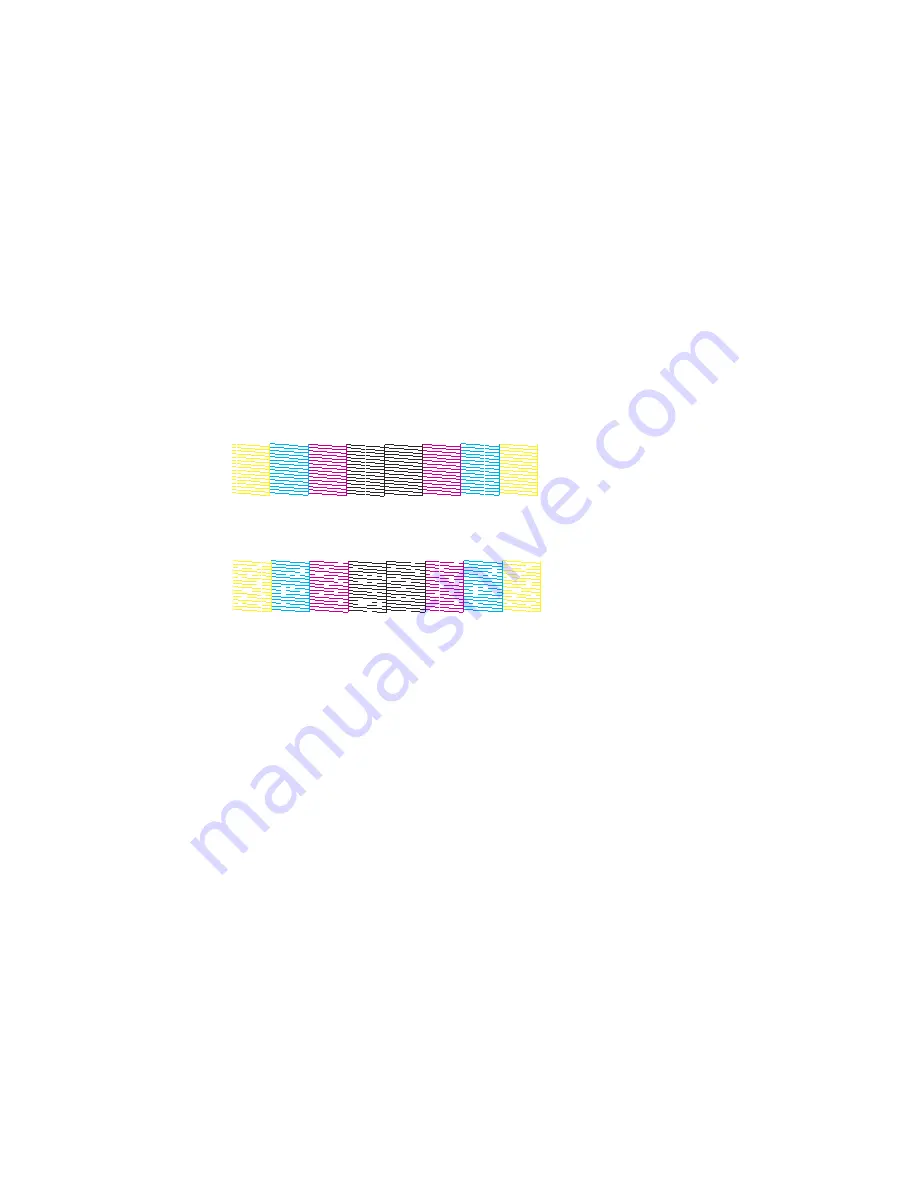
Check the printed pattern to see if there are gaps in the lines.
Print head is clean
Print head needs cleaning
• If there are no gaps, click
Finish
.
• If there are gaps or the pattern is faint, click
Clean
to clean the print head again.
If you don’t see any improvement after cleaning the print head up to 4 times, leave the product turned on
and wait at least 6 hours. Then try cleaning the print head again. If quality still does not improve, one of
the ink cartridges may be old or damaged and needs to be replaced.
Parent topic:
Print Head Cleaning
Related tasks
Removing and Installing Ink Cartridges
Cleaning the Print Head Using a Computer Utility
Cleaning the Print Head Using the Product Control Panel
250
Summary of Contents for WF-5620
Page 1: ...WF 5620 User s Guide ...
Page 2: ......
Page 119: ...You see a window like this 2 Click the Scan icon 119 ...
Page 134: ...You see this window 134 ...
Page 180: ...You see this window 3 Select Fax Settings for Printer Select your product if prompted 180 ...
Page 193: ...You see this window 4 Select Speed Dial Group Dial List 193 ...
Page 241: ...Related references Ink Cartridge and Maintenance Box Part Numbers 241 ...


