3
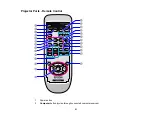
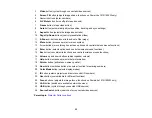
Video
button (cycles through connected video sources)
4
Screen Fit
button (adjusts image shape; functions on PowerLite 1915/1925W only)
5
Numeric buttons (enter numbers)
6
A/V Mute
button (turns off picture and sound)
7
Freeze
button (stops video action)
8
Auto
button (automatically adjusts position, tracking, and sync settings)
9
Aspect
button (selects the image aspect ratio)
10
Page Up
/
Down
buttons (control presentation slides)
11
E-Zoom +
/
-
buttons (zoom into and out of the image)
12
Menu
button (accesses projector menu system)
13
Arrow buttons (move through on-screen options and control wireless mouse functions)
14
Enter
button (selects options and controls wireless mouse functions)
15
Esc
button (cancels/exits functions and controls wireless mouse functions)
16
Volume
up and down buttons (adjust speaker volume)
17
Help
button (accesses projector help information)
18
Pointer
button (activates on-screen pointer)
19
Num
button (switches buttons to number function for entering numbers)
20
Color Mode
button (selects display modes)
21
ID
button (selects projector and remote control ID numbers)
22
User
button (customizable for different functions)
23
Focus
buttons (adjusts the image focus; functions on PowerLite 1915/1925W only)
24
LAN
button (switches to available network sources)
25
USB
button (cycles through connected USB sources)
26
Source Search
button (searches for connected video sources)
Parent topic:
22
Summary of Contents for PowerLite 1830
Page 1: ...PowerLite 1830 1915 1925W Projector User s Guide ...
Page 2: ......
Page 8: ......
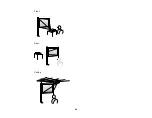
Page 24: ...Front Rear Ceiling 24 ...
Page 47: ...1 Open the battery cover as shown 2 Insert the batteries with the and ends facing as shown 47 ...
Page 52: ...5 Select the Basic menu and press Enter PowerLite 1830 PowerLite 1915 1925W 52 ...
Page 56: ...2 Insert the wireless LAN module into the port 3 Replace the cover 56 ...
Page 117: ...Component video input source Composite video input source 117 ...
Page 134: ...2 Open the air filter cover 134 ...


