2-54
Setup
Rev. C
Confidential
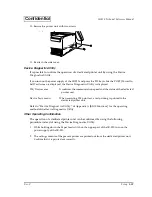
5. Attach the printer tray with two screws.
6. To get power for the TM printer from the IR-320, remove one or more tabs on the rear cover
to make a hole for cables to pass through.
7. Attach the rear cover with one screw.
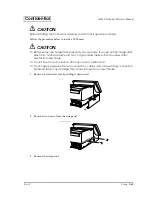
8. Install the TM printer on the printer tray.
Installing a Printer
Dedicated printers are designed especially for the IR systems. Any of theses printers can be
installed directly on the main body. Other types of TM printer can be used on the printer tray
described in the previous section.
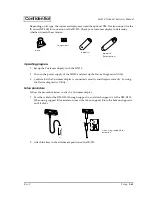
Installing a TM Printer
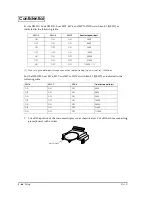
The power supply to the printer can be tapped from the TM power connector.
OI-R01-001
OI-R01-022
TM power supply
Summary of Contents for IR-320
Page 1: ...Technical Reference Manual IR 320 Issued Date Issued by EPSON English 404368102 ...
Page 2: ......
Page 38: ...1 22 IR 320 System Overview Rev C ...
Page 260: ...4 80 Utilities Rev C ...
Page 294: ...5 34 BIOS Functions Rev C ...
Page 308: ...6 14 Device Diagnostics Utility Rev C Confidential ...
Page 324: ...A 4 Wake On LAN Rev C Confidential ...
Page 332: ...B 8 The IR 310 Compared to the IR 320 Rev C ...
Page 339: ......
Page 340: ...EPSON SEIKO EPSON CORPORATION ...


