


2-62
Setup
Rev. C
Confidential
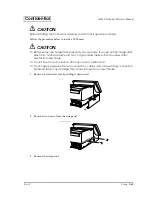
4. Remove the retaining screw securing the slot cover. Keep the screw to secure the PCI board.
Save the PCI slot cover.
5. Push the board in firmly but carefully to insert it fully. You should feel the connectors fit into
place. If the board does not go in smoothly, do not force it; pull it all the way out, and try
again.
6. Lock the PCI board with the screws removed in step 4.
7. Reattach the side panel with two screws.
8. Reattach the side cover.
When you remove the PCI board, be sure to attach a slot cover.
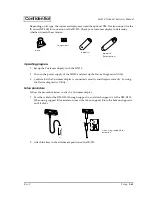
Installing a Customer Display
The following customer displays can be connected to the IR-320.
DM-D110 DM-D210 DM-D500
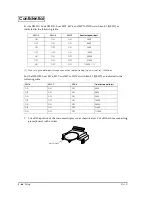
Model name
Specification
DM-D110/210
20 characters x 2 lines
DM-D500
256 x 64 dots (graphics mode)
32 characters x 4 lines (font A) / 42 characters x 8 lines (font B)
Summary of Contents for IR-320
Page 1: ...Technical Reference Manual IR 320 Issued Date Issued by EPSON English 404368102 ...
Page 2: ......
Page 38: ...1 22 IR 320 System Overview Rev C ...
Page 260: ...4 80 Utilities Rev C ...
Page 294: ...5 34 BIOS Functions Rev C ...
Page 308: ...6 14 Device Diagnostics Utility Rev C Confidential ...
Page 324: ...A 4 Wake On LAN Rev C Confidential ...
Page 332: ...B 8 The IR 310 Compared to the IR 320 Rev C ...
Page 339: ......
Page 340: ...EPSON SEIKO EPSON CORPORATION ...