Replacing Consumable Products
109
6
6
6
6
6
6
6
6
6
6
6
6
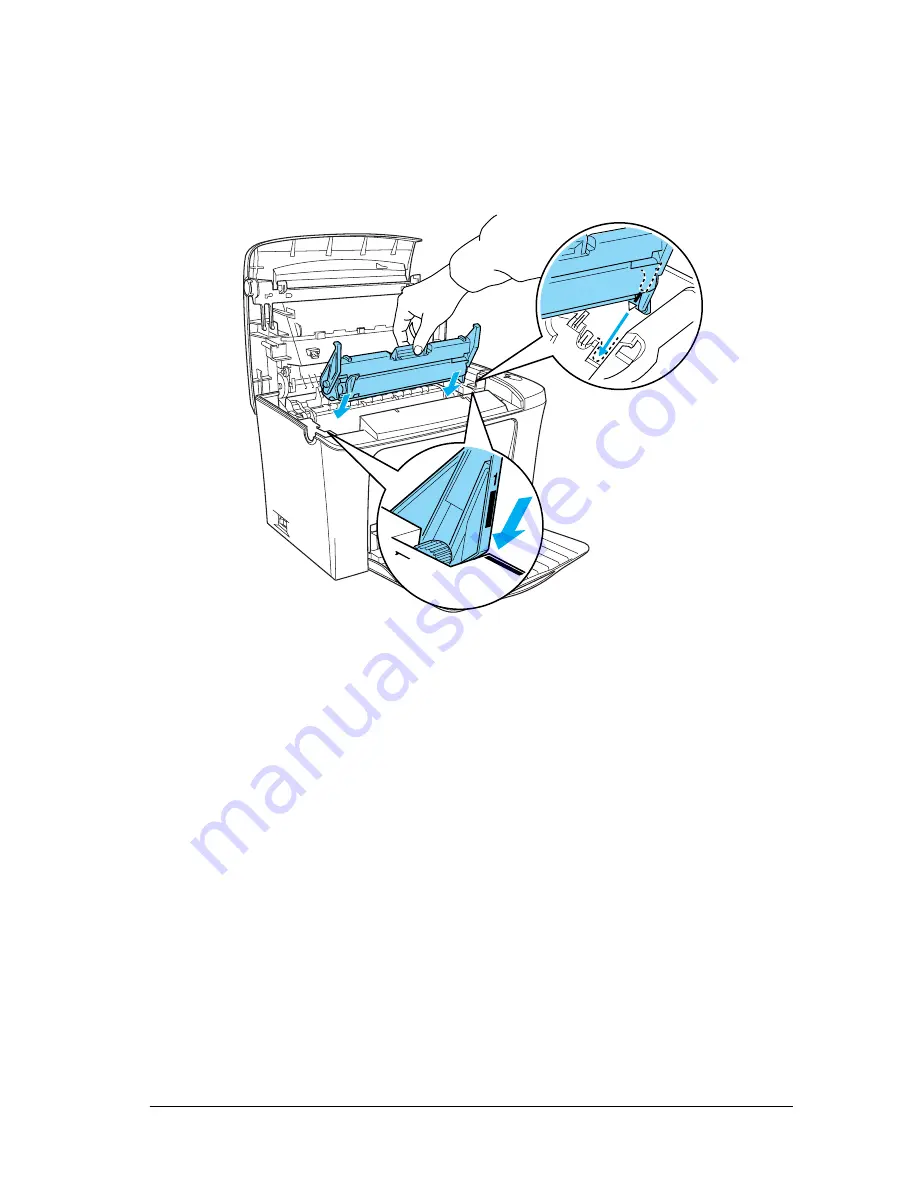
7. Insert the pins on both sides of the new photoconductor unit
into the grooves inside the printer. Slide the unit gently into
the opening until it locks into place.
8. Reinstall the developer cartridge as described in “Replacing
the Developer Cartridge” on page 97.
Summary of Contents for EPL-6100L
Page 2: ...2 ...
Page 4: ...4 ...
Page 9: ...Contents 9 Index ...
Page 10: ...10 Contents ...
Page 26: ...26 Handling Paper 3 Raise the face down tray ...
Page 64: ...64 Using the Printer Driver ...
Page 73: ...Setting Up Your Printer on a Network 73 4 4 4 4 4 4 4 4 4 4 4 4 Click Additional Drivers ...
Page 96: ...96 Installing and Removing Options ...
Page 112: ...112 Replacing Consumable Products 11 Click OK to reset the Photoconductor level counter ...
Page 129: ...Troubleshooting 129 8 8 8 8 8 8 8 8 8 8 8 8 1 Remove paper stacked on the MP tray ...
Page 139: ...Troubleshooting 139 8 8 8 8 8 8 8 8 8 8 8 8 ...
Page 140: ...140 Troubleshooting ...
Page 152: ...152 Technical Specifications ...
Page 190: ...190 Index ...


