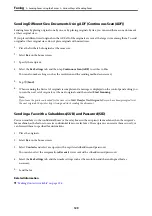
Sending Different Size Documents Using ADF (Continuous Scan(ADF))
Sending faxes by placing originals one by one, or by placing originals by size, you can send them as one document
at their original sizes.
If you place different sized originals in the ADF, all of the originals are sent at the largest size among them. To send
originals at their original sizes, do not place originals with mixed sizes.
1.
Place the first batch of originals at the same size.
2.
Select
Fax
on the home screen.
3.
Specify the recipient.
4.
Select the
Fax Settings
tab, and then tap
Continuous Scan(ADF)
to set this to
On
.
You can also make settings such as the resolution and the sending method as necessary.
5.
Tap
x
(
Send
).
6.
When scanning the first set of originals is complete and a message is displayed on the control panel asking you
to scan the next set of originals, set the next originals, and then select
Start Scanning
.
Note:
If you leave the printer untouched for the time set in
Wait Time for Next Original
after you have been prompted to set
the next originals, the printer stops storing and starts sending the document.
Sending a Fax with a Subaddress(SUB) and Password(SID)
You can send faxes to the confidential boxes or the relay boxes in the recipient's fax machine when the recipient's
fax machine has the feature to receive confidential faxes or relay faxes. The recipients can receive them securely, or
can forward them to specified fax destinations.
1.
Place the originals.
2.
Select
Fax
on the home screen.
3.
Select
Contacts
and select a recipient with a registered subaddress and password.
You can also select the recipient from
Recent
if it was sent with a subaddress and password.
4.
Select the
Fax Settings
tab, and then make settings such as the resolution and the sending method as
necessary.
5.
Send the fax.
Related Information
&
“Making Contacts Available” on page 396
>
Sending Faxes Using the Printer
>
129

