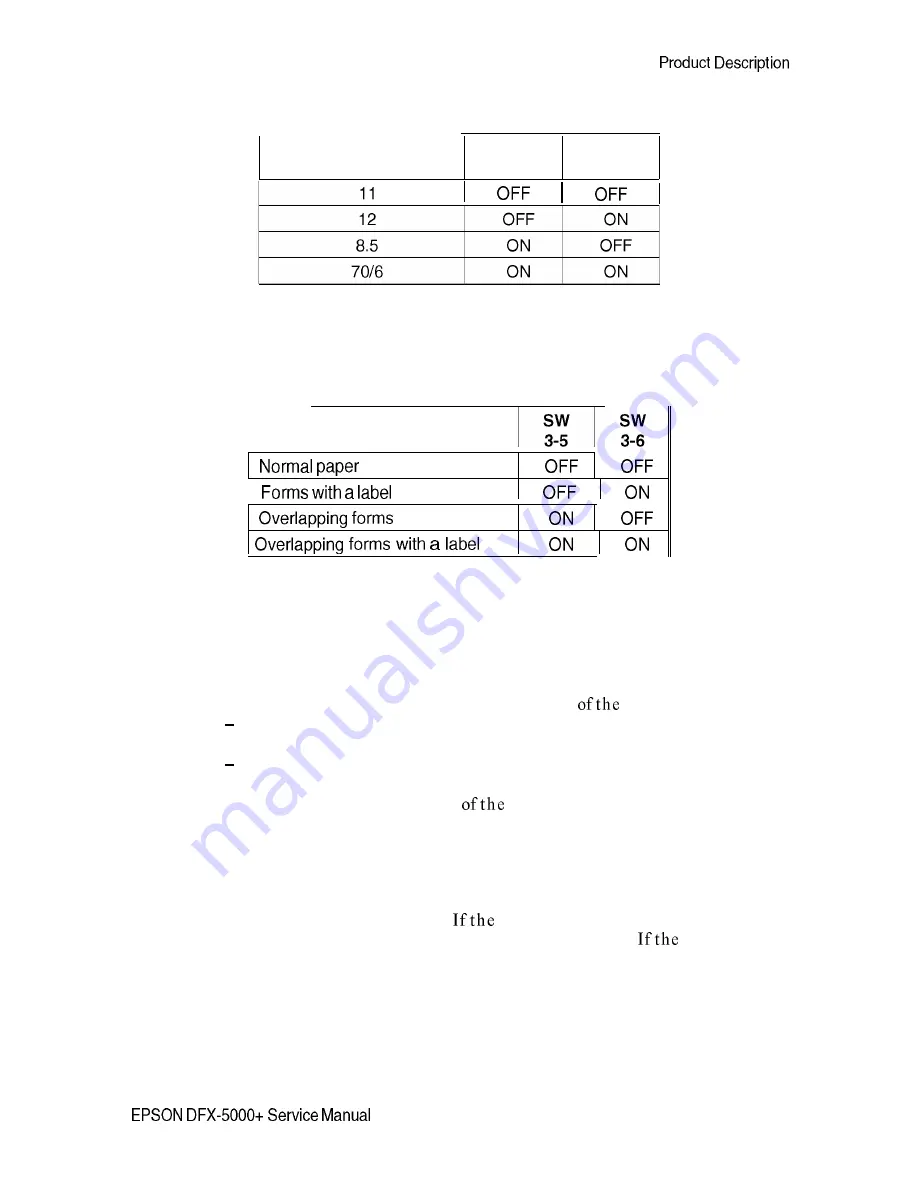
Table l-10. Setting the Page Length
Page Length (inches)
DIP SW
DIP SW
3-1
3-2
4.
Use DIP switches 3-5 and 3-6 to set the paper type
Table l-11. Setting the Paper Type
Paper Type
I
5.
6.
7.
Hold down both MICRO FEED buttons and turn on the printer.
If you are using forms with a label, indicate the label’s position by following
these steps:
(1) Open the printer cover.
(2) Align the pointer on the ribbon mask with one
label’s corners.
To feed the paper up or down, press the appropriate MICRO FEED
button.
To move the pointer right or left, move the printhead by hand.
(3) Press the TOP OF FORM button.
(4) Move the pointer to the corner
label diagonally opposite the first
corner.
(5) Press the TOP OF FORM button.
(6) Close the printer cover.
Use the printer beeps to confirm that the paper format and thickness
information has been saved properly.
printer beeps once or twice, the
information has been saved correctly in memory area 1 or 2.
printer
beeps 10 times, the information has not been saved; carefully follow steps 1
through 7 in this section again.
1-27
Summary of Contents for DFX-5000+
Page 1: ...EPSON Service Manual Epson America Inc TM DFX5K ...
Page 154: ......
Page 212: ...Appendix Table A S CN7 C117 MAIN Board Assembly A 8 EPSON DFX 5000 Service Manual ...
Page 218: ......
Page 219: ...Appendix DFX 5000 Exploded Diagram 1 EPSON DFX 5000 Service Manual A 15 ...
Page 220: ...Appendix Figure A 5 Exploded Diagram 2 A 16 EPSON DFX 5000 Service Manual ...
Page 221: ...597 J86 ...
Page 222: ...Appendix A 18 EPSON DFX 5000 Service Manual ...
Page 223: ...Appendix Figure A 7 C117 MAIN Board Circuit Diagram EPSON DFX 5000 Service Manual A 19 ...


