ELAD FDM-DUOr
User Manual - Rev. 1.1 - 04/2016
© 2016 ELAD S.r.l. All rights reserved. No part of this document may be reproduced, published, used, disclosed or disseminated in any form or
by any means, electronic, photocopying or otherwise, without prior written permission of ELAD S.r.l.
73
Download the latest version of the RX firmware. Unzip the archive and copy the file “
fdmduorx.bin”
in
the USB flash drive provided with the FDM-DUOr. If the file already exists, replace it.
The file
“fdmduorx.bin”
must be in the root of the USB flash drive. For example :
“E:
\
fdmduorx.bin”
.
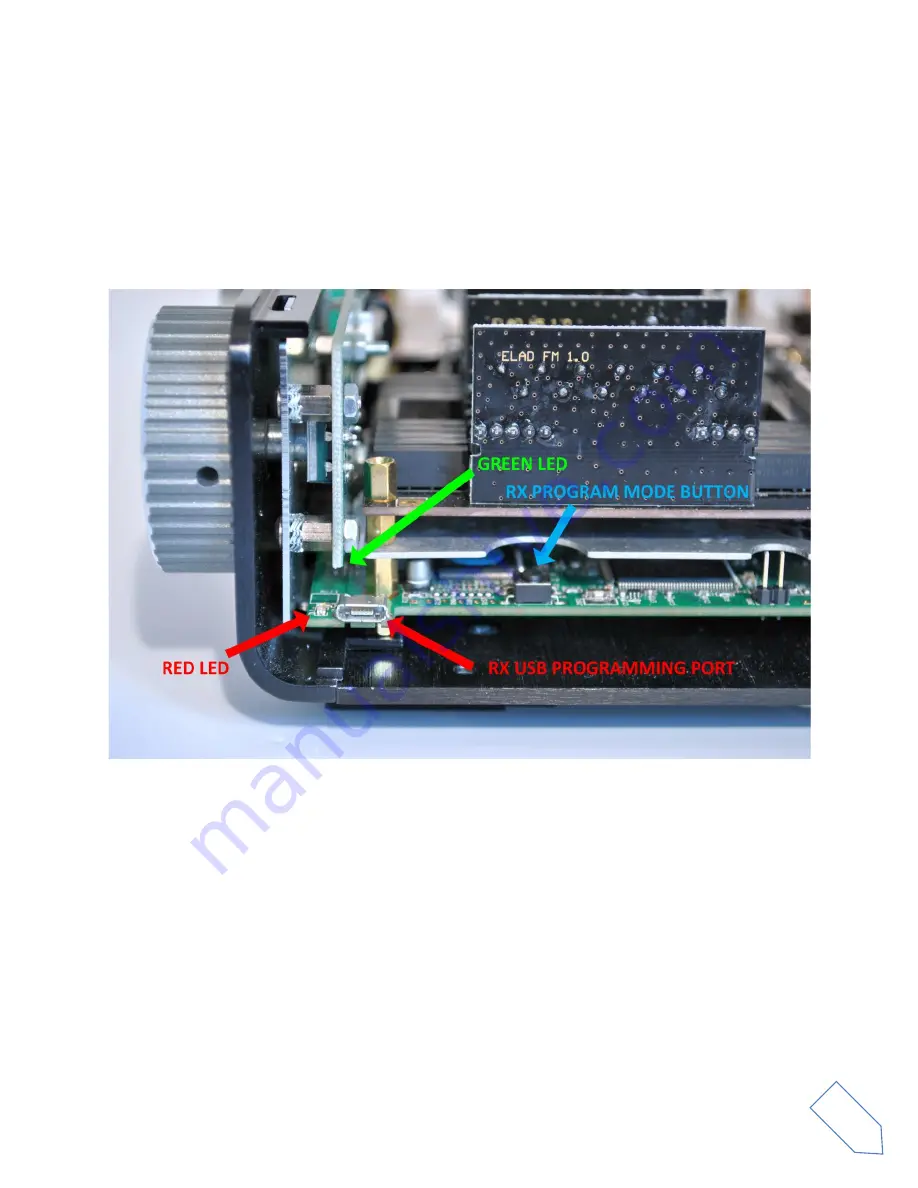
Connect the provided USB flash drive to the FDM-DUOr “
RX USB PROGRAMMING PORT
” using the
provided micro-USB adapter. See the picture below. Connect the power supply, keep pressed the “
RX
PROGRAM MODE BUTTON
” and power up the FDM-DUO.
Keep pressed the “
RX PROGRAM MODE BUTTON
” until the “
RED LED
” turns on.
Release the “
RX PROGRAM MODE BUTTON
”.
Wait until the “
RED LED
” turns off.
Turn off the FDM-DUO, disconnect the USB flash drive and power up the FDM-DUO.
If during the firmware update the “
GREEN LEDS
” are blinking together quickly, it means that the
update process ended not successfully. In this case contact the ELAD technical assistance.


