


Description Of Controls
60
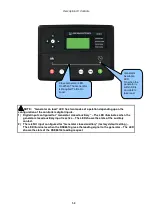
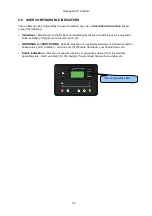
5.3 VIEWING THE INSTRUMENT PAGES
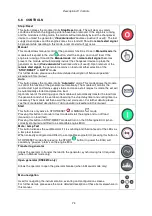
It is possible to scroll to display the different pages of information by repeatedly operating the next /
previous page buttons
.
Example
Status
Engine
Generator
And so on until the last page is reached.
A Further press of the scroll right button
returns the display to the Status page.
The complete order and contents of each information page are given in the following sections
Once selected the page will remain on the LCD display until the user selects a different page, or after
an extended period of inactivity (
LCD Page Timer
), the module will revert to the status display.
If no buttons are pressed upon entering an instrumentation page, the instruments will be displayed
automatically subject to the setting of the
LCD Scroll Timer
.
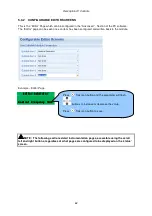
The
LCD Page
and
LCD Scroll
timers are configurable using the DSE Configuration Suite Software or
by using the Front Panel Editor.
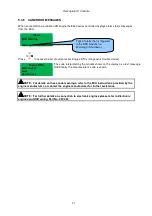
The screenshot shows the factory
settings for the timers, taken from
the DSE Configuration Suite
Software.
Alternatively, to scroll manually through all instruments on the currently selected page, press the scroll
buttons. The ‘autoscroll’ is disabled.
To re-enable ‘autoscroll’ press the scroll
buttons to scroll to the ‘title’ of the instrumentation page (ie
Engine). A short time later (the duration of the
LCD Scroll Timer
), the instrumentation display will
begin to autoscroll.
When scrolling manually, the display will automatically return to the Status page if no buttons are
pressed for the duration of the configurable
LCD Page Timer
.
If an alarm becomes active while viewing the status page, the display shows the Alarms page to draw
the operator’s attention to the alarm condition.
If you want to view one of the
instruments towards the end of the list,
it may be quicker to scroll up through
the instruments rather than down!
If you want to view one of the instrument
pages towards the end of the list, it may
be quicker to scroll left through the pages
rather than right!
Summary of Contents for DSE8610
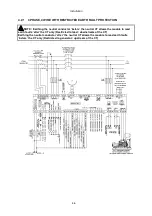
Page 47: ...Installation 47 4 2 2 3 PHASE 4 WIRE WITHOUT EARTH FAULT PROTECTION...
Page 51: ...Installation 51 4 3 2 SINGLE PHASE WITHOUT EARTH FAULT...
Page 53: ...Installation 53 4 3 4 2 PHASE L1 L2 3 WIRE WITHOUT EARTH FAULT...
Page 55: ...Installation 55 4 3 6 2 PHASE L1 L3 3 WIRE WITHOUT EARTH FAULT MEASURING...
Page 118: ...Intentionally Left Blank 118...


