Removing and Replacing Field Replaceable Units
3.6 Removing a TZK10/TZK11 Tape Drive
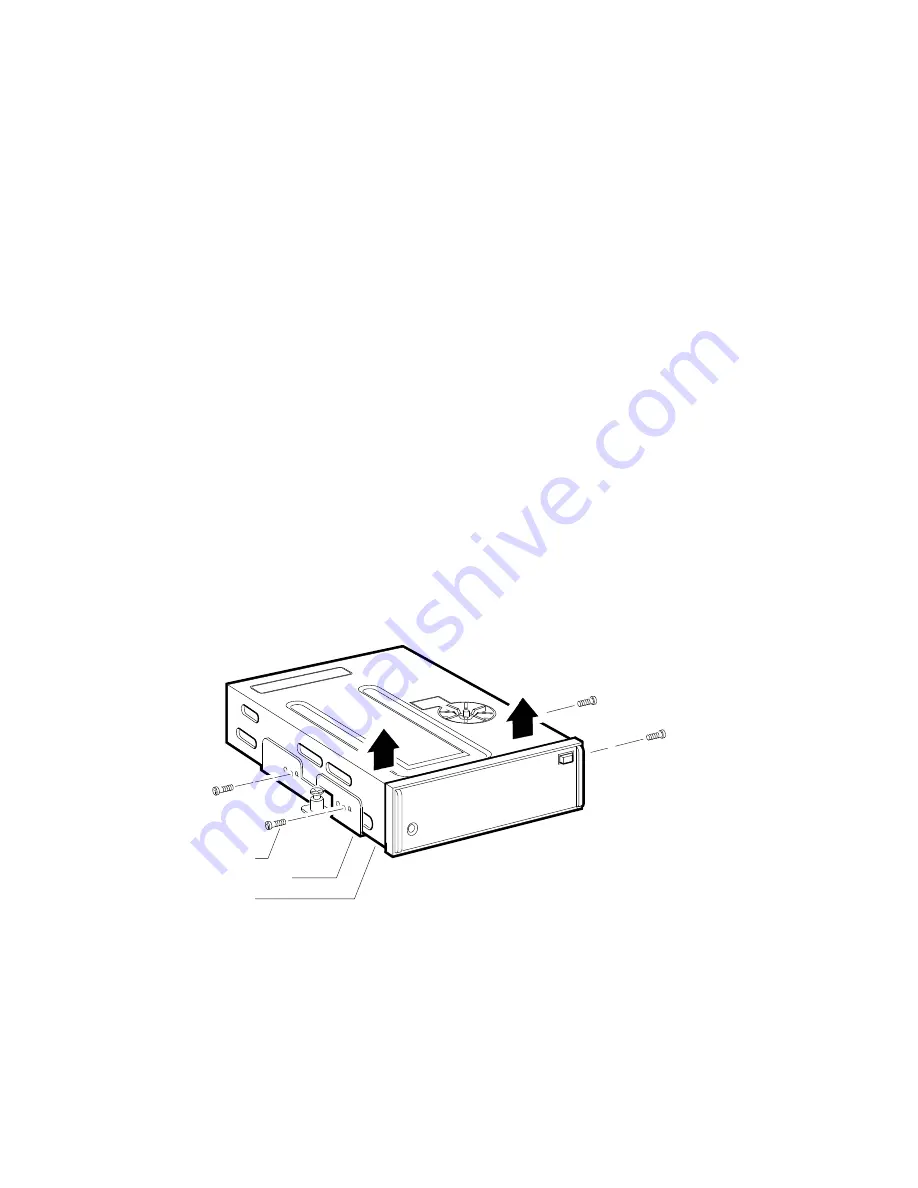
3.6.1 Separating the TZK10/TZK11 Tape Drive from the Mounting
Bracket
When you install a replacement TZK10/TZK11 tape drive, you must use the
mounting bracket (74-42449-01) that is attached to the faulty TZK10/TZK11
tape drive (TZK10-AA, TZK11-AA). To separate the mounting bracket from the
faulty TZK10/TZK11 tape drive, follow these steps:
1. Note which holes are used for attaching the mounting bracket to the drive
before you remove it. You must use the same holes for the replacement.
2. Remove the four screws (90-10961-03) that secure the mounting bracket to
the TZK10/TZK11 tape drive (refer to Figure 3–17).
3. Separate the mounting bracket from the TZK10/TZK11 tape drive.
Figure 3–17 Separating the Mounting Bracket from the TZK10/TZK11 Tape
Drive
Phillips Screws (4)
TZK10 Mounting Bracket
TZK10 Tape Drive
MLO-009938
4. Keep the mounting bracket and the four screws in a safe place because you
must use them to install the replacement TZK10/TZK11 tape drive.
Removing and Replacing Field Replaceable Units 3–25


